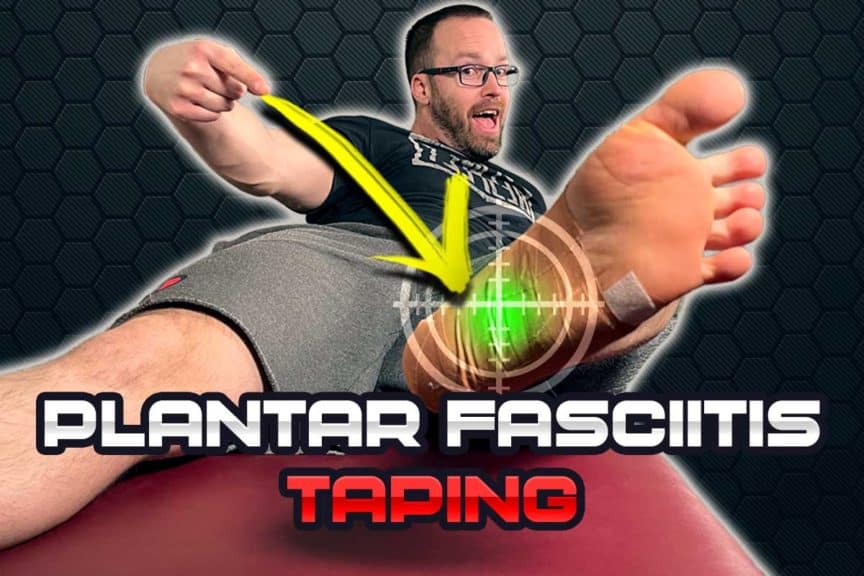
This article will show you how to use a highly effective taping technique that you can do all by yourself to offload your plantar fascia, which can significantly reduce your pain and discomfort.
Plantar fasciitis can be absolutely brutal to deal with. One of the things that makes it especially brutal is that no matter how painful it may be, you still have to stand and walk on your foot throughout the day. And when each and every step feels like a knife going into your foot, you want to do all that you can to reduce the pain to make your day more manageable.
The best way to tape your foot for plantar fasciitis is to perform the Low-Sye taping technique with a highly rigid (and very sticky) tape known as Leukotape. This will provide significantly improved offloading to the plantar fascia than standard white tape and can last for multiple days.
Now, since you want the details for how to master this taping technique — and the significant benefits it can provide — keep on reading!
ARTICLE OVERVIEW
Click/tap any of the headings below to instantly read that section!
• Quick tips
• Materials: What you’ll need
– Cover Roll
– Leukotape
• The steps: Low-Dye taping
• Bonus tip: Fine-tuning the tension
Disclaimer: While I am a physical therapist, I am not YOUR physical therapist. As a result, I cannot tell you whether or not any treatments mentioned on this website or in this article may or may not be appropriate for you, including taping your foot for plantar fasciitis. By following any information within this post, you are doing so at your own risk. You are advised to seek appropriate medical advice for any pain you may be experiencing.
Quick tips
Pro tip: This taping technique can also be highly effective for reducing foot and heel pain with a condition known as fat pad syndrome, which is often mistaken for plantar fasciitis.
- The Low-Dye technique has been shown to be helpful for immediate and prolonged pain relief for plantar fasciitis. In a 2015 study by Park et al., the Low-Dye taping technique not only showed a statistically significant reduction in foot pain but also a statistically significant improvement in foot stability compared to the control group.1
- The easiest way to determine the length of tape you’ll need for each step is to pre-measure by flipping the tape backwards so that you can lay the non-sticky side on your skin.
- Make sure your foot is dry (not sweaty) and clean from debris before applying your tape; even a small amount of moisture or debris on your skin can drastically reduce how well the tape sticks to your skin.
- Leukotape can be extremely difficult to tear if you haven’t used it before or if you have difficulty or pain using your fingers. You can always cut the tape with scissors if need be (I sometimes have to do this myself).
- This technique can be extra tricky when first learning it. It’s even more difficult to do on yourself, so don’t expect it to be perfect the very first time. Just try your best; you’ll get better every time you do it. Practice makes perfect, ya know.
- This technique can be a powerful adjunct to helping you reduce your pain from plantar fasciitis. Still, it shouldn’t be the only step you should take, as it likely won’t be a cure all on its own. Make sure you take other appropriate actions in addition to using this technique to stand the best chance possible of overcoming this condition!
Related article: How to K-tape Your Achilles Tendon All By Yourself: A Step by Step Guide
Materials: What you’ll need
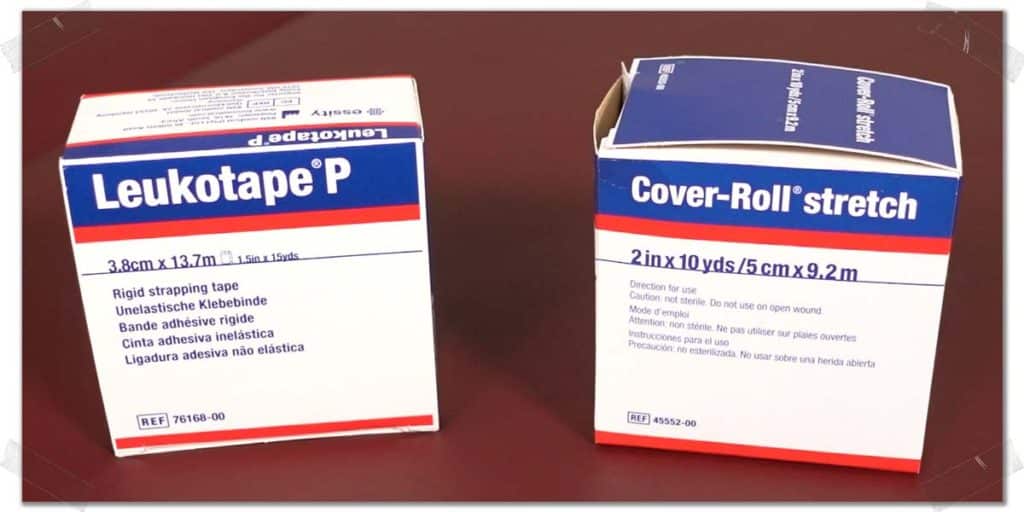
There are only two types of tape you’ll need for what follows. Ultimately, you really only need one of them. However, I always advise those who have never used the rigid, extra sticky tape (which I’ll discuss in a second) to lay the other tape on their skin first as a base layer. This just helps ensure you won’t irritate your skin. So, ultimately, all you’ll need is some Leukotape but use some Cover Roll first if you’re worried about your skin reacting to some extra sticky tape.
Related article: Seven Easy Ways for Making Kinesio Tape Stick Way Better
Cover Roll (Hypafix)
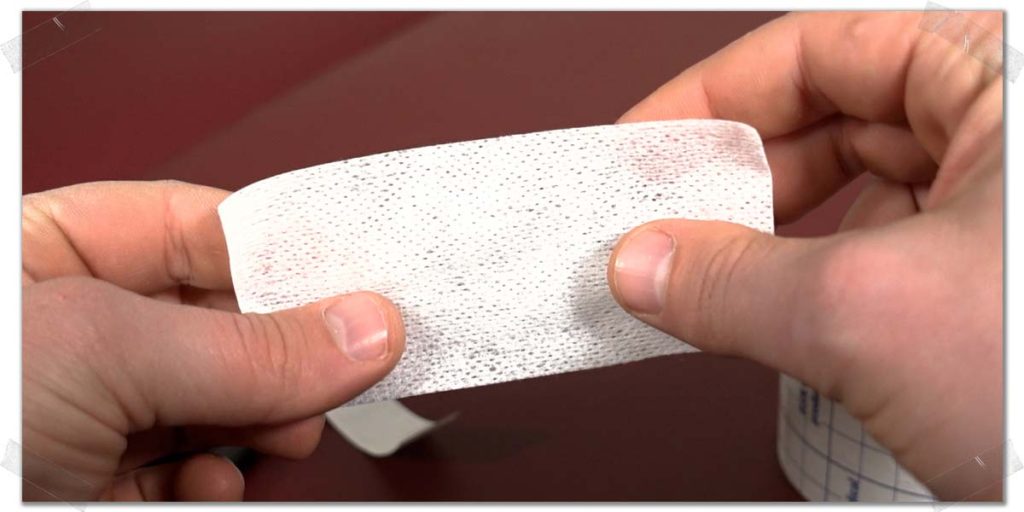
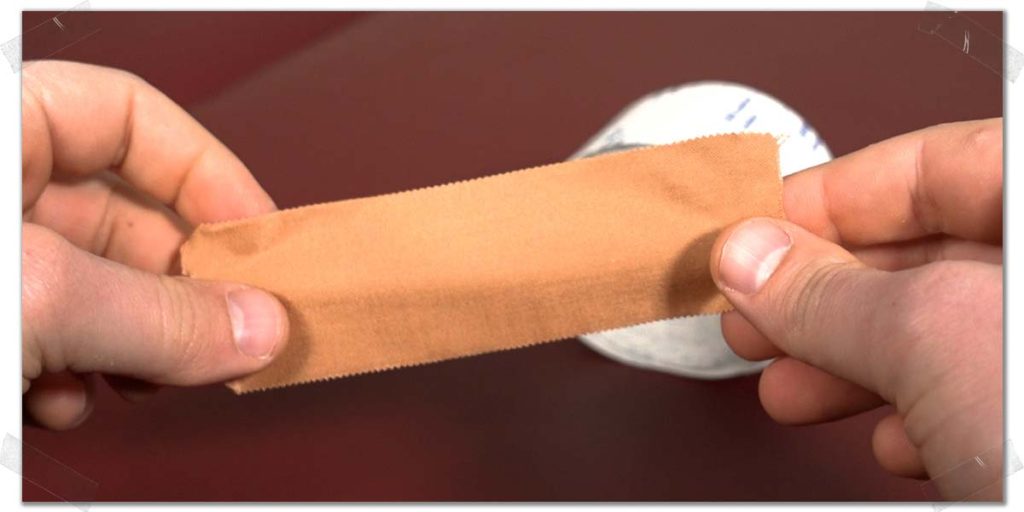
Cover Roll (often called Hypafix) is a hypoallergenic cloth tape that makes an excellent base layer to stick to your skin. As mentioned above, it’s not necessary, but I use it on most of my patients, which they tend to appreciate. You can’t tear this stuff, so you’re going to have to cut it with scissors.
Leukotape
The star of the show! Leukotape is an extra rigid, extra sticky tape that works wonders for these types of taping conditions. If standard white athletic tape (zinc oxide tape) were a garden hose, Leukotape is a fireman’s hose — it’s just on another level entirely.
Fun fact: When used for taping the foot/ankle, traditional white athletic tape will lose nearly all of its effectiveness within the first hour of wear.2
The steps: Low-Dye taping
The following steps are for a popular taping technique known as the Low-Dye taping technique. It’s worth mentioning here that this particular technique is often modified slightly from one practitioner to the next, based on individual preferences, patient needs, etc.
I have made minor modifications below to make the overall taping process easier for you since I’m imagining you’ll be performing this on yourself (but you can always get a friend, loved one, etc., to tape your foot for you following these same steps).
Step 1: The horseshoe
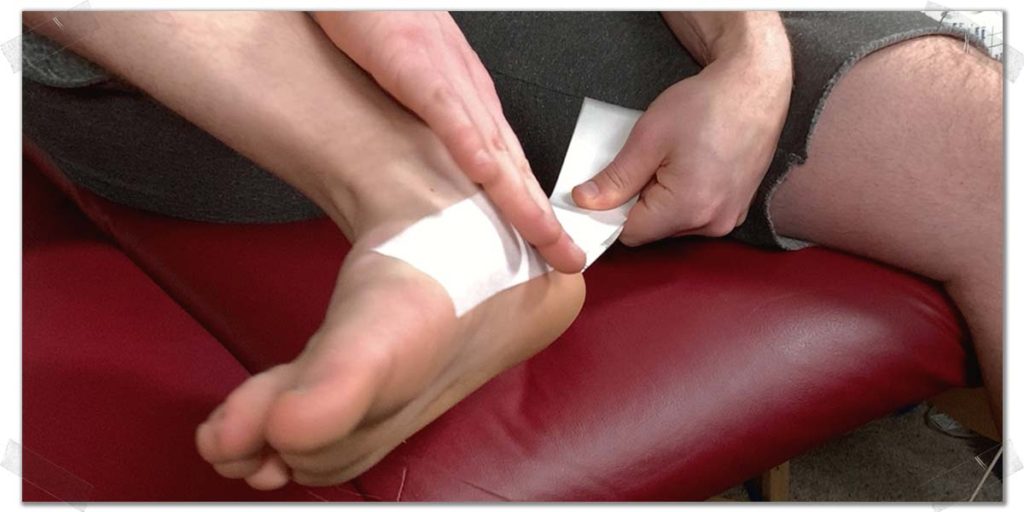
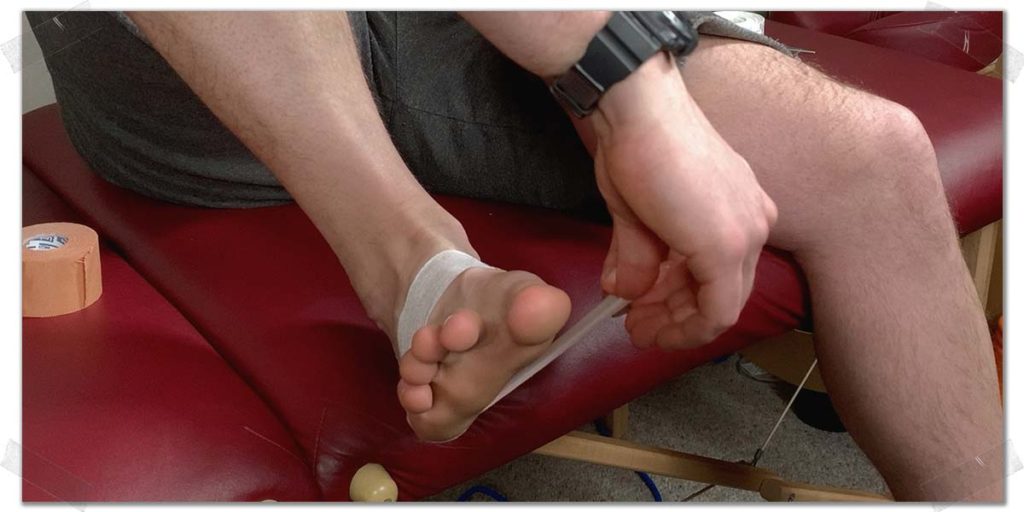
Start by taking a piece of Cover Roll and pre-measure a length that wraps around your heel out to both sides of your forefoot. Lay it down on your skin with as few wrinkles as possible.
Next, repeat this process with the Leukotape, laying it down directly on top of the Cover Roll.
Step 2: Top strip
Next, quickly lay down a strip of Cover Roll across the top of your foot. At the end of the taping technique, we’re going to throw down one or two strips of Leukotape on top of this area to secure everything.
Step 3: Underside strips
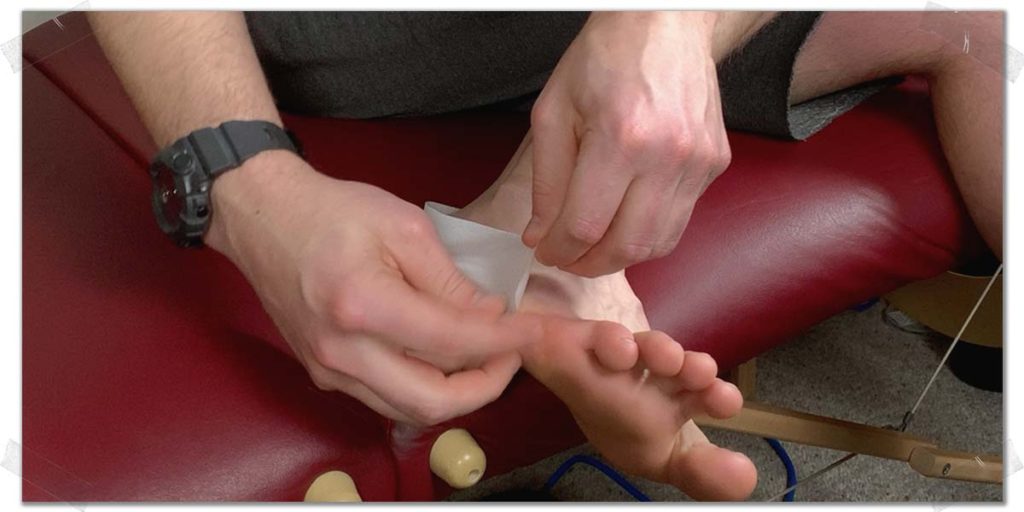
With the horseshoe securely laid down, pre-measure a strip of Leukotape running alongside the bottom of your foot from one edge to the other edge.
Place the tape on the outside edge of your foot and pull it with firm tension along the underside, anchoring it to the inside edge of your foot.
Take another strip of tape and repeat the exact same process, this time overlapping half of this new strip on top of the previous strip.
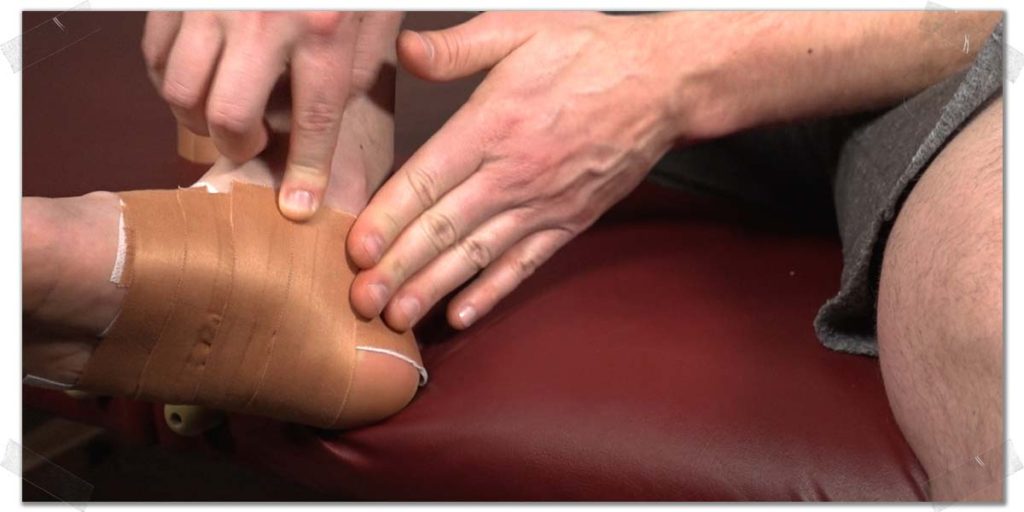
Repeat this process as many times as needed until the bottom of your foot is covered (each strip should be closer towards your heel).
Pro tip: The closer each strip gets to your heel, the more tension you’ll likely want to anchor the tape strip down with so that the greatest amount of structural support occurs over the sorest spot of your foot, which is typically near the heel.
Now, just cover up any remaining windows of skin with a piece of tape to ensure these areas don’t get irritated or get blisters.
Step 4: Another horseshoe
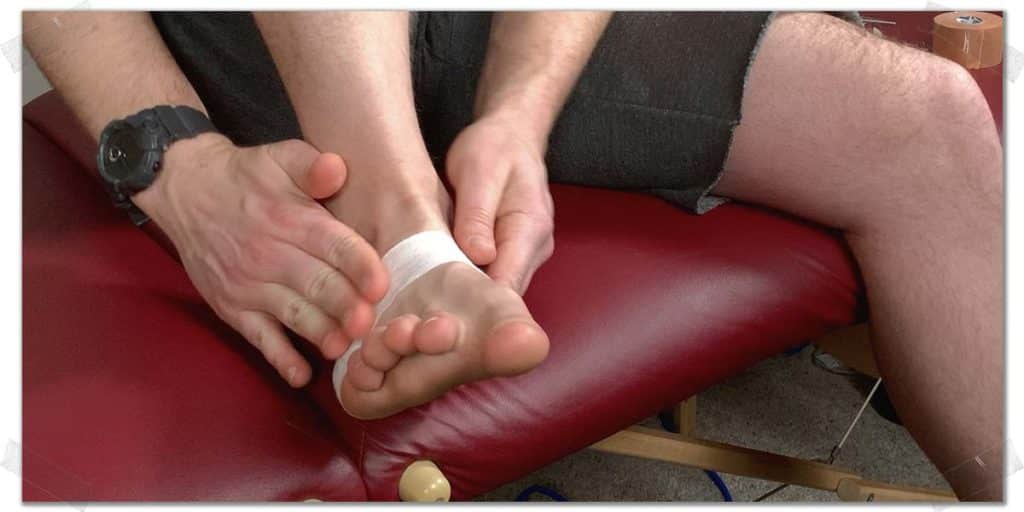
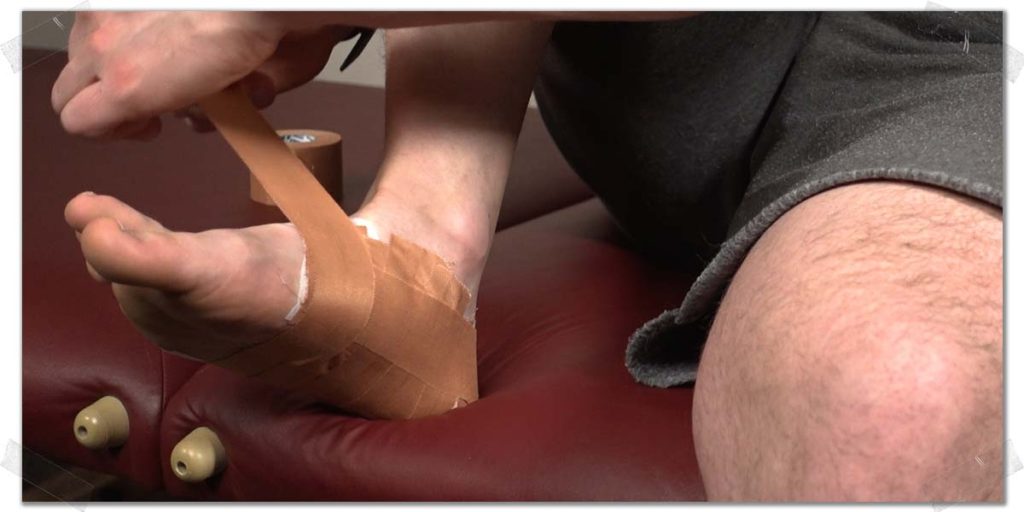
Now, add another horseshoe directly over your first horseshoe strip to ensure that the strips of tape you just laid across the bottom of your foot stay securely in place.
Step 4: Adding the top strips
Lastly, take one or two strips of Leukotape and run them across the topside of your foot from the bottom inside edge to the outside edge. This acts as a reinforcement strip to ensure that the tape can’t splay out with your foot when standing.
And that’s it — you’ve successfully taped your foot to offload your plantar fascia!
Now, if the tape doesn’t feel supportive enough, simply throw a few additional strips across the bottom of your foot while using more tension than you did the first time. Remember, it can take a bit of practice to know just how tightly to pull.
Bonus tip: Fine-tuning the tension
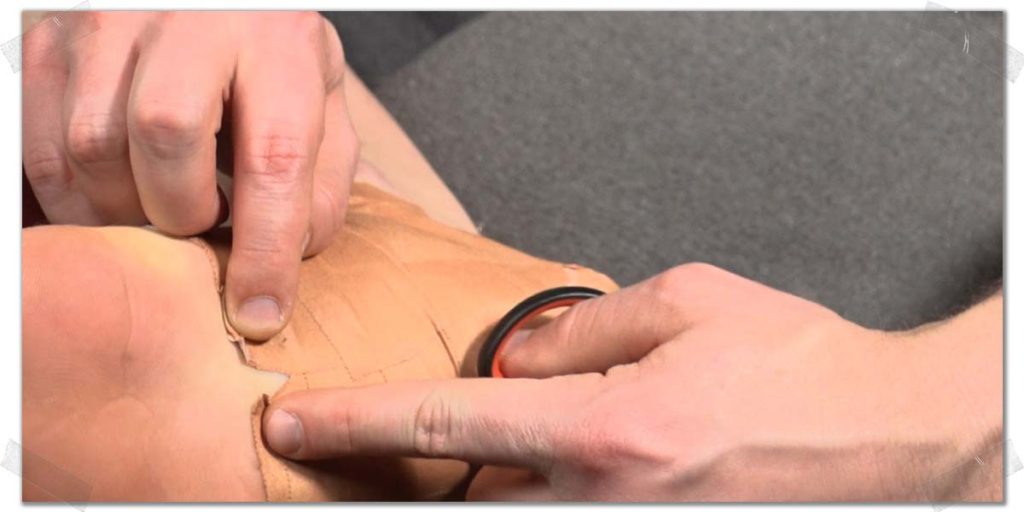
If you feel that you applied the tape a bit too tightly, grab a pair of scissors and cut a small slit along the bottom of your foot. This will help reduce the excessive tension or compression you may be feeling from the tape without forcing you to take the tape off entirely.
Start with a small slit, and see how that feels. Keep cutting until you feel the tension is just right (the more extensive the slit you create, the more tension you’ll offload on the underside of your foot).
Final thoughts
In the war on plantar fasciitis, any little strategy that you can use to reduce your pain and improve your functional abilities is one worth considering. The Low-Dye taping technique is no exception. It can dramatically help reduce pain and make your day more manageable.
Now, keep taking the other appropriate steps required to ensure you get this condition under control once and for all!
References:
1. Park C, Lee S, Lim D young, Yi CW, Kim JH, Jeon C. Effects of the application of Low-Dye taping on the pain and stability of patients with plantar fasciitis. J Phys Ther Sci. 2015;27(8):2491-2493.

Hi! I’m Jim Wittstrom, PT, DPT, CSCS, Pn1.
I am a physical therapist who is passionate about all things pertaining to strength & conditioning, human movement, injury prevention and rehabilitation. I created StrengthResurgence.com in order to help others become stronger and healthier. I also love helping aspiring students and therapists fulfill their dreams of becoming successful in school and within their clinical PT practice. Thanks for checking out my site!

