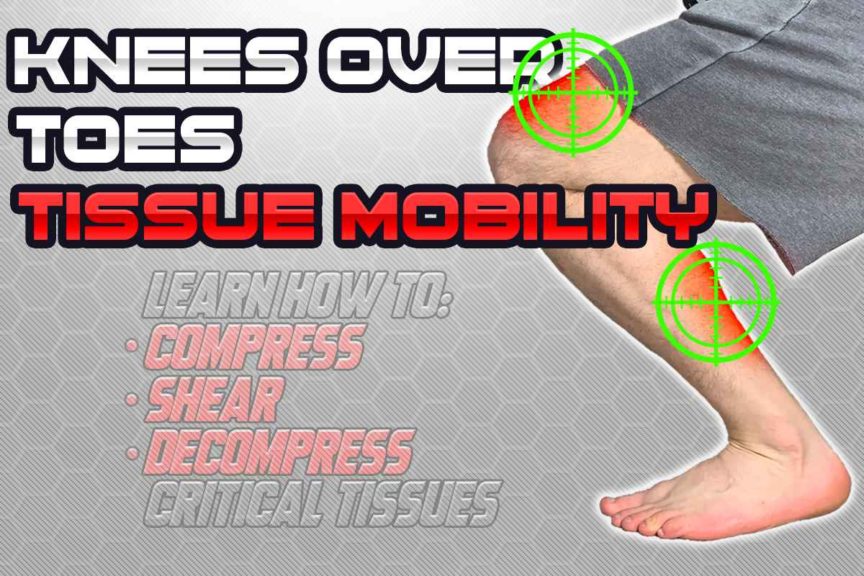
These days, when it comes to pursuing mobility, many individuals are working on the ability to push their knees past their toes when performing various exercises and feats (often known as knees-over-toes mobility). Many factors go into improving and achieving this ability, with one of them being the overall health and suppleness of your soft tissues. If you work on the soft tissue health of key muscles within your legs, you will likely see some stellar results.
To seriously improve your soft tissue health for your knees over toes mobility, incorporate barbell sleeve rolling, compression flossing, and decompressive cupping. Doing this with your quadriceps and calve muscles can significantly decrease pain, improve range of motion and improve tissue health.
Thankfully, each of these techniques is simple, inexpensive, and rather effective. Each one challenges the targeted tissues in its own unique way.
If you’re wanting to know the specifics of each of these techniques and how you can incorporate them into your mobility pursuits, be sure to keep on reading. Each of these methods will be described below in detail, allowing you to have greater confidence and greater efficacy in achieving your mobility goals.
ARTICLE CONTENTS
Click/tap on any of the following headlines to jump to that particular section of the article.
- Knowing which tissues you need to target
- Barbell sleeve rolling
- Compression flossing
- Decompressive techniques
Related article: The Seven Best Ways to Massage Your Calf Muscles all by Yourself
Disclaimer: While I am a physical therapist, I am not YOUR physical therapist. As a result, I cannot tell you whether or not any treatments mentioned on this website or in this article may or may not be appropriate for you, including soft tissue techniques. By following any information within this post, you are doing so at your own risk. You are advised to seek appropriate medical advice for any pain you may be experiencing.
Knowing which tissues you need to target
When aiming to get the most out of these self-treatment techniques (along with the rest of the information within this article), it’s important to have a good understanding of which soft tissues can be holding you back from improving your knees-over-toes mobility. A better, more thorough understanding of these structures and how to treat them will likely lead to much more favorable outcomes. So, here’s a brief rundown on things:
The quadriceps muscles
The quadriceps muscles refer to a group of four muscles on the front of the thigh. While each quadriceps muscle is separate and unique, they all converge together to form the common quadriceps tendon. This tendon attaches to the patella (the knee cap), which connects to the top of the tibia (the shin bone).
When the quadriceps muscles shorten (contract), they serve to strengthen the knee. This means that when the knee bends, these muscles must lengthen out. The problem, however, is that if these muscles are tight, bound up, and restricted, they can limit how much your knee can bend.
Targeting the lower quadriceps muscles (near where they all converge) and the common tendon can, therefore, be a critical step to take when wanting your knees to have full range of motion when bending.
The gastrocnemius & soleus muscles
The gastrocnemius muscle is more commonly known as the calf muscle, the bulging muscle on the backside of the lower leg. Just underneath it is a lesser-known (but very similar in function) muscle known as the soleus. The calf muscle has two heads (known as the inner and outer head), and when paired up with the soleus muscle, it is referred to as the triceps surea.
The common feature of these muscles is that they both attach onto the Achilles’ tendon, which then attaches onto the calcaneus (the heel bone). When these muscles shorten or contract, they pull the foot downward (think of the motion of stepping on the gas pedal when driving). This movement is known as plantar flexion.
The opposite movement of plantarflexion is dorsiflexion. When dorsiflexion occurs, the calf muscles and the soleus must lengthen out, which they will have a hard time doing if they have excessive tightness, restriction, or other mobility-based issues.
A lot of knees over toes mobility exercises and strengthening exercises require you to take your ankle through extensive ranges of dorsiflexion, which means that you want your calf and soleus muscle to be as supple and mobile as possible, as it will lead to greater overall ranges of motion with your exercises.
Barbell sleeve rolling
While not everyone has access to a barbell at home, they are easily accessible at any standard gym. So, as long as you have access to a gym (if you don’t have your own barbell at home), you’ll have access to a barbell and, thus, this particular technique.
Related article: IASTM: Here’s How it Works to Decrease Pain and Improve Mobility
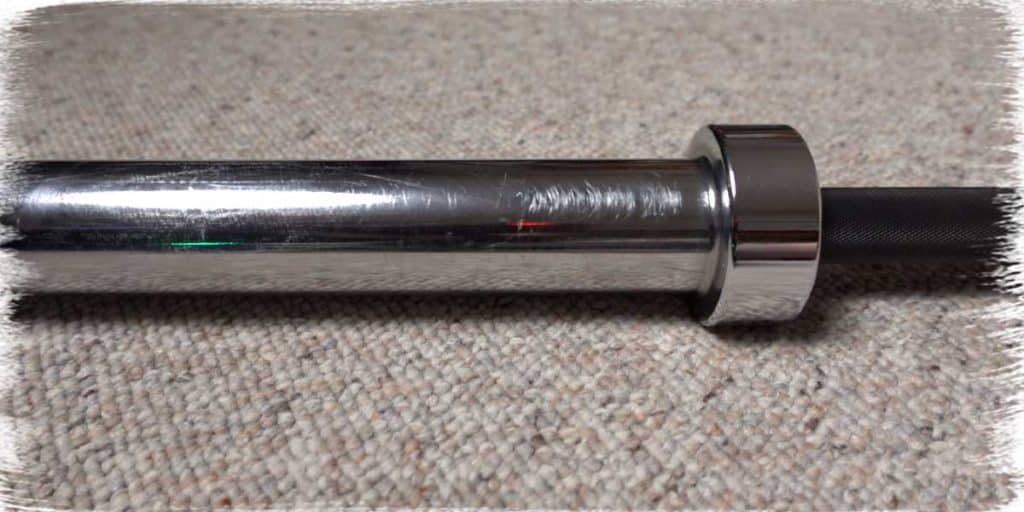
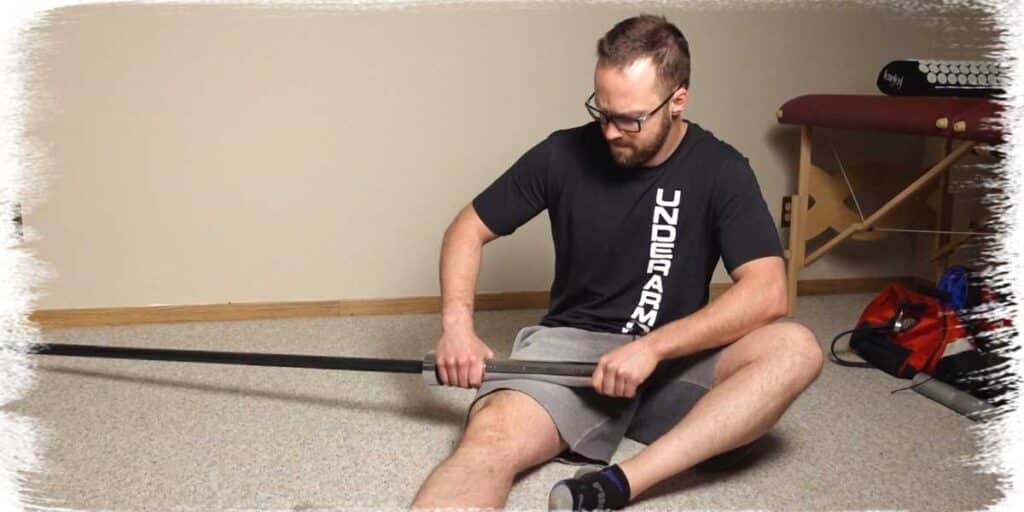
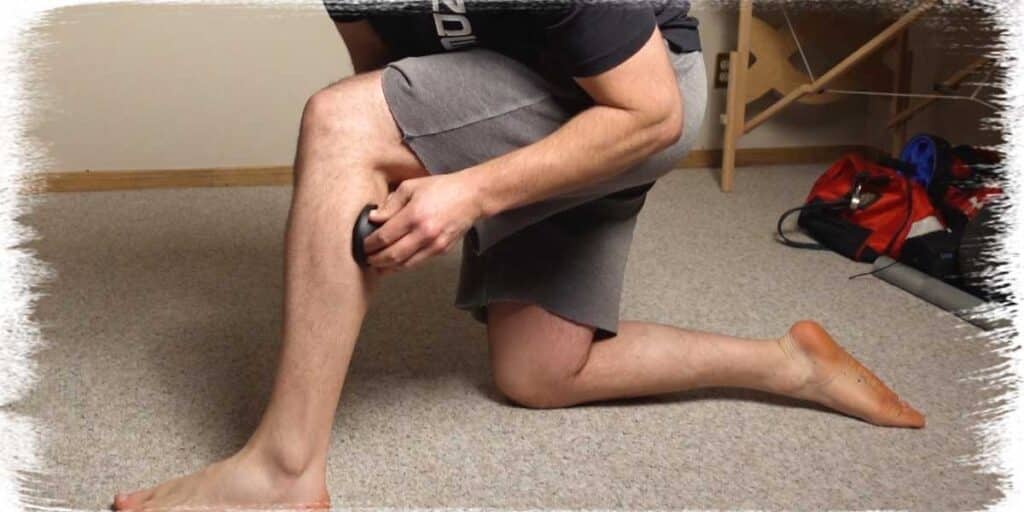
Using the sleeve of a barbell is a form of instrument-assisted soft tissue mobilization (IASTM), which has been shown to have some positive changes on muscles when used appropriately.1-4 In the case of using the barbell, you’ll essentially be doing a super aggressive form of foam rolling.
When it comes to grasping the concept of this compressive tissue technique, it can be helpful to use the analogy of a baker who is kneading some dough with a rolling pin. In this case, your muscles are the dough, and the barbell sleeve is the rolling pin. Time to get the lumps and bumps out!
How to perform barbell sleeve rolling on the quadriceps muscles
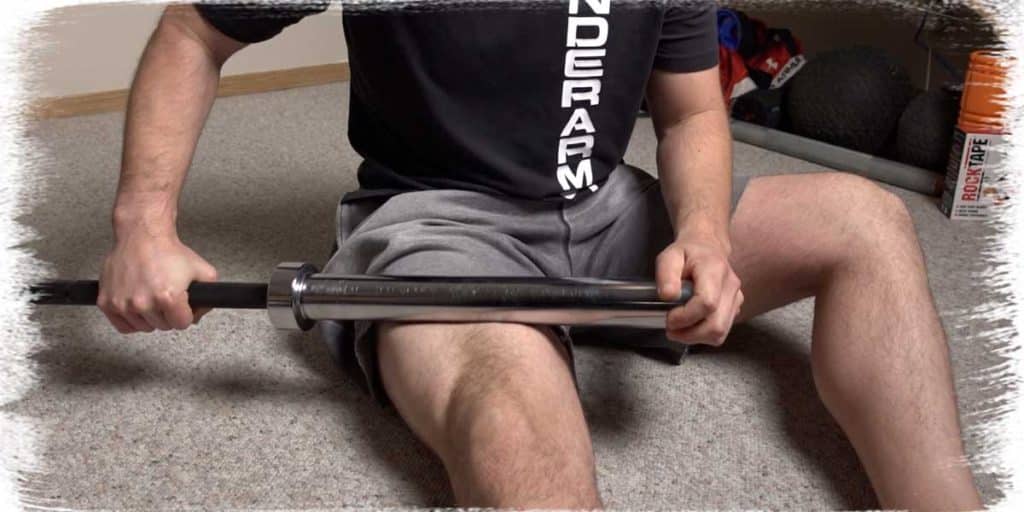
Start by placing the sleeve on top of your thigh. This will be a decent amount of pressure, so make sure you’re ready for it and can tolerate it well enough.
Next, slowly roll the sleeve up and down your thigh. If you find more tender spots than others, make sure to go over them much more slowly. Giving these sore, lumpy spots (known as trigger points) more time to respond to the pressure of the barbell will provide the tissues with more time to be positively influenced by the sleeve in terms of relaxation and mobility improvement.
You can roll from the top of the thigh down to about two inches before the kneecap; rolling below this area is very uncomfortable and might not be as effective since you’re essentially rolling over the quadriceps tendon.
Be sure to roll the top of the thigh, the outside portion of the thigh, and the inner edge of the thigh as the quadriceps muscles can be targeted effectively from different angles due to their size when wrapping around the front of the femur (thigh bone).
Don’t be surprised if you’re a little sore from this over the next day or so; it’s an aggressive technique that is very similar to a deep tissue massage.
How to perform barbell sleeve rolling on your calves
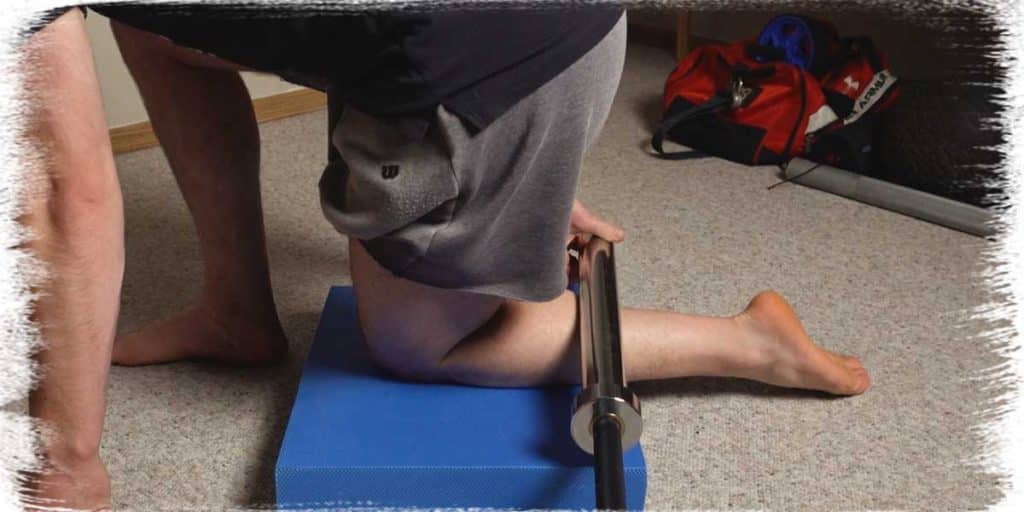
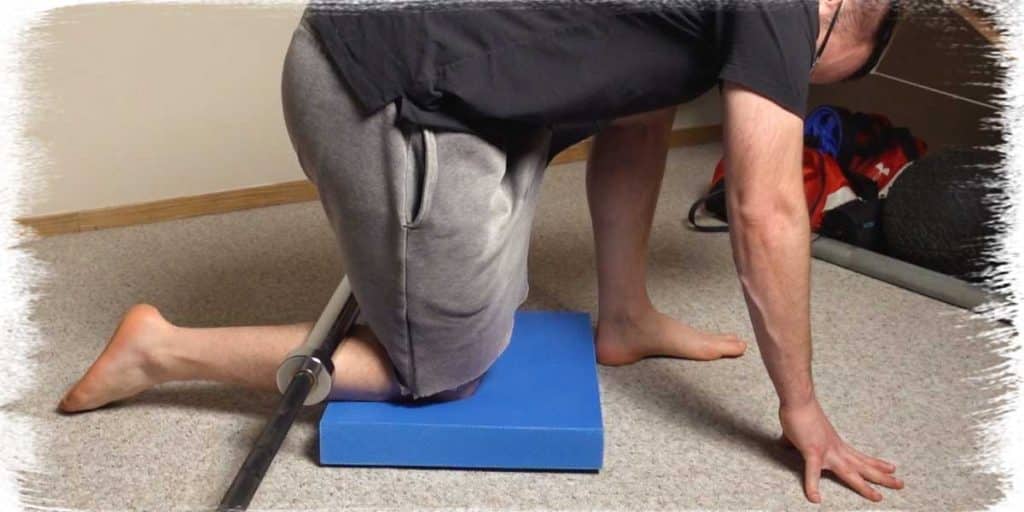
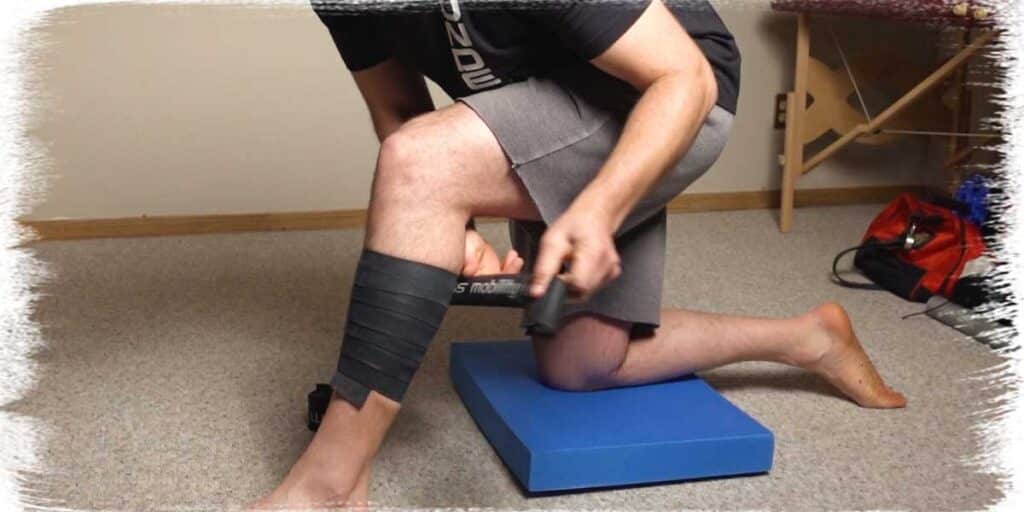
Rolling your calves with the barbell sleeve will likely require a few deep breaths, as it can be incredibly tender to do so, but the results are often worth it. Just like with the quadriceps, the more sessions you spend rolling out your calves, the less tender they’ll be when doing so.
The rolling should be slow, just like with the quadriceps. The key is to roll mostly over the calf muscles’ belly and only roll down to what’s known as the musculotendinous junction (the area where the calf muscle belly converges onto the Achilles’ tendon).
Related article: How to K-tape Your Achilles Tendon all by Yourself
Rolling below this junction is likely to be somewhat uncomfortable, though you certainly can do so if desired. Just be prepared for some likely high levels of discomfort.
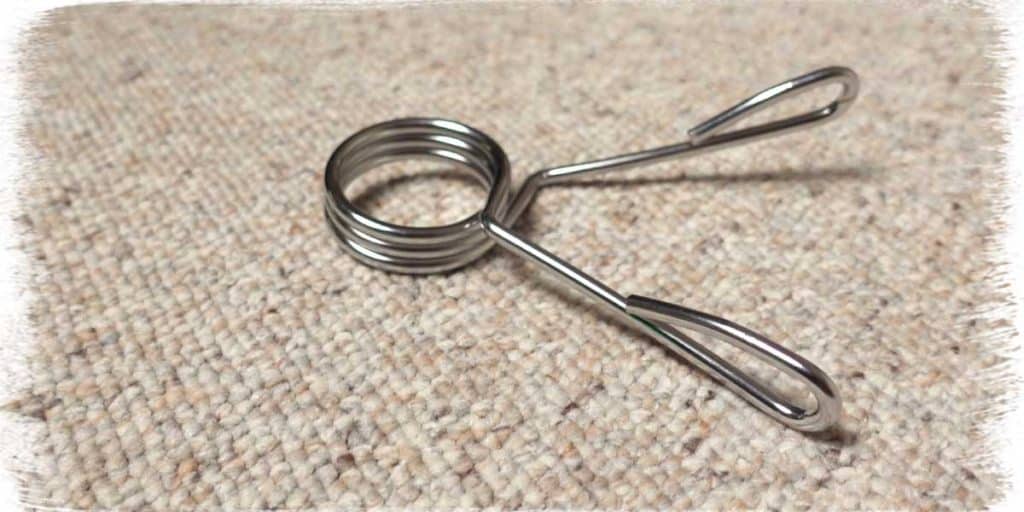
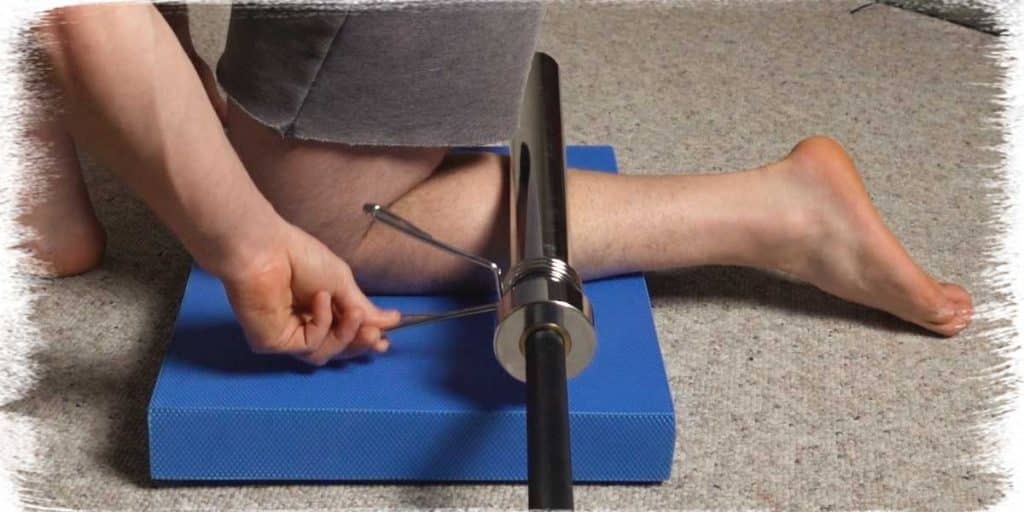
Pro tip: If you want to make the process a bit easier, take a traditional spring-loaded barbell collar and toss it onto the sleeve to use as a handle. This handle can essentially act as a throttle, making it very easy and convenient to roll the calf muscles. Simply “throttle up and down” to roll the sleeve up and down over your muscles.
Compression flossing
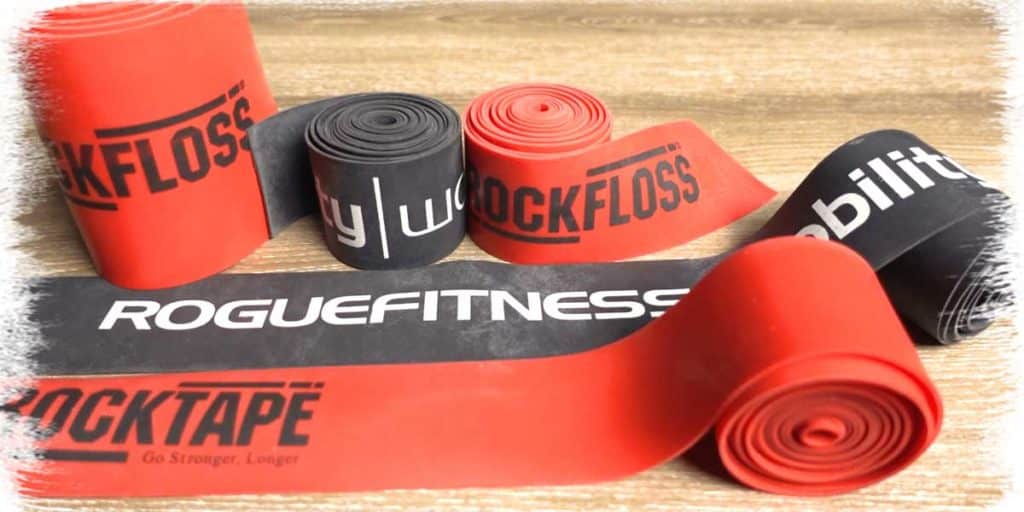
Compression flossing (often known as Voodoo flossing) is a relatively new soft-tissue treatment technique that works in quite a unique way when mobilizing soft tissue. While barbell sleeve rolling (and other forms of IASTM) work by directly compressing the tissue it’s pressing down onto, compression flossing takes it one step further through a mobilizing technique known as tissue shearing.
While there is still a compressive element with flossing, its trademark feature is its simultaneous ability to produce shearing forces to the tissue(s) it’s wrapped around while keeping them compressed throughout the process. There’s some solid evidence emerging within the scientific community that supports its ability to help restore tissue mobility through these means.5-7
A couple of universal tips to follow:
- Ensure you do not have any allergies to latex (which is what the bands are made from).
- Aim for approximately 50% stretch when using the bands.
- Try not to keep the band on for more than two minutes at most.
- Always wrap from distal to proximal (furthest away to closer towards you) in order to ensure the health of your blood vessels.
- With each wrap, have approximately half of the band wrap on top of the band and the other half on top of the skin. This allows the band to adhere decently to itself as well as your skin.
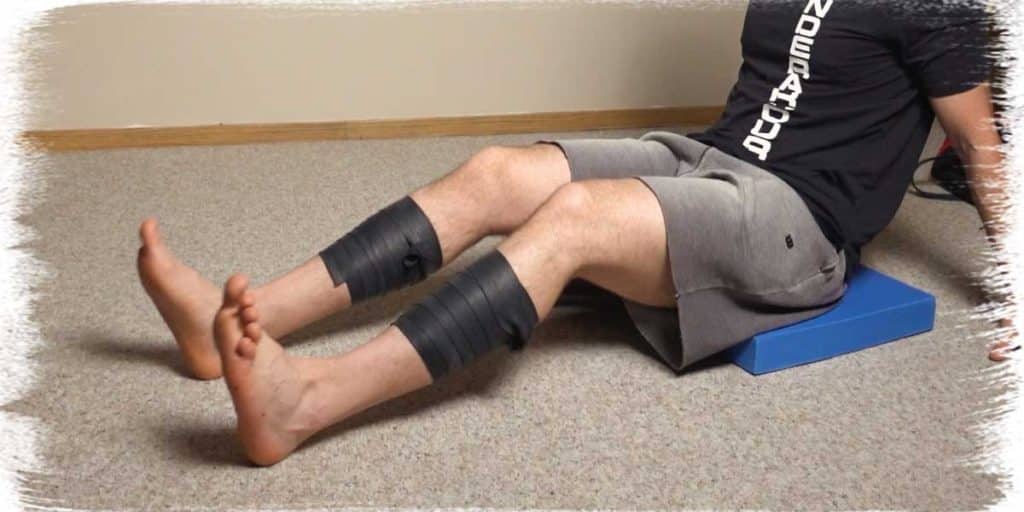
To perform compression flossing, you will need a compression band or two. You can opt to floss one extremity at a time, or you can double up if you have a second band to use.
As for the bands themselves, they usually come in either two-inch wide or four-inch wide bands. You should be fine with either. I use both, depending on the area(s) that I’m flossing.
How to perform compression flossing on the quadriceps muscles
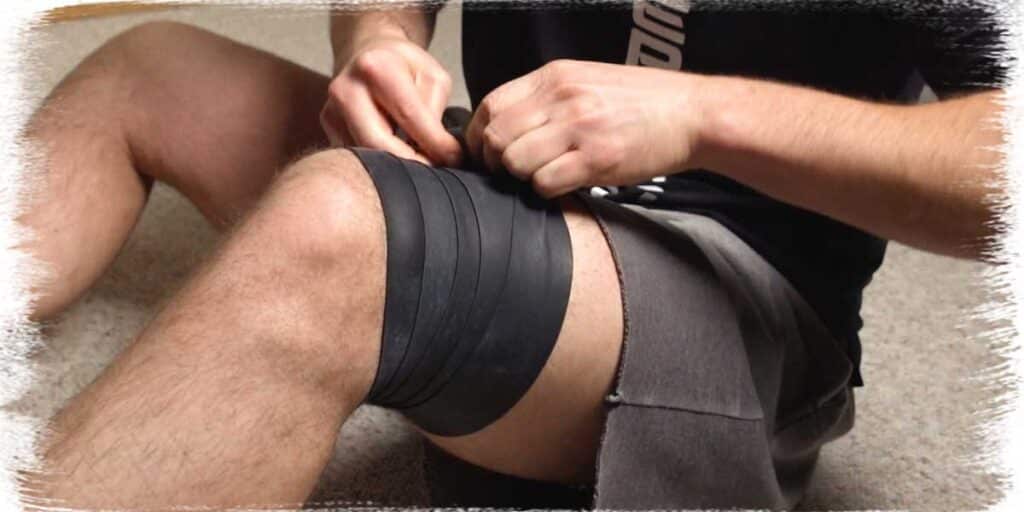
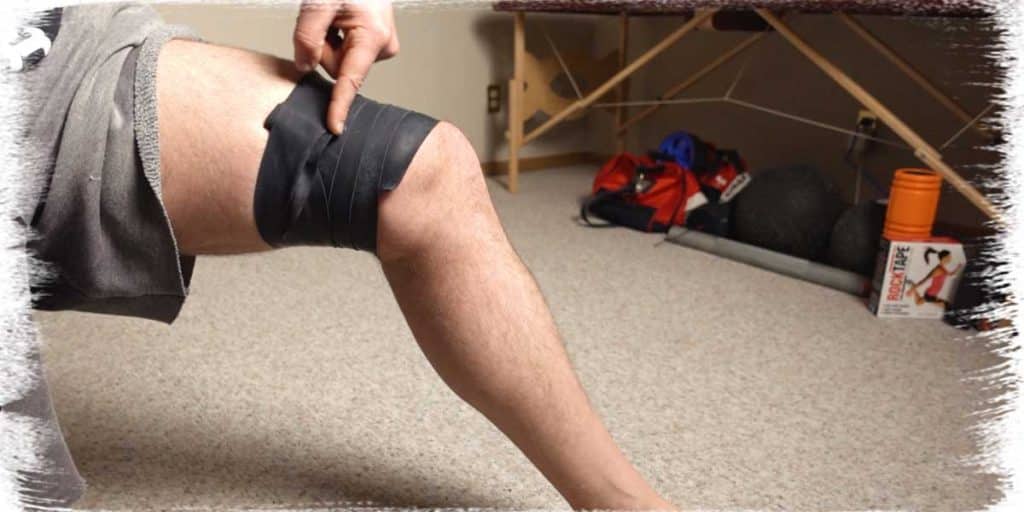
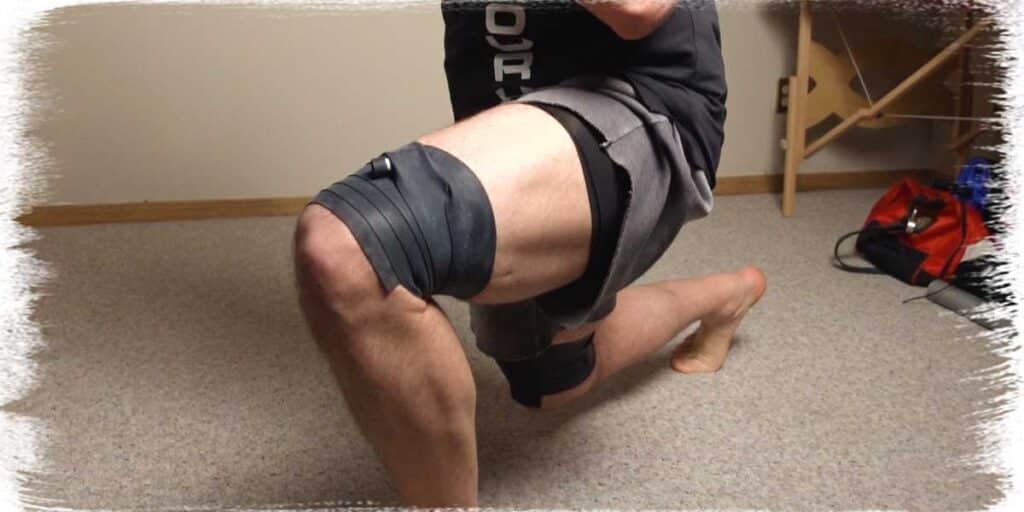
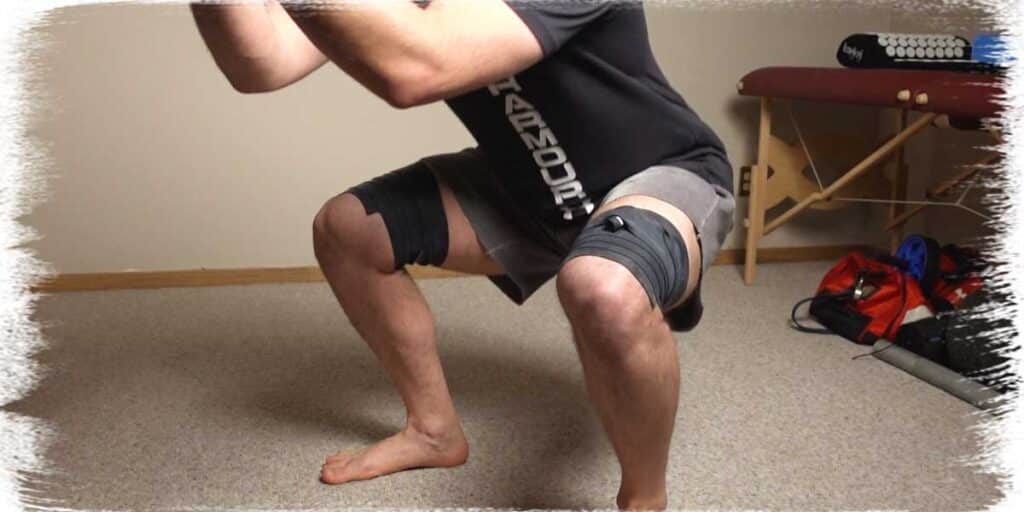
While you can wrap any portion of the quadriceps that you’d like, my recommendation is to try wrapping the bottom part of the quadriceps. I tend to have the most success starting about two inches above the kneecap and wrapping upwards for about four or six inches.
Use about 50% stretch of the band, and once you’re all wrapped up, simply tuck the end of the band underneath the last wrap to make sure it’s secured.
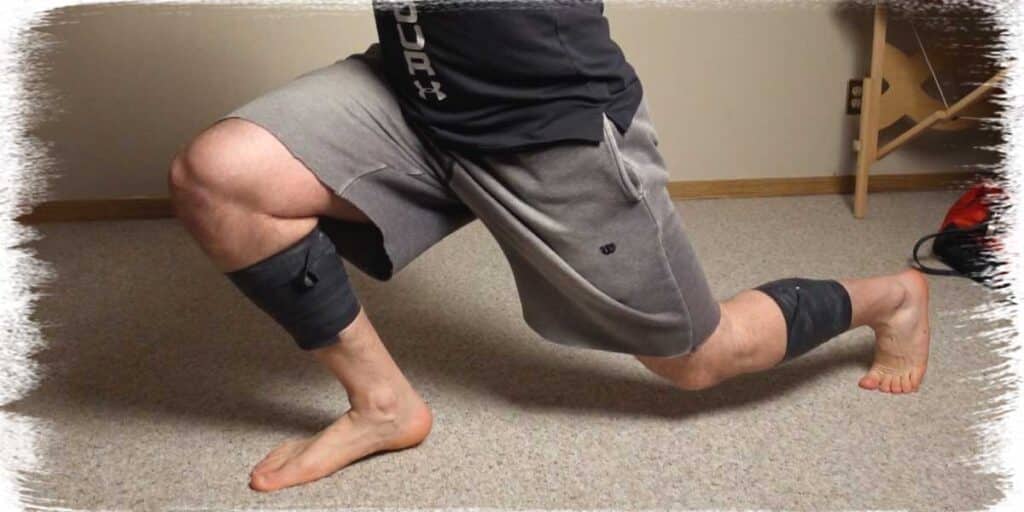
With the band in place, perform any knee-bending movements that you’d prefer. As you bend your knee, you’ll feel the portion of the quadriceps muscles beneath the band having to move against the resistance of the band, which is pinning them down.
My favorite movements include:
- Half-kneeling lunges
- Bodyweight squats
- Reverse Nordics
Perform as many movements and repetitions that you’d like for a minute or two before unwrapping the bands. Try doing those same movements again without the bands on and you’ll likely feel a pretty solid difference in your knee mobility!
How to perform compression flossing for the calves
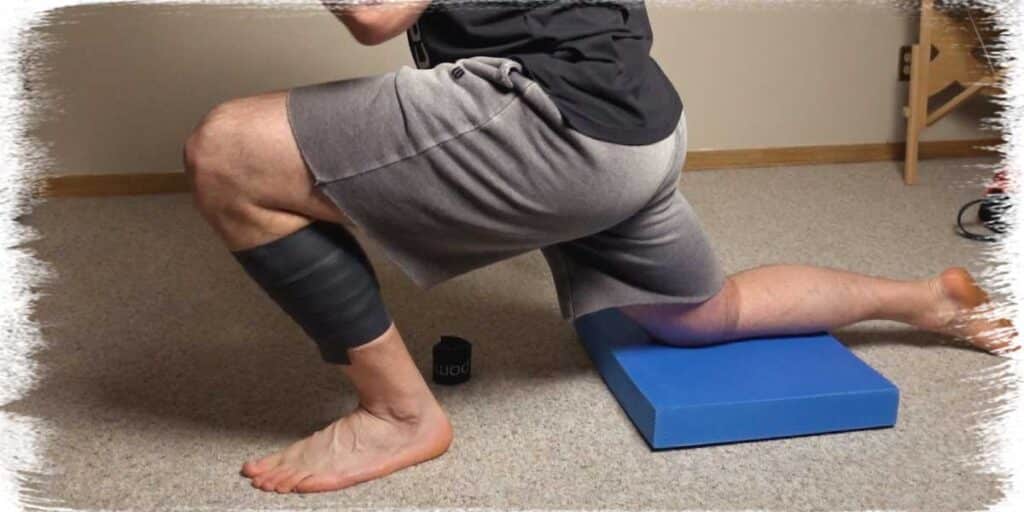
For wrapping your calves, you’ll likely have the most success if your placement includes wrapping over the musculotendinous junction of the gastrocnemius (calf) muscle. You can wrap solely above or below this point, but I find the most significant amount of success to occur when compression flossing covers and targets this area.
The wrapping technique will be the same as when wrapping your quadriceps. Just make sure that you start your calf wrap about two or three inches below the musculotendinous junction and that your wrap works upwards enough to cover the bottom two or three inches of the calf muscles themselves.
Once the wrap is complete, and the end of the band is tucked securely in place, start performing your flossing movements.
My favorite movements include:
- Ankle pumps (these are deceptively effective, and you will feel the tissues having to move underneath the band’s compression).
- Standing calf raises
- Half-kneeling lunges
As with your quadriceps, perform as many exercises and repetitions that you’d like over a one or two-minute span. Pop the bands off and try some of those movements again without them. With any luck, things will be moving and feeling better!
Decompressive techniques
Decompressive tissue therapy is often referred to as “cupping.” It’s a unique soft tissue treatment in that it serves as the only way to improve tissue quality and mobility by separating the layers of tissues beneath the skin; all other treatment methods work through some aspect of tissue compression (such as IASTM and compression flossing).
Therefore, Cupping therapy can likely be a powerful adjunct to incorporate effective, mobility-enhancing tissue changes to your muscles.8-10
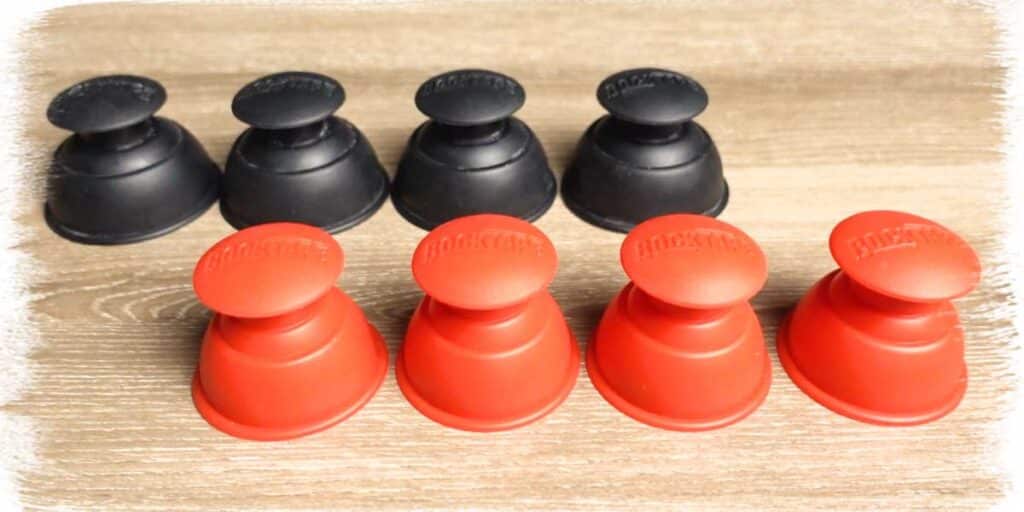
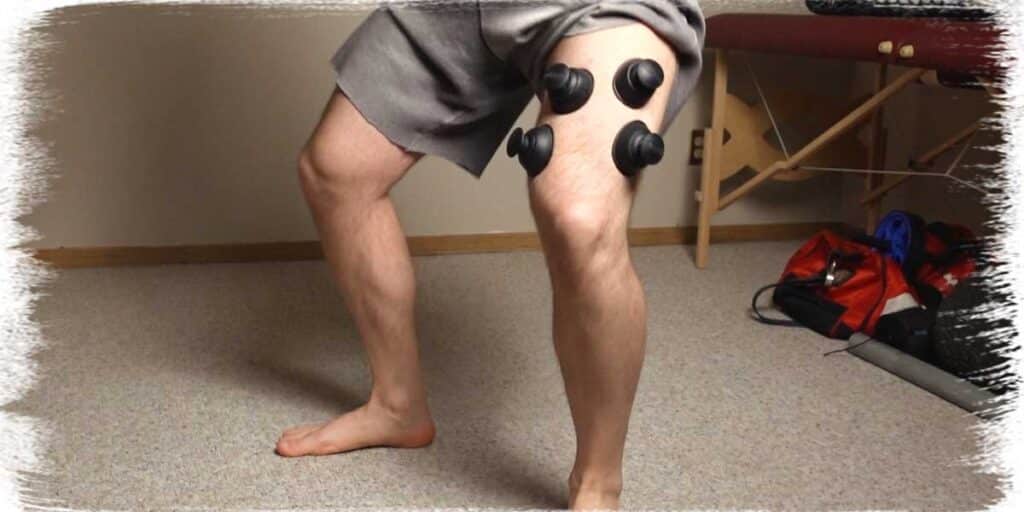
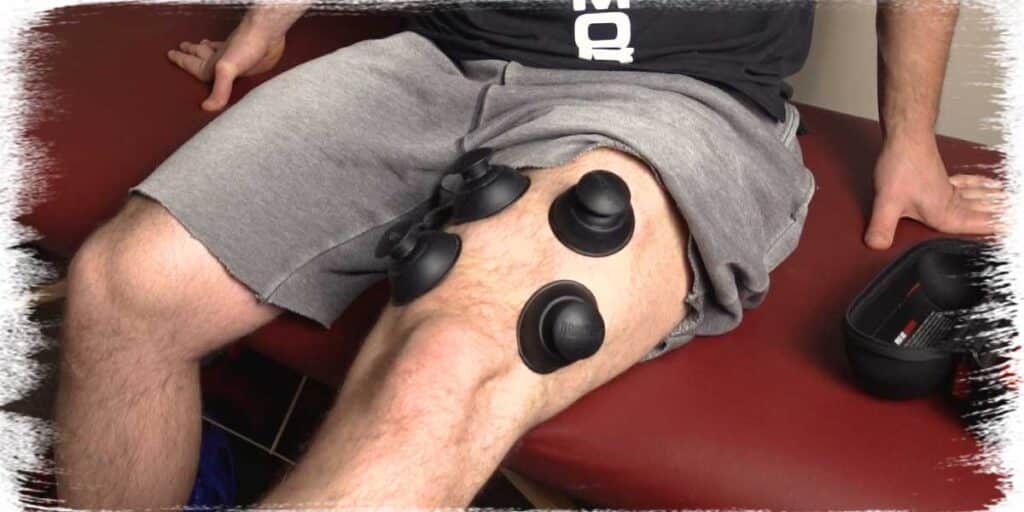
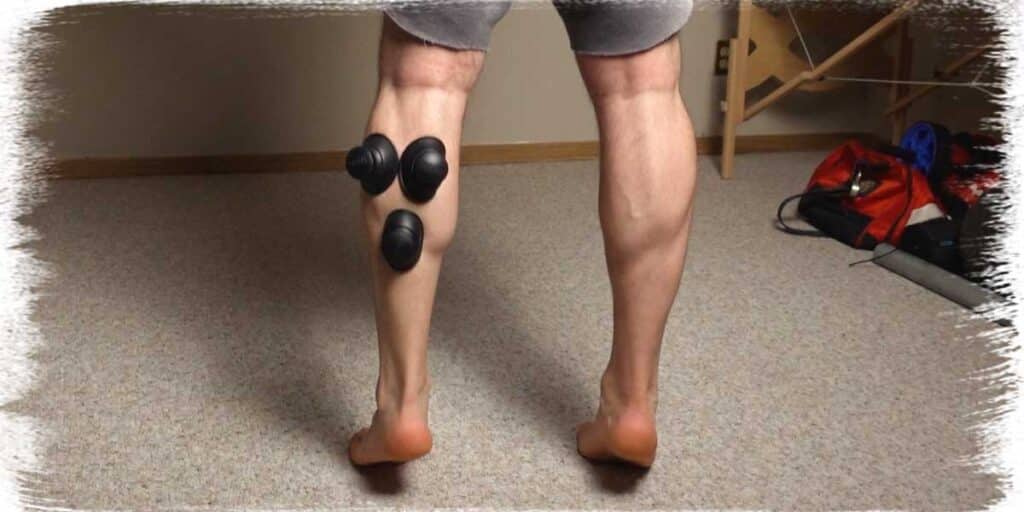
While there are many different styles of cupping and types of cups to use, I tend to find that high-power silicone cups, such as RockPods, work rather well for this type of application. They offer enough suction that they won’t fall off while performing most movements and will be powerful enough to provide therapeutic benefits. If used correctly with their “inversion” method, you’ll no doubt feel their suction on your skin.
How to perform cupping on the quadriceps
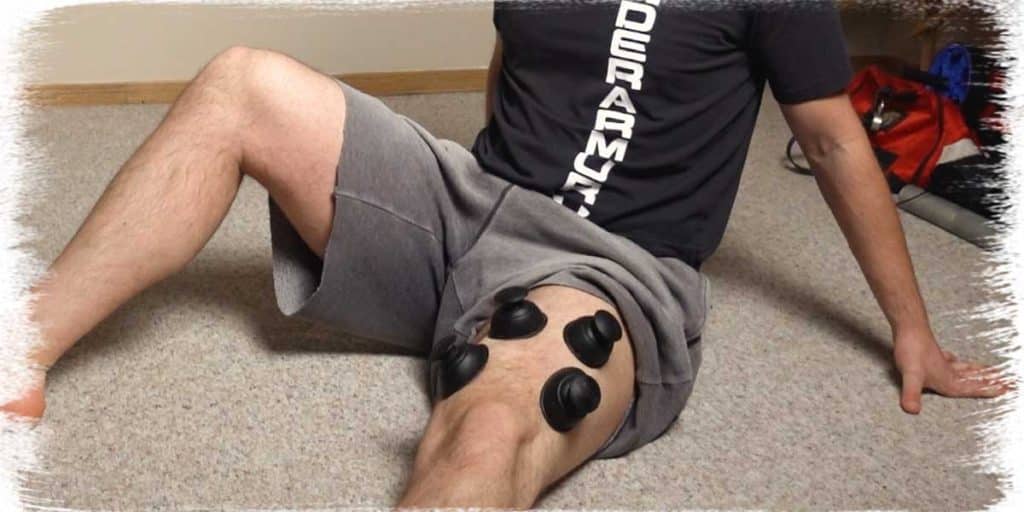
Place a couple of cups on the inner portion of the lower quadriceps (the vastus medialis is obliquus muscle) along with a few cups on the outer portion (on the vastus lateralis muscle). If you have a couple of extra cups left, place one or two on the top quadriceps muscle (the rectus femoris).
With the cups securely in place, perform any knee-dominant movements that you feel will be appropriate for you. Perform as many repetitions as you’d like or until one or two minutes have passed.
My favorite movements include:
- Squats
- Knee extensions from sitting on the edge of a table (open-chain knee extensions).
How to perform cupping on your calves
Using RockPods or any other sort of cup on your calves will follow the same concepts as with your quadriceps. I tend to find good success with placing two cups on the medial (inside) head of the gastrocnemius muscle and two on the lateral (outside) head. You can also try putting some on around the musculotendinous junction if you feel so inclined.
With the cups firmly in place, perform any movements that you feel will give your calf muscles some good contractions. Do this for a minute or two.
My favorite movements include:
- Standing calf raised
- Half-kneeling lunges
- Ankle pumps when leaning back in a chair (feet off the ground)
Final thoughts
If you’re serious about improving your knees over toes mobility, giving your soft tissues (particularly your quadriceps and triceps surae muscles) some dedicated mobility work may be the exact ticket that you need. If nothing else, these techniques can be a great way to ensure that you keep your mobility top-notch and your tissues pain-free.
Tissues that are in a healthy state tend to be stronger, more physically robust, and more resilient to aches, pains, and most importantly, injury. When muscles and tendons are immobile, bound up, and generally feel stiff, they hold us back from physical movement and bodily longevity, which is super lame.
So give these treatments a try if you feel appropriate for you to do so. The results may be more than just improved mobility; you may find yourself moving a bit quicker, a bit more smoothly, and without any of the annoying aches and pains that tend to plague us when our muscles and tendons don’t get the treatment and attention they deserve.
References:

Hi! I’m Jim Wittstrom, PT, DPT, CSCS, Pn1.
I am a physical therapist who is passionate about all things pertaining to strength & conditioning, human movement, injury prevention and rehabilitation. I created StrengthResurgence.com in order to help others become stronger and healthier. I also love helping aspiring students and therapists fulfill their dreams of becoming successful in school and within their clinical PT practice. Thanks for checking out my site!
