Plenty of people experience tight and nasty feeling calf muscles. After all, these muscles tend to get used more so than nearly any other muscles in our body. So, when it comes to getting calf tension under control and thus getting them to feel better, having effective, self-directed treatment methods that are easy, quick and convenient to perform should be at the top of the priority list.
The best ways to massage your calf muscles on your own involve using your own hands, a lacrosse ball, floss bands, foam rollers, IASTM tools, vibration therapy and even a barbell. Each of these techniques will offer unique benefits that will help get calf tension under control and eliminate pain.
If you’re curious as to what some of the best ways are to treat your tight and painful calves, then keep on reading as I’ll be providing detailed information for each treatment method below!
Article contents (Quick links)
Click/tap on any of the headlines below to instantly jump to that particular section of the article!
Method 1: Using your fingers and hands (different techniques)
Method 2: Use a lacrosse ball for specific areas
Method 3: Try floss bands for getting the muscle fascia
Method 4: Using a foam roller for general massage
Method 5: IASTM tools for the calves
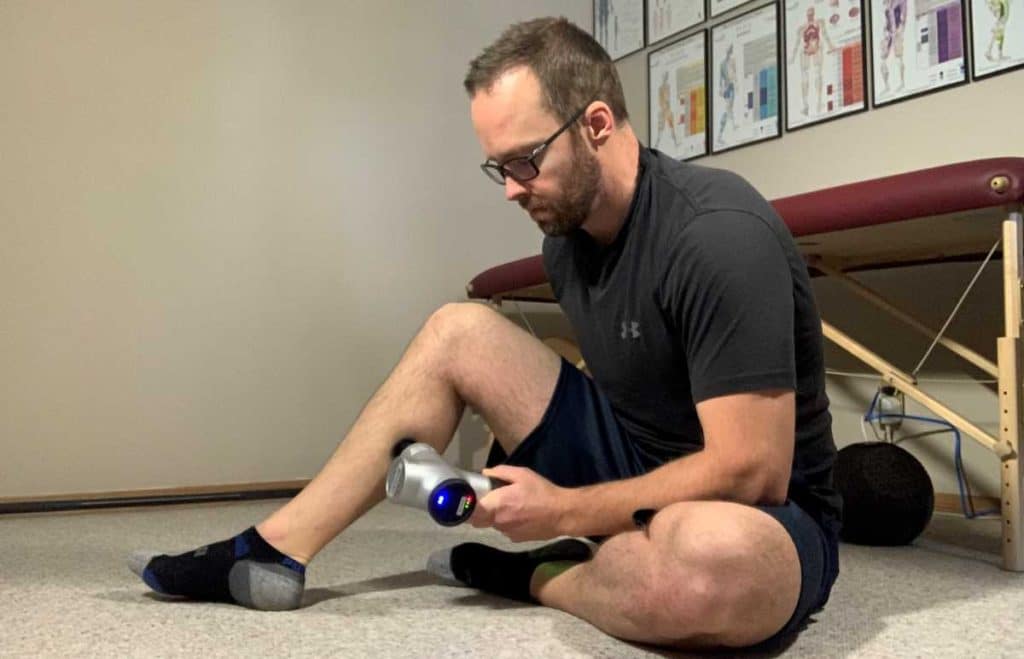
Method 6: Massage guns can feel super nice on the calves
Method 7: Using a barbell for some serious (but effective) treatment
Final Thoughts
Disclaimer: While I am a physical therapist, I am not YOUR physical therapist. As a result, I cannot tell you whether or not any treatments mentioned on this website or within this article may or may not be appropriate for you, including self-treatment of your calves. By following any information within this post, you are doing so at your own risk. You are advised to seek appropriate medical advice for any pain you may be experiencing.
Method 1: Using your fingers and hands (different techniques)
We might as well start off with the technique that most everyone is likely familiar with – using your hands. This is pretty much the oldest technique in existence for taking care of tight muscles on oneself, and what’s nice is that just about every person has hands that they can use in order to do so.
When it comes to treating your calf muscles with your hands, you’re a bit limited in terms of how you can contort your body to reach and get at them with your fingers or knuckles, but there are some rather good techniques that you can try.
Technique 1: Using your thumbs
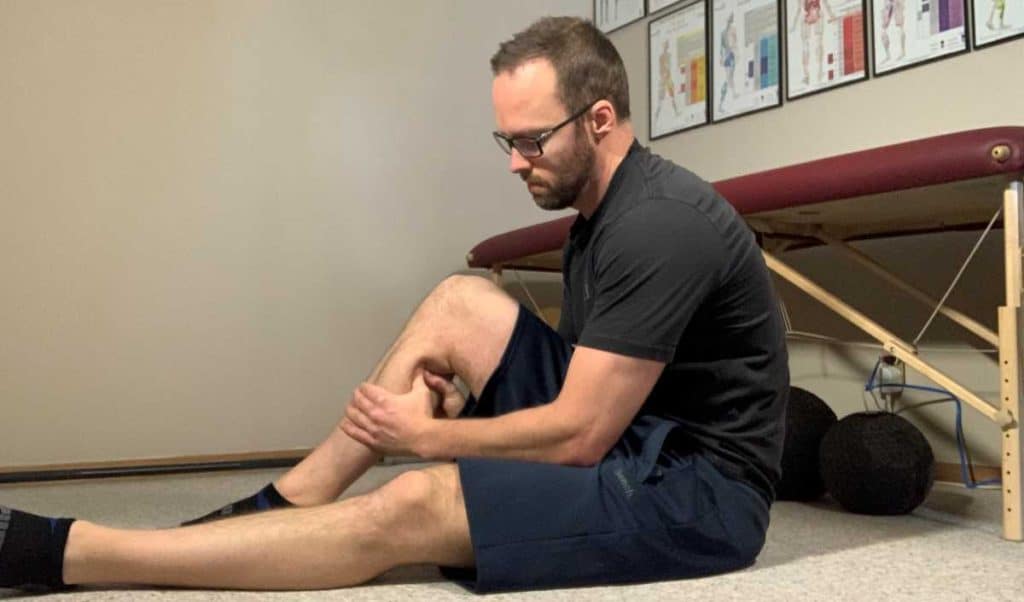
Perhaps the most classic way to start massaging your calves is to sit on the ground and bend your knee while keeping your foot on the ground. This will allow pretty unrestricted access to the calf muscles. If you feel like there are a couple of painful knots in your calves, you can use sustained pressure with your thumbs to try and help settle those spots down.
If you’d like to perform more traditional massaging strokes, simply use a skin lotion of some sort (Lubriderm works great) or even a topical muscle relaxant (Tiger Balm, A535, etc.) and run your thumbs upwards along the calf. Use as much pressure is tolerable for both your calf muscles and your thumbs. Again, be sure to start down at the ankle and massage upwards – this direction is much more ideal for the one-way valves in some of your blood vessels (massaging against the direction of these valves could damage them).
Technique 2: Using your knuckles
The thumbs can be rather delicate little structures and sometimes we can’t simply use enough pressure with them as we’d like due to pain and discomfort that arises within them when firmly pressing into tissues.
If this happens to be the case, making a switch over to using the knuckles may work better for you. Things might have to change a little it in terms of how you position yourself, but this technique still works great nonetheless.
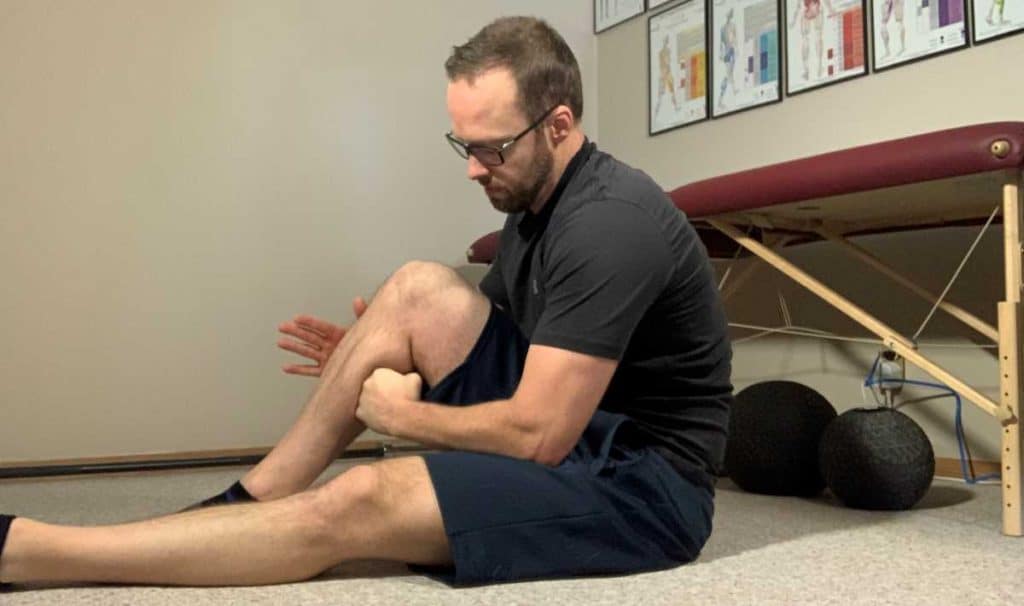
You can try the exact same positional setup as with your thumbs, but this time try using only one fist to press into the muscle while using the other hand to stabilize your shin/knee to counter the force of your fist pressing into the calf muscles.
Another great way to perform this knuckle technique is to go at the calf muscles from the side. For this, I like to rest my leg on the ground and drive my fist down into any sore spots that require sustained pressure. If I want to perform a more traditional massage technique using lotion, I can easily still do that as well, running my fist up the side of the calf muscle.
Method 2: Use a lacrosse ball for specific areas
Sometimes there’s just one or two key areas (often referred to as muscle knots or trigger points) that are in your calves. These can be rather stubborn to take care of and painful as well. If your hands and subsequent knuckles and fingers just aren’t cutting it, don’t worry.
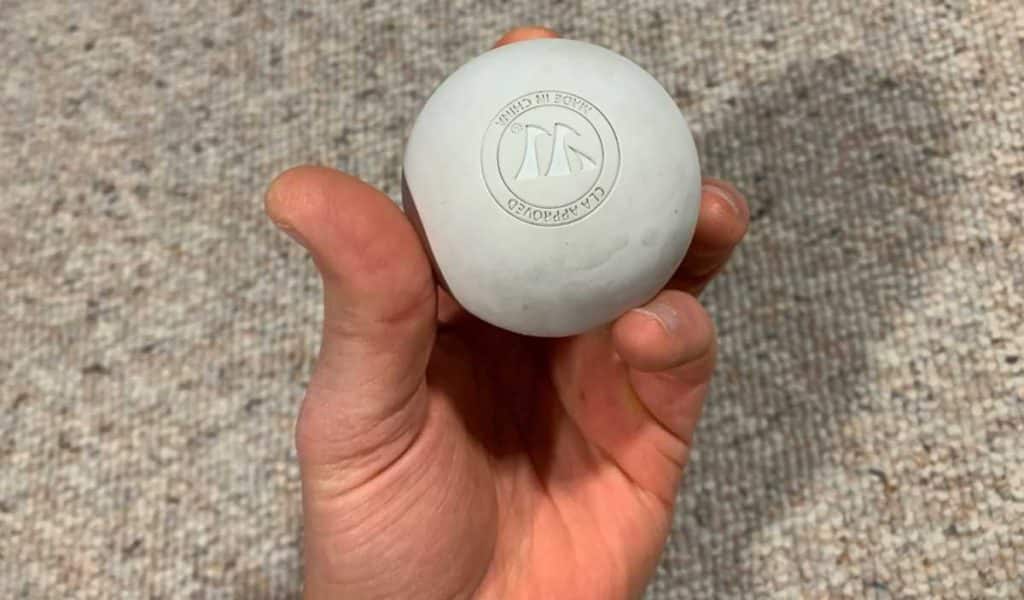
Thankfully, there’s a really solid way you can get at these little focal areas and it doesn’t take any sort of expensive or specialized equipment. All you’ll need is a lacrosse ball! If you don’t have one, they’re only a couple of dollars and will last you a lifetime. You can try something such as a tennis ball, however you’ll likely find that the tennis ball is just a bit too soft and will cave in when you try to use it as described below.
There are two great ways you can use the lacrosse ball once you know where the muscle knots or trigger points are within your calves.
Technique 1: Drive the ball into the muscle using your hand
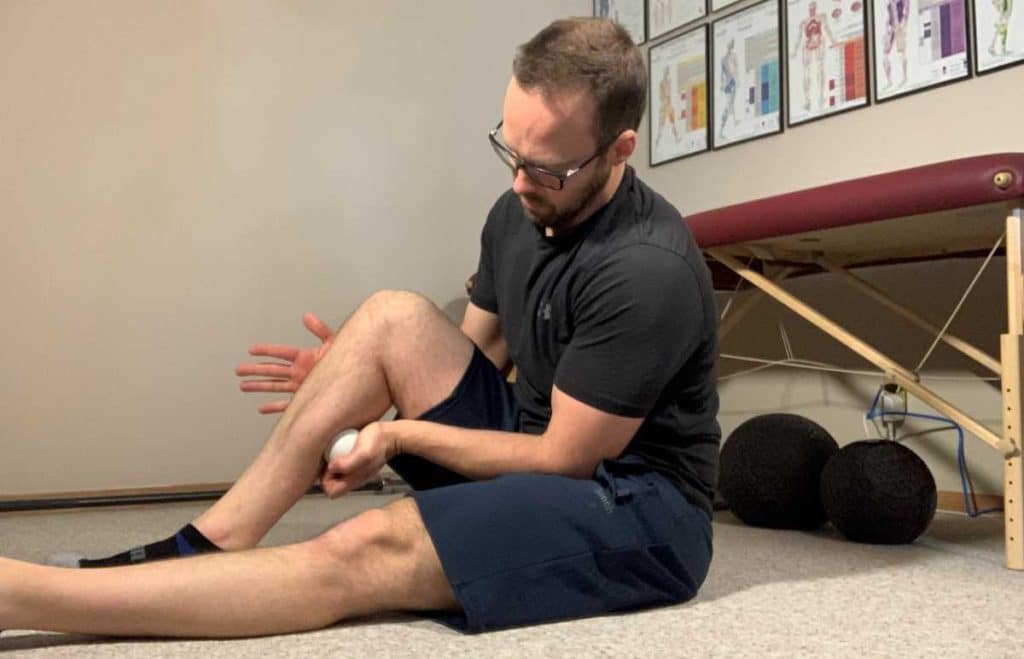
This method works really well if you want to try and treat the calves from the side. It’s basically the exact same technique as the previously mentioned knuckle technique, but this time you’re replacing your knuckles with the ball. This allows you to now get even more aggressive while sparing your the joints in your hand from unnecessary or uncomfortable pressure.
What’s also great when going at the calves from the side of the leg is that there are in fact more muscles in the lower leg than just the calf muscles, so you may even be able to get at some of these other muscles when going from the side.
Simply hold onto the ball in one hand and press it into the sore spot(s) that you’ve found in the calf area. You can have your leg rest on the ground (see picture), which is my preferred way, but you can also squeeze the ball into the tissue as you stabilize the leg (to counter the force) using your other hand. Either way is totally acceptable and really comes down to your own preferences, mobility issues, etc.
Technique 2: Place the ball under your calf as it rests on the ground
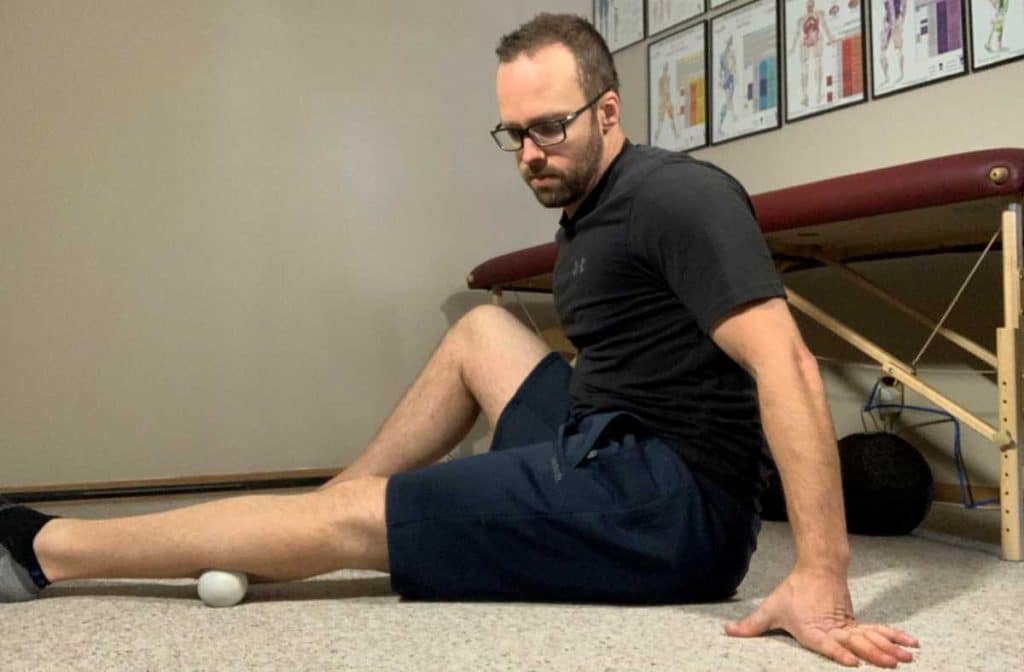
The second way you can use the lacrosse ball is to simply rest it on the ground and then rest your leg right on top of it. You should place the sore spot of your calf right onto the ball. The weight of your leg will provide enough downward pressure for you to feel the ball settling into the muscles. If you need more pressure, however, simply cross your other leg on top of the leg being treated, which will add more pressure.
Just keep your leg still and let the ball sink into the tissue, no need to roll it around. I usually let the ball sink into my calf muscles for 30-60 seconds while just focusing on my breathing.
Method 3: Try floss bands for getting the muscle fascia
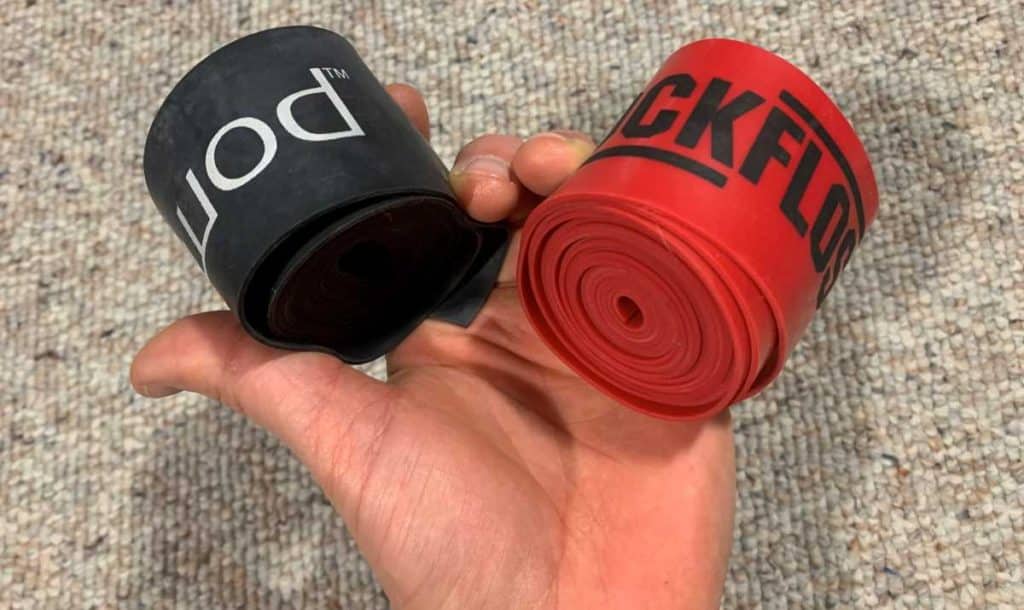
Band flossing (sometimes called voodoo flossing or compression flossing) is a relatively new, yet great way to treat tight, restricted muscles. It involves using an elastic band (usually made from latex) and wrapping it around an area of the body (most often a limb) that has sore and tight muscles. Once it’s wrapped, a series of non-specific, active movement is performed for a short duration of time to help treat the tissue underneath.
If you need a pair of floss bands, just grab these Iron Core Athletics floss bands (link takes you to Amazon); they’re a great price for a pair and they don’t come with unnecessary carrying cases or anything else that makes you pay more money than you have to. These are currently the best deal I’ve found on Amazon.
Please note: I earn an incredibly small commission off of any purchases you make through these Amazon links at no extra cost to you. I use these commissions to pay for the web hosting and other expenses I incur with running this website.
One of the unique ways that flossing can help alleviate tension and discomfort is through creating shearing forces across the muscles. This in turn helps to mobilize the tissue that wraps around the muscles themselves, known as fascia. Think of muscle fascia as seran wrap that’s wrapped around a sandwich and holding it together or think of it as the casing that wraps around a sausage, serving the same purpose. Fascia can get restricted and as a result create pain and restriction (known as myofascial pain or myofascial restriction, respectively).
What’s awesome about flossing is that it’s rather easy to perform and picking up a floss band or two only costs a couple of dollars, so it’s certainly worth a try if you’re not having any success with traditional pressure-based massage treatments.
How to use floss bands for your calves
If you have a history of circulatory issues, circulatory disease or sensory impairments in your legs then you’ll want to avoid trying this technique – it’s only recommended for individuals without any circulatory or nerve disorders (see the medical disclaimer at the top of this article).
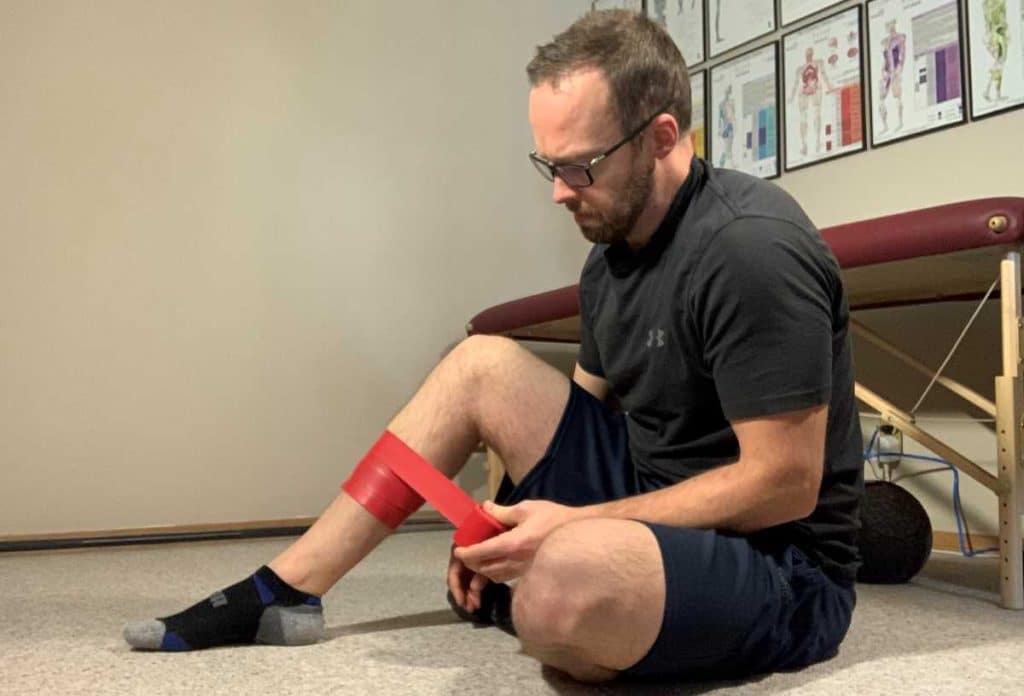
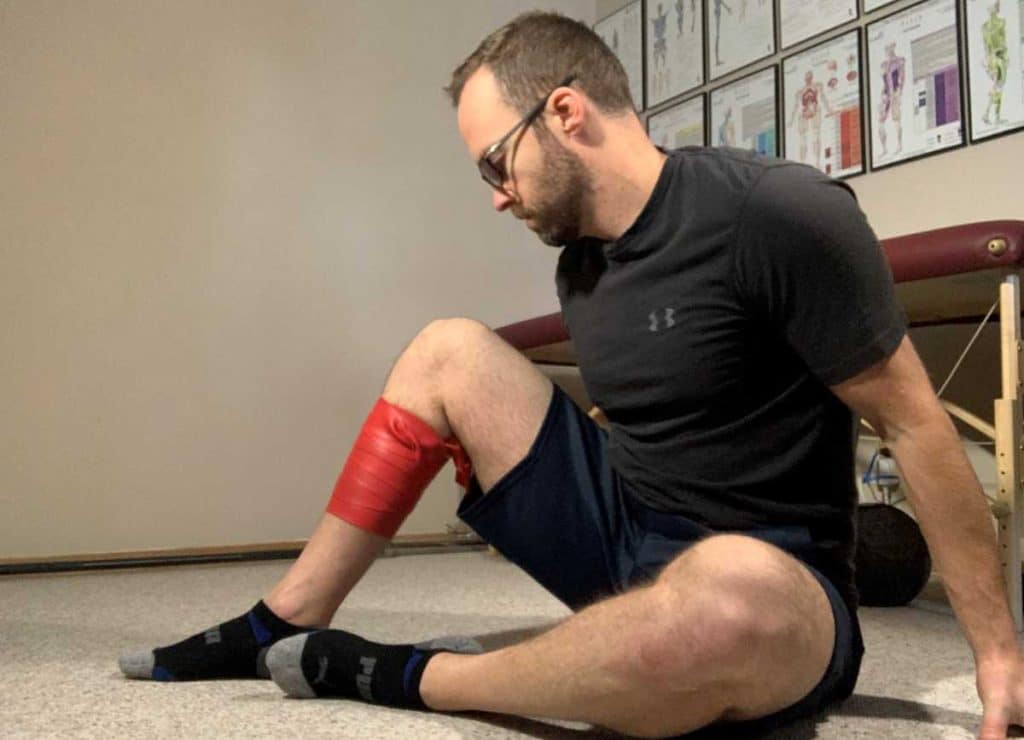
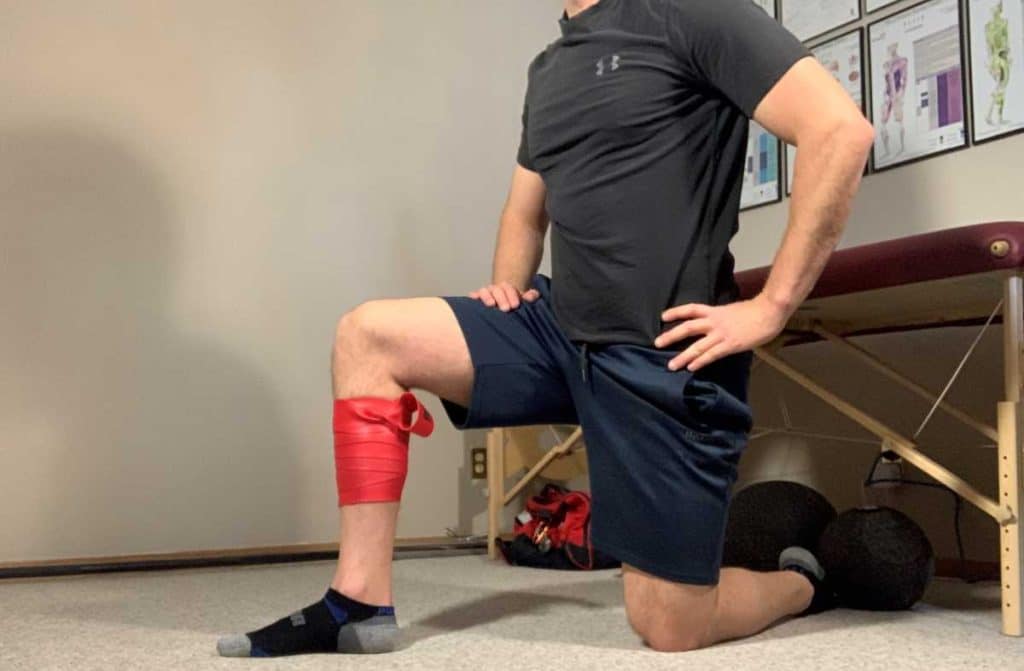
To perform flossing for your calves, grab a floss band and wrap it around your lower leg, starting down at the ankle and moving upwards until it’s covered most of the calf itself. Tuck the finishing end of the band under a wrapped section in order to secure it.
When you wrap the band, wrap it so that half of the band overlaps the previous wrap, while the other half of the band rests on the skin. This ensures all of the muscle is covered while also making sure that the band will stick to itself and not slide around on the skin.
In terms of how much tension to use when pulling on the band and wrapping it, it widely varies, but start light if it’s your first time, maybe approximately 25% maximal stretch of the band. As you get familiar with it you can work up to 50% stretch or whatever feels best for you. I usually stay around the 50% range, personally.
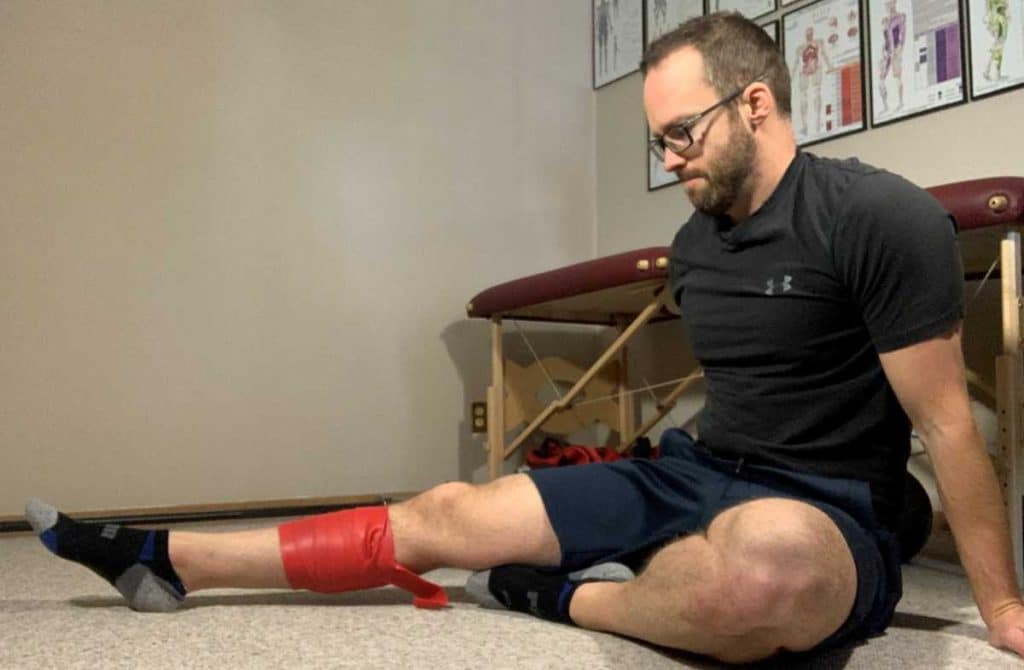
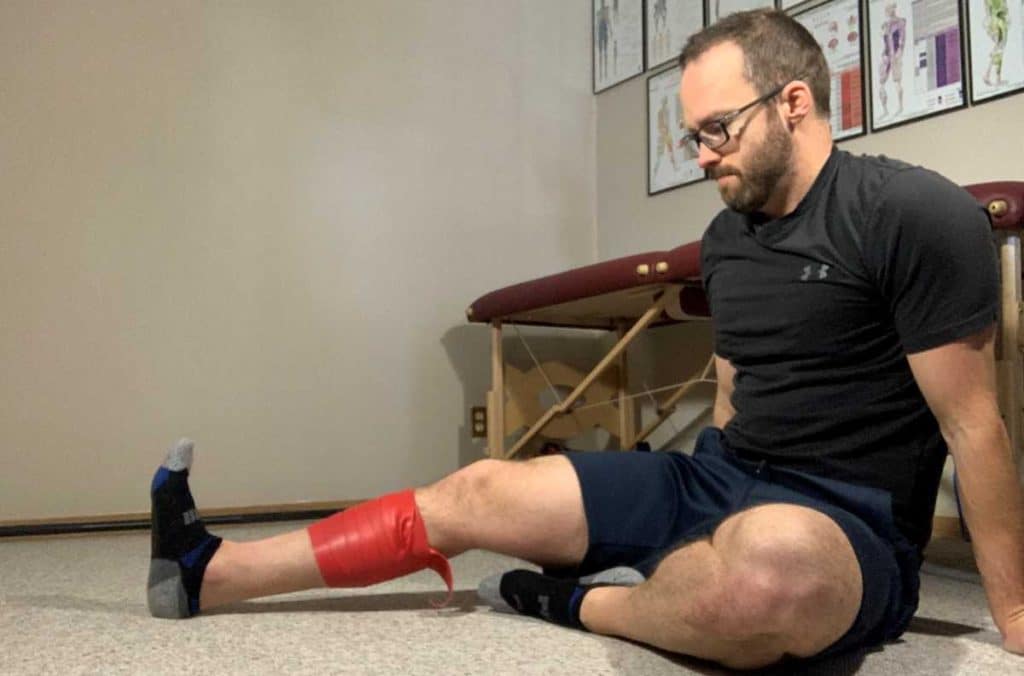
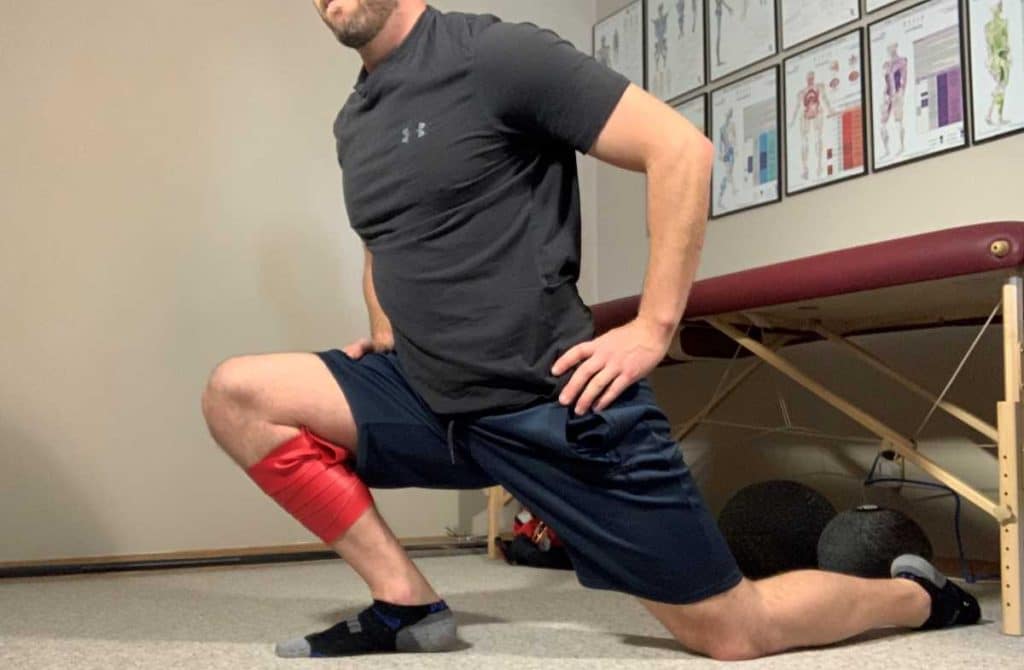
Keep the band on for a few minutes (so long as it feels comfortable to you) and move your ankle up and down – this will floss the calf muscle tissue underneath the band, which you should feel. Feeling restricted when trying to perform any ankle movements while the band is wrapped around your calf is entirely normal and exactly what we’re after.
My favourite stretch for my calves when compression flossing them is the half-kneeling lunge, which I perform while keeping my foot flat on the ground the entire time (see picture). This really takes the calf muscles through their fully available range of motion while flossing the tissue being compressed beneath the band itself.
Method 4: Using a foam roller for general massage
Most people are familiar with foam rolling these days, or have at least heard the term “foam roller” bounced around once or twice before. It can be a great starting point when wanting to explore the world of self-directed soft tissue treatment. Foam rollers are rather inexpensive and common enough these days that pretty much every sporting good store sells them, so they’re an easy find.
Related article: Massage Gun vs. Vibrating Foam Roller – Is One Better Than The Other?
The calves in particular lend themselves quite nicely to foam rolling since they’re not only an easier and less energy-intensive area to target using a foam roller but also since it’s very easy to modulate just how much pressure and intensity you want to put into the calves when rolling them out.
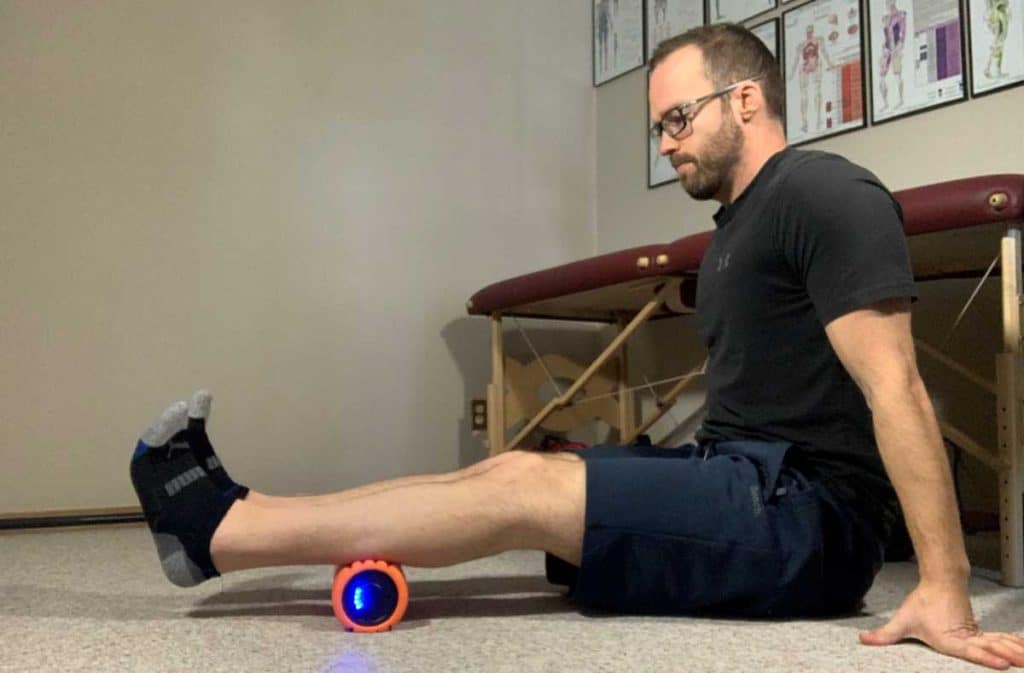
If you’re in need of a small-sized travel roller, I’d either recommend the TriggerPoint Grid Vibe Plus (link takes you to Amazon) if you want the added benefits of vibration therapy when working on your calves, or their standard Grid Foam Roller (Amazon link).
Either will serve you well, however they’re not the only brand to go for – I just enjoy their products and feel like they are priced very reasonably for their quality and performance.
Technique 1: Double leg technique
The easiest and most comfortable way to start out when foam rolling the calves is to use the double leg technique. This technique allows you to equally disperse the weight pressing down on the foam roller across both legs. This is a much less aggressive and intense method when targeting the calves, making it much more tolerable and thus appropriate for those with either really tight, pressure-sensitive calves or those who are just starting out with the calf foam rolling technique.
To foam roll the calves, simply rest your calves on top of the roller while you sit on the ground. Slowly roll your calves across the roller, going from just below the knee joint to just above the ankle joint. Try doing this slowly for around one or two minutes.
Technique 2: Single leg technique
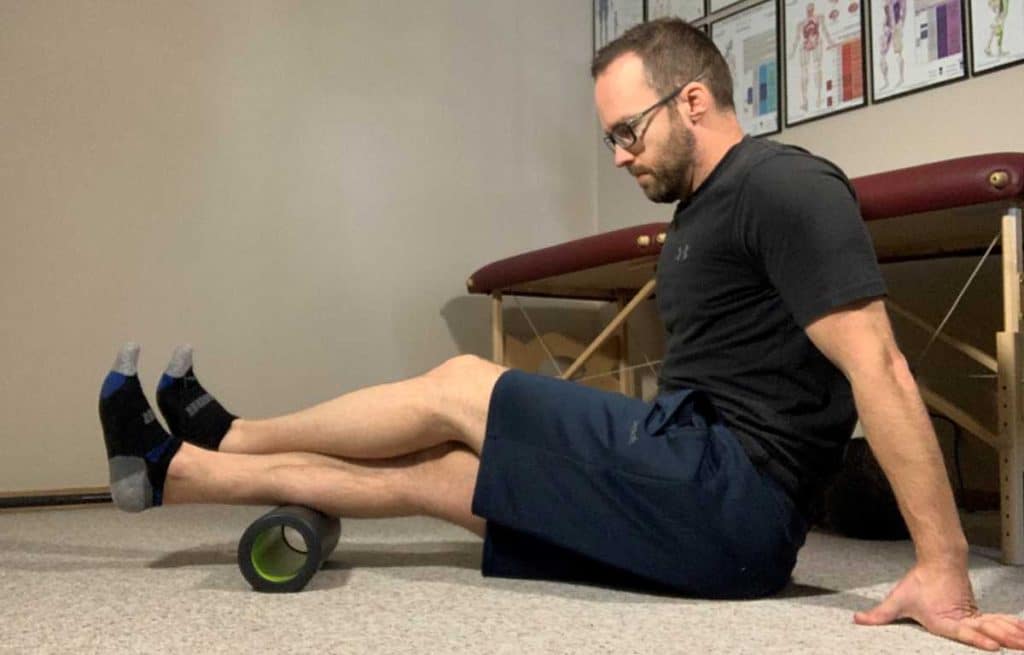
If the double leg technique doesn’t seem to be cutting it, you can try upping the pressure/intensity that your calves will experience. To do this, simply cross one leg on top of the other. The result will be an approximate doubling of pressure being placed on the calf that’s still in contact with the roller since it now must take all of the weight while the other calf now additionally presses downwards on it, creating even more pressure.
Roll the calf slowly, going up and down just like you did with the double leg technique. Again, try for maybe one or two minutes. It should be tolerable though not exactly pleasant, especially when you roll over any muscle knots/trigger points.
Method 5: IASTM tools for the calves
IASTM stands for Instrument Assisted Soft Tissue Mobilization. It’s a form of soft tissue treatment that houses some really unique benefits.
For starters, one of the best things about IASTM is that it can save your hands, fingers and their subsequent joints a world of pain and discomfort while also being incredibly versatile for use all over the body.
The world of IASTM can seem rather overwhelming when you first dive into the world of it, especially if you have no formal training but are wanting to pick up a tool that is right for you. If you happen to fall into that category, don’t worry, I’ve got you covered.
Related Article: IASTM: Here’s How it Works to Decrease Pain and Improve Mobility
Selecting the right IASTM tool
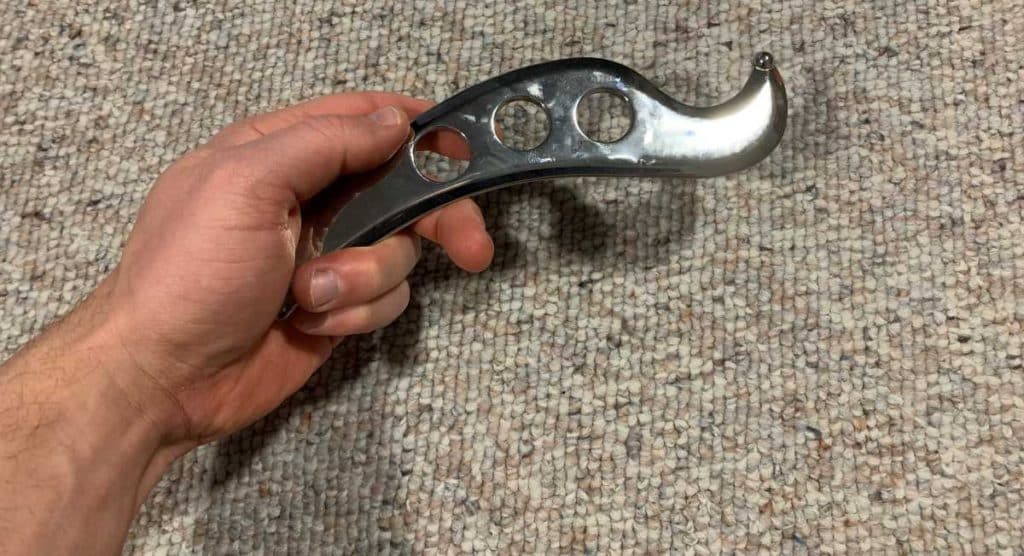
A good multi-use IASTM tool can be super awesome to have since it won’t cost much, it’s super portable, can be used on multiple areas of the body and will essentially last you a lifetime. Think of a multi-use IASTM tool like a Swiss Army knife – tiny and portable with all sorts of amazing ways to use it.
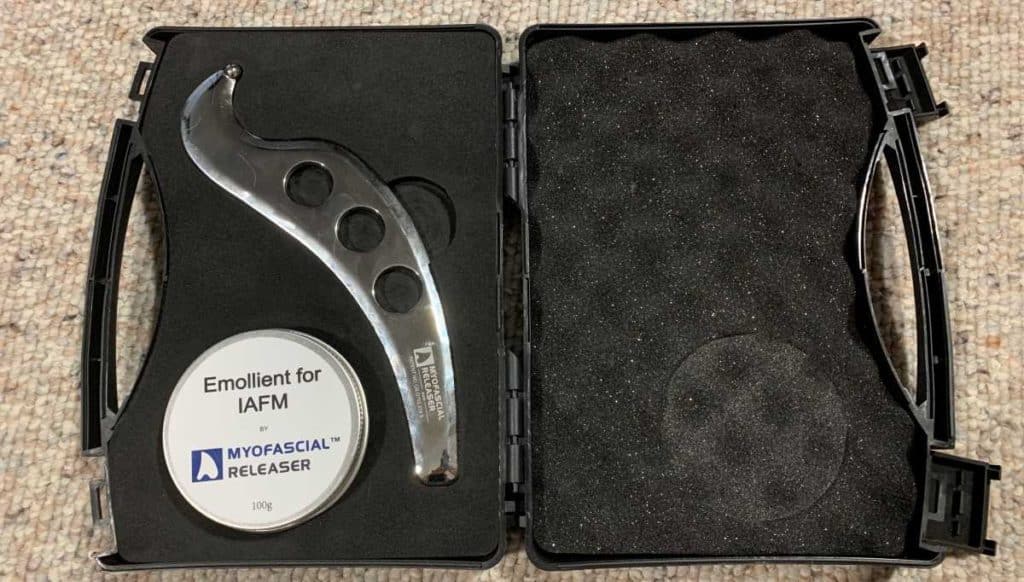
For me personally, my preferred material is stainless steel, and as a guy who is paying back an exorbitant amount of student loans, I can’t afford to drop tons of money on a bunch of tools, especially the name-brand ones (even if I do like them – ALOT!).
Related Article: Why You Shouldn’t Spend Tons of Money on IASTM Tools
So, as a result, I opted for the Myofascial Ellipse Pro (link to Amazon) a couple of years ago and have been extremely happy with it. Great price point for what you get with it and what you can do with it. It’s by no means the only one worth springing for, but if you’re looking for a good all-around tool, it’s what I would personally recommend.
How to use an IASTM tool on your calves
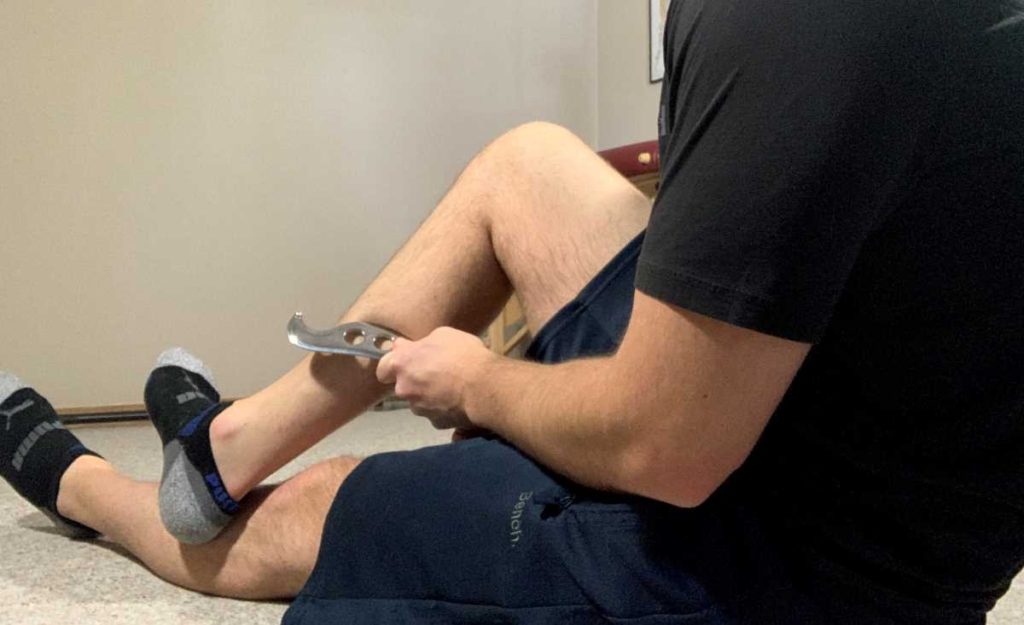
When it comes to giving your calves some IASTM treatment, the simplest (and arguably the most effective) way is to provide firm pressure to the muscle(s) while scraping in an upward motion.
In terms of trying to down-regulate (decrease tension for) the calf muscles, the most effective technique will likely be to provide firm, consistent pressure while slowly dragging/scraping the IASTM tool upwards. The reason for the slow and deep pressure is that this will stimulate different receptors beneath the skin than with faster and/or lighter pressure. To be more technical, slow and deep pressure will influence rufinni corpuscles the most, which will theoretically yield better results for decreasing muscle tension.
Simply use a lotion on top of your skin when performing the slow, deep pressure with the tool and perform this motion for 3-5 minutes, or based on what feels best for you. Your skin should turn a bit pink during the self-treatment, which is a sign that increased blood flow is moving into the area.
Method 6: Massage guns can feel super nice on the calves
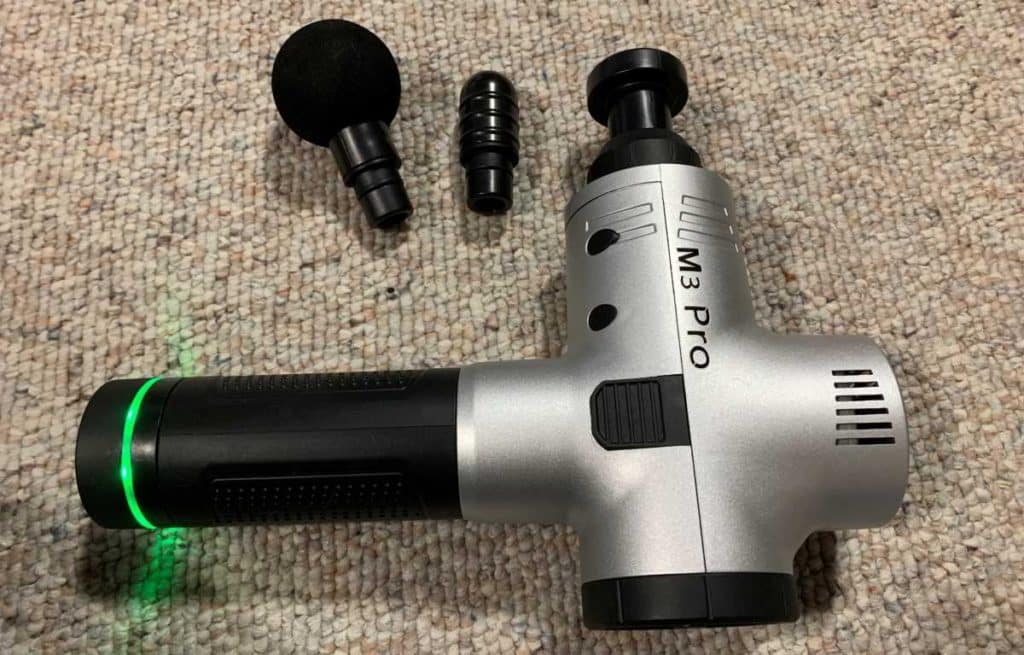
If you’re wanting to get a bit fancy with things and can afford to spend a bit of money, another great device to try is a massage gun. Now, there’s a billion different ones on the market, but the one that I use that has struck the perfect balance of cost to quality is the Opove M3 Pro. It’s not the absolute best one on the market, but for the cost I’d say that it’s pretty hard to beat. I’ve been pretty happy with mine ever since I purchased it a while back.
Unfortunately, they’re no longer being sold, but if you’re looking for something that costs the exact same amount and has just as many thousand of positive reviews, you can can check out the Mebak Deep Tissue Percussion Massager, which I’d be inclined to try.
Regardless of which brand or type of massage gun that you get or have, however, you’ll pretty much use them all in the exact same way, so don’t fret if you have one that’s different than mine or what your friends might have, etc.
How to use a massage gun on your calves
It’s a pretty straightforward process, so try not to overcomplicate things. If your massage gun has interchangeable head pieces, select one that you feel will be best for you. I tend to most often use the flat head on mine when it comes to these types of applications.
Select a power setting on your gun that feels the best for you and give some mild pressure to your calf muscles as you slowly move the gun over the muscle belly. I tend to not use the massage gun below the calf muscles (i.e. I don’t use it on the Achilles’ tendon). You can also try going over the peroneal/fibularis muscles on the outside of your leg and can also try going for the inner calf region by going on the inner portion of the leg. Just don’t go over the shinbone itself as you won’t get any sort of benefits and it’ll likely hurt as well.
I tend to use the gun for 5-10 minutes at a time for one area or until the muscles that I’m targeting get nice and warm to the touch due to the influx of blood coming into the area. The skin might turn a mild pink during this process due to the blood coming in underneath, which is totally normal and expected.
Method 7: Using a barbell for some serious (but effective) treatment
If all of the aforementioned techniques haven’t seemed aggressive enough for you, or you’re simply wanting a form of self-massage that can be done quickly and make some seriously noticeable changes in your calf tension and mobility, a standard barbell may just be your best friend in this case.
It also helps that barbells are a staple in every single gym, meaning that you can perform this little technique any time you’re in the gym. This method isn’t the most pleasant feeling, but I’ve seen it do amazing things for both myself and many of those whom I treat in terms of restoring calf mobility while simultaneously decreasing pain.
How to use a barbell for rolling your calves
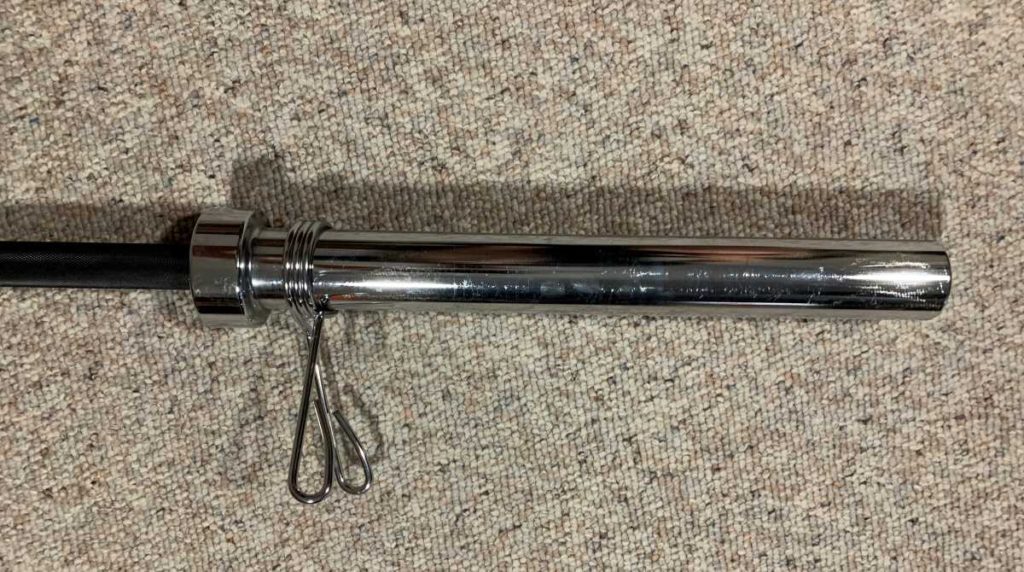
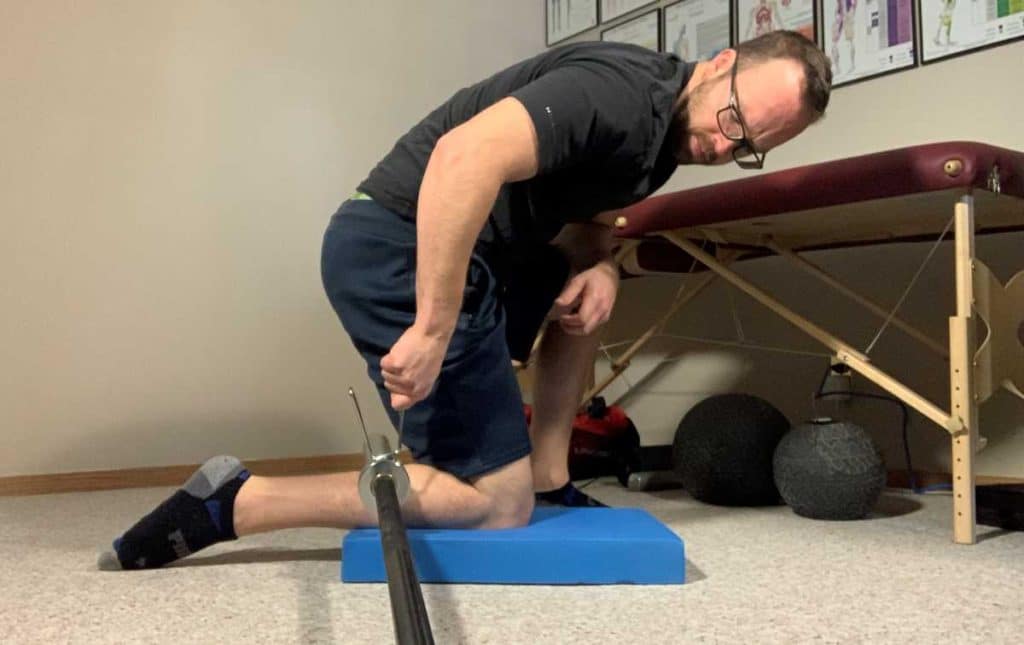
The easiest way to do this is to take a spring-loaded collar and slide it over the barbell sleeve. This will act like a handle/throttle to grab onto as you slowly roll the barbell up and down your calf.
It’s likely going to be uncomfortable, but as long as you keep the barbell sleeve over the bulk of the calves, you should be just fine. You’ll very likely find that the lower down your calf that you go, the more tender it becomes. Just experiment with things and find what works best for you. It shouldn’t take more than two or three minutes per leg to get things effectively targeted and treated.
Final Thoughts
Calves can oftentimes become tight and nasty on people, especially those who are regularly physically active. Thankfully, when it comes to self-directed treatment methods, there are a handful of effective and straight-forward techniques one can use to get their muscles feeling better.
Keep in mind that one type of self-treatment isn’t “better” than another, and you can oftentimes use a combination of different techniques to meet your own personal needs. The key is to trial each method and tweak it in ways that you feel are best for you, personally. After years of playing around with all sorts of self-directed soft tissue treatments on myself, I know which methods tend to work/feel best for me along with how to individually tweak each one to make it most ideal for me.
So if you give any of these methods a try, don’t be afraid to play around with them until you intuitively find what works best for you. Your calves will certainly thank you.
Move well. Live bold.
-Jim

Hi! I’m Jim Wittstrom, PT, DPT, CSCS, Pn1.
I am a physical therapist who is passionate about all things pertaining to strength & conditioning, human movement, injury prevention and rehabilitation. I created StrengthResurgence.com in order to help others become stronger and healthier. I also love helping aspiring students and therapists fulfill their dreams of becoming successful in school and within their clinical PT practice. Thanks for checking out my site!
