While there is no shortage of rehabilitative or prehabilitative hip-strengthening exercises you can perform, few might be able to rival the particular movement I’m going to show you here in this article. Why is that, you wonder?
The exercise in this article will not only strengthen your deep hip stabilizer muscles but will also challenge your quadriceps strength, improve your balance, enhance your movement control, and it can even help prevent low back pain. Not bad for a single exercise, eh?
Sure, many exercises tackle one or two of these particular issues, but few of them bundle everything together in one challenging movement the way that this exercise does. Trust me.
So, if you want to learn the mother of all hip-strengthening exercises, keep on reading.
Related article: Bulgarian Split Squat Benefits (Are You Missing Out?) | Make Gains!
As we get going here, I will quickly mention that this exercise is more of a late-stage rehabilitation exercise or prehabilitative (i.e., injury-preventative) exercise.
If you’re in early-stage injury recovery or have a hard time putting weight through your hip (or have been advised by a healthcare professional not to do so), then you’ll want to hold off on this exercise for the time being.
Instead, you can likely opt for the best exercise on planet Earth to truly isolate and strengthen your glute medius and minimus muscles, which is a brilliant movement worth incorporating into your lifestyle (unless you’ve recently had a hip replacement).
Also, if you’d prefer to watch the video version of this exercise, check out my YouTube video below!
What does this exercise accomplish?
The purpose of this exercise is to accomplish functional strengthening of the lower extremity (the entire leg), including critical stabilizing muscles in the hip.
The main muscles targeted by this specialized movement include:
- The gluteal muscles (glute medius, minimus, and maximus)
- The obturator muscles
- The Gemelli muscles
- The quadriceps muscles
Additionally, by strengthening these muscles, this movement helps to improve knee positioning and knee control (knee position is highly influenced by hip muscle strength), which can prevent a world of pain and trouble with your knee.
“Sure, many hip exercises tackle one or two particular issues, but few of them bundle everything together in one challenging movement the way that this exercise does.”
It’s an outstanding way to ward off or prevent issues such as gluteal tendinopathy or tendinosis of the hip muscles, prevent or eliminate knee conditions such as patellofemoral pain syndrome (PFPS), IT band syndrome, and other similar knee conditions.
Here’s an outstanding article discussing the relationship between PFPS and hip strength:
Patellofemoral Pain Syndrome and Hip Strength (physio-pedia.com)
Lastly, as this exercise is a single-leg movement, you will improve your ankle strength and proprioception, which can prevent ankle sprains and other associated injuries. Additionally, you’ll also likely improve your overall balance if you practice this movement enough!
Alright, read below to learn how it’s done.
Step 1: Getting set up
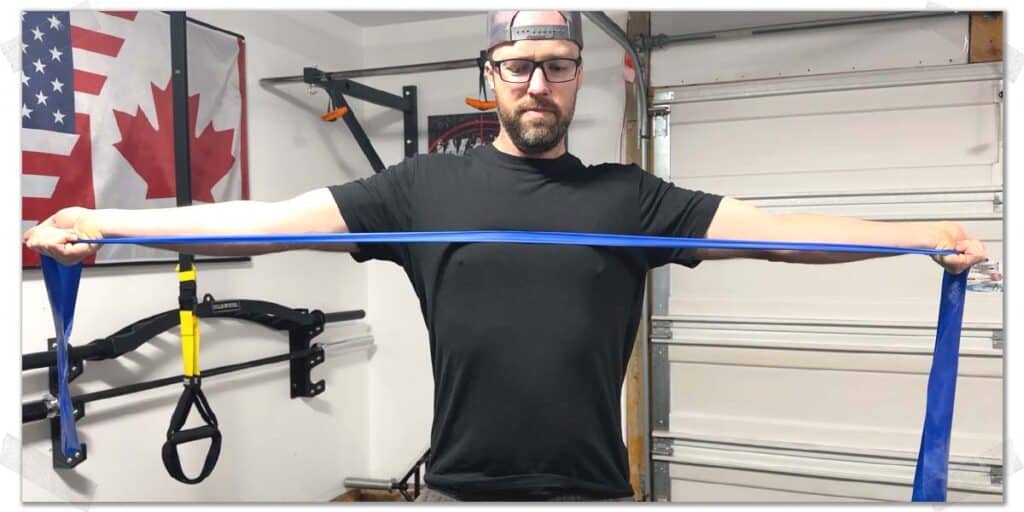
Grab some Theraband or any other type of stretchy band. You’ll find out in a moment why this makes the exercise so much more effective.
Then, using either an overhand or underhand grip, pull the band apart and keep it like this for the remainder of the upcoming exercise.
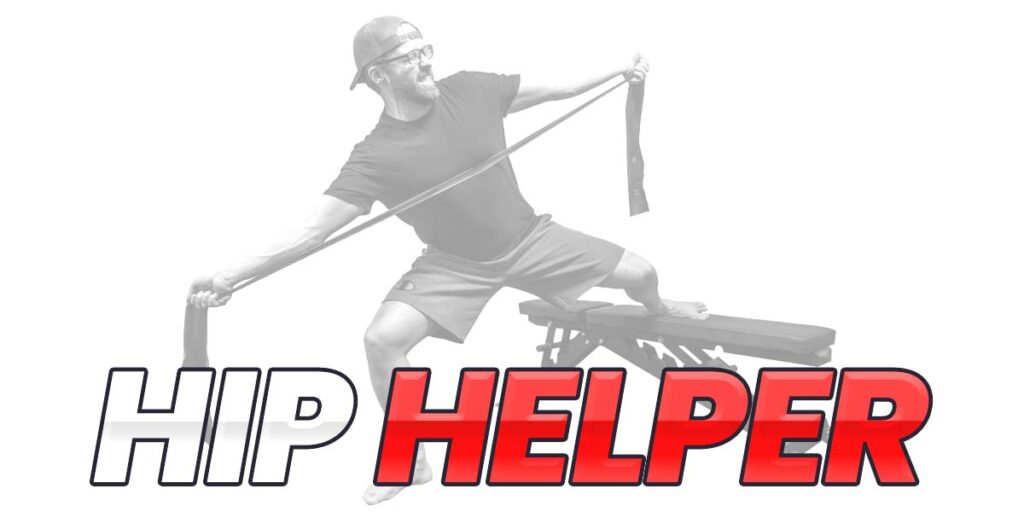
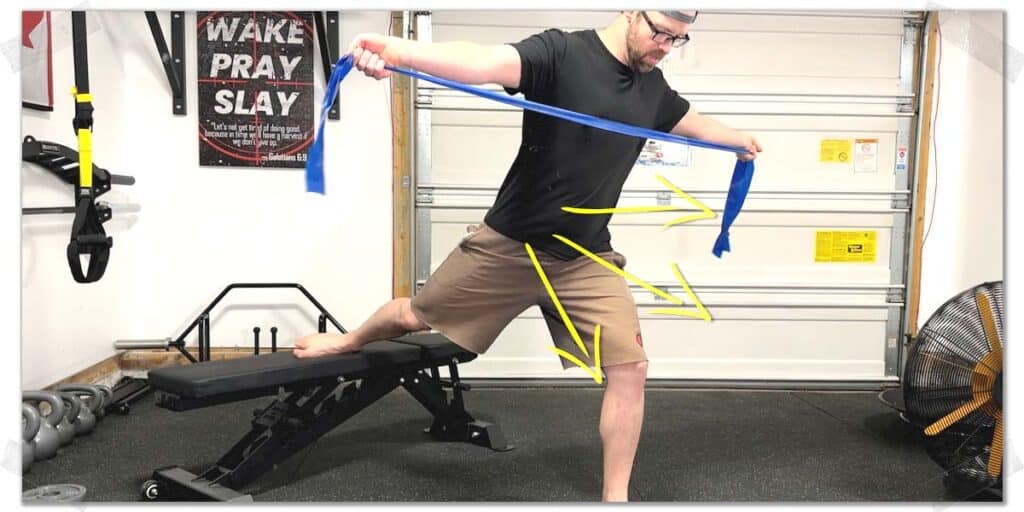
Take the leg you want to strengthen, keep it on the ground, and place the other leg behind you on a bench, chair, or similar object.
From here, be aware that the more bodyweight you shift directly over your stance leg, the more intense the upcoming movement will become. Play around with how much you lean forward vs lean back to strike an ideal challenge for this exercise.
A small request: If you find this article to be helpful, or you appreciate any of the content on my site, please consider sharing it on social media and with your friends to help spread the word—it’s truly appreciated!
Step 2: Initiating the movement
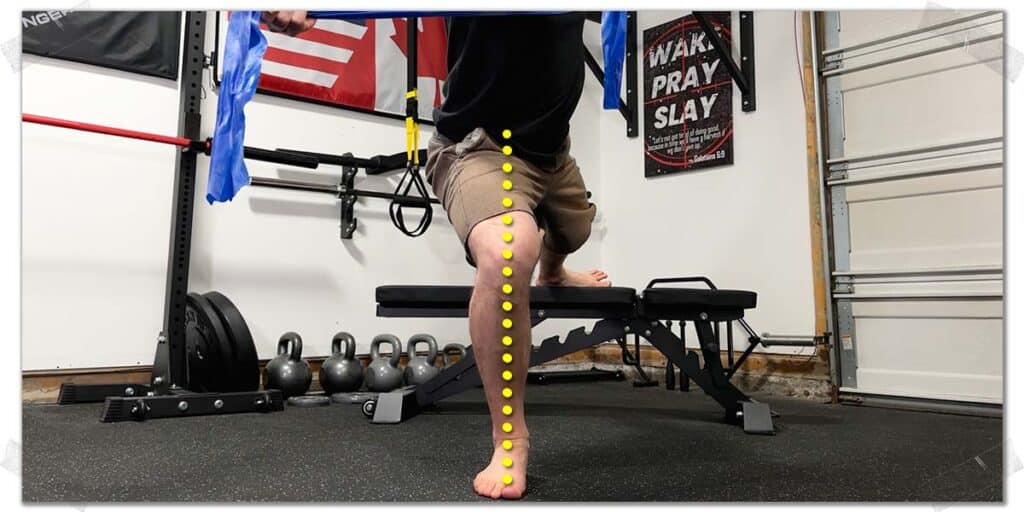
Once you’re set up in the starting position, bend your stance leg slightly while putting about 60-70% of your weight on the outer half of your foot. This small weight shift to the outer edge will help you keep your knee from collapsing inward. It will also light up your hip muscles to a much greater extent with the upcoming movement. Again, feel free to play around with how much knee bend you have in your stance leg to find your optimal challenge.
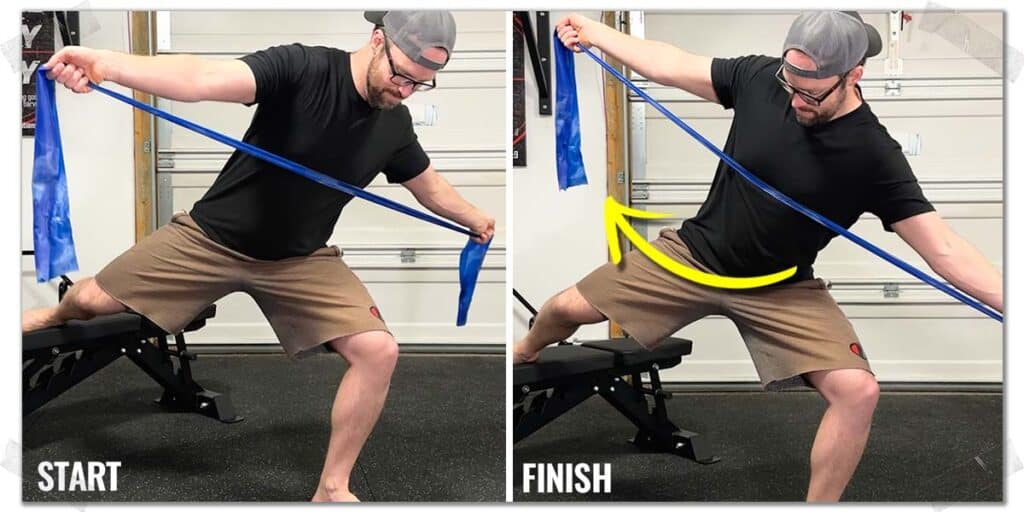
Next, while holding this one-legged mini-squat, rotate your ENTIRE body upwards as one solid unit. The easiest visualization here is to think about pointing your belly button to the wall while mimicking the movement of a dog peeing on a fire hydrant.
Do NOT let your knee on your stance leg cave inwards a single millimeter throughout this process. If anything, think about pushing it outwards in the opposite direction.
Step 3: The Secret Sauce for Success
Now, here comes THE SECRET SAUCE: do the movement outlined in the previous step incredibly slowly. Like, ridiculously slow. The slower, the better. And once you think you’ve gone as far as you possibly can, fight for one more millimeter of movement.
Then, hold this position for a couple of seconds and then slowly return to the starting position, again as one solid unit.
Congratulations, you have just performed an immensely beneficial movement to load up and strengthen your hip stabilizers and rotators. You’ve also just made your quadriceps and hamstring muscles perform what’s known as an isometric contraction, which is super beneficial for all sorts of physical health and functionality benefits.
And guess what? You now get to do it all over again for more repetitions!
How many repetitions to perform
Typically, I advocate that my patients and athletes perform enough repetitions until they feel a hefty burn or fatigue build up in their leg and then fight for two more repetitions.
If you’re going at an appropriate tempo, it should take you around 45 seconds to a minute to complete around ten repetitions. Anywhere from one to three sets of these repetitions should suffice, but feel free to individualize this to your needs.
So basically, you’ve just performed a highly beneficial exercise for your entire lower body that helps avoid and eliminate very common aches and pains that arise in a large majority of the population.
How does the band help improve hip strength?
If you’re wondering why we’re pulling a band apart and holding it here, it’s because it forces you to rotate your body as one solid unit, allowing you to get way more out of the exercise. Often, people will think they’re rotating their entire body when, in fact, they’re mostly rotating their upper body, meaning the hips and legs aren’t being challenged to an optimal extent.
Plus, it’s a nice little way to engage and strengthen some of the postural muscles in your upper back.
Once you’re rather proficient with the movement, you might not need to use the band, but I always prefer my patients and athletes to use it, and I even use it when doing the exercise myself!
Ideal populations: Who is this exercise for?
This exercise is beneficial for numerous populations. It can be used for general strengthening and injury prevention, and it can be used for rehabilitation from various injuries in various areas of the lower body.
I often use it for those recovering from ankle and knee injuries, and I often use it with patients who need to recover from hip tendinopathy, specifically with their glute medius and glute minimus, otherwise known as glute med and glute min.
If you want to learn the best way to truly isolate these muscles for targeted strengthening, I’ve got a detailed article where I walk you through what you need to know. I learned it from literally one of the best hip physiotherapists on the entire planet. And tons of my viewers have been having massive success with it, so check it out right here if you want to learn how it’s done. Check it out below!
Final thoughts
A strong set of hips is essential if you want to live a physically active lifestyle and one that’s not riddled with pain. Without healthy hip muscles, it’s difficult to move in the ways you want, hard to balance, and an overall frustrating experience.
So, take the information in this article and give it a shot if appropriate for you to do so. You may just find that, before long, you’ll have a bulletproof set of hips and a new level of functionality within your lower body!

Hi! I’m Jim Wittstrom, PT, DPT, CSCS, Pn1.
I am a physical therapist who is passionate about all things pertaining to strength & conditioning, human movement, injury prevention and rehabilitation. I created StrengthResurgence.com in order to help others become stronger and healthier. I also love helping aspiring students and therapists fulfill their dreams of becoming successful in school and within their clinical PT practice. Thanks for checking out my site!
