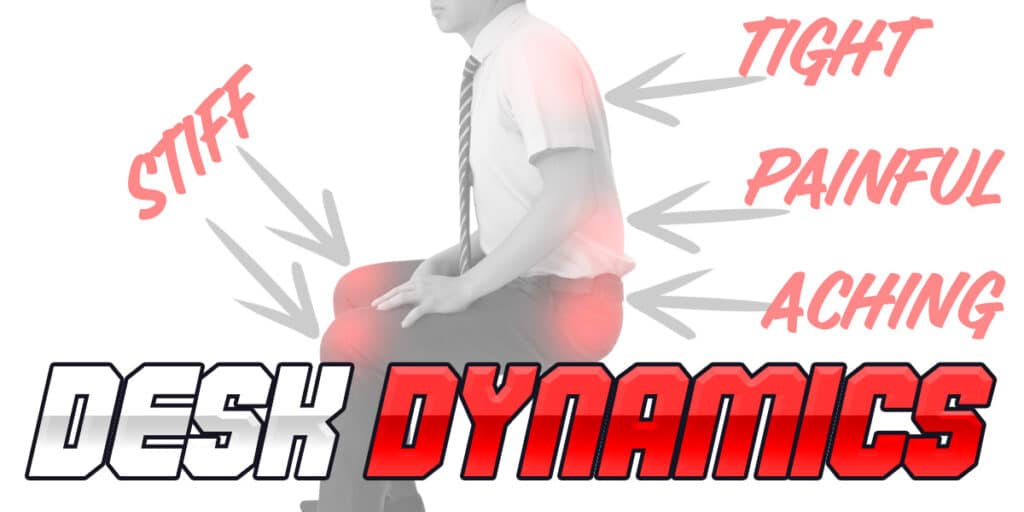
If you sit at a desk all day long, are filled with annoying aches and pains, and need a convenient series of exercises to perform right at your desk — without even leaving your chair — then this article is for you.
The little exercises covered in this video are the perfect way to begin offsetting the various aches and pains that can really start to pile up from being glued to your chair all day long, day after day.
We’re talking:
- Practicality
- Convenience and
- Simplicity
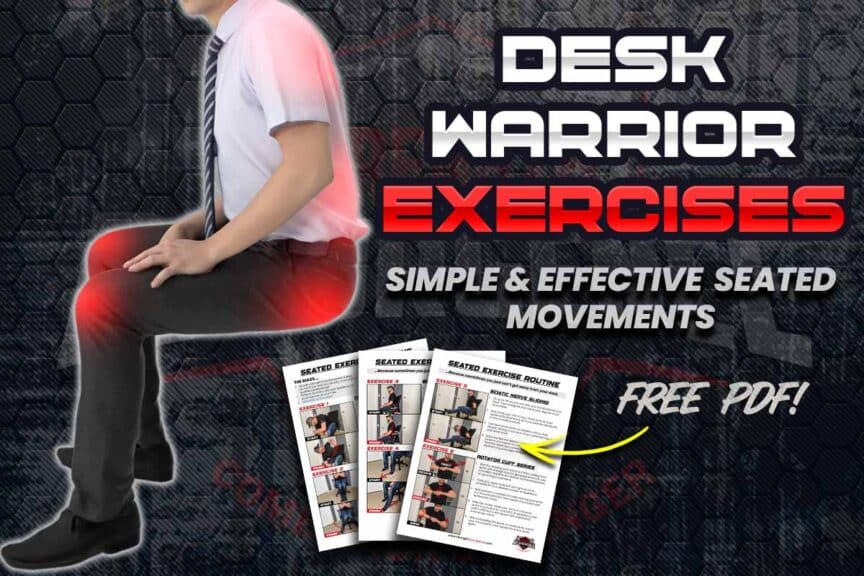
No equipment is needed. No extra space is needed. It’s a simple routine. It’s an effective routine. You can even get a free PDF document (walking you through each exercise step by step) to keep at your desk if you want to have a visual reference on hand because sometimes you just can’t watch YouTube videos at work.
So, Let’s get to it!
A small request: If you find this article to be helpful, or you appreciate any of the content on my site, please consider sharing it on social media and with your friends to help spread the word—it’s truly appreciated!
Why: Creating a sitting-only routine
I got the idea to put this video together because of all the sitting I’ve been doing over the past few months while working hard at making content for all of you.
As my audience, you are absolutely worth it — but holy smokes, I’ve been getting sore and achy from all this time spent typing these articles, filming and editing videos, and all the other content-related tasks I can only accomplish while working on my computer. So, this video is dedicated to any of you folks on the other side of the internet who have been forced to sit a lot to accomplish your work-related tasks.
Because let’s face it: sometimes you just can’t really get away from your desk. So, that’s why I’ve put together a series of simple and convenient exercises you can perform while sitting in your chair.
Now, of course, breaking out of your seated position as much as possible and moving your body through full-body movements and exercises is your best bet. I’m not trying to give you this seated exercise routine here as a substitute for this, but rather as a supplement. You know, for those times when you just can’t break away from your chair, like when you’re in a formal office environment, or when you’re in work clothes that don’t easily permit full-body movements.
So, let’s run through the sequence of little muscular activations and joint mobilizing movement snacks you can do to give your body at least some sort of therapeutic input while sitting at your desk throughout the day.
RELATED CONTENT:
The ground rules: What to know for this routine
And as we get going, here are the ground rules:
- No pain is allowed. Mild discomfort, stretching, or gentle sensations of tension are just fine, but stay away from pain.
- Perform as many or as few repetitions for each exercise as you’d like. Higher numbers of repetitions will likely be more therapeutic than lower repetitions, but play around with this to suit your needs. This is all about what feels best for you.
- You can perform this routine in a circuit fashion, where you perform one movement right after another, or you can perform multiple sets of each exercise before moving on to the next one. It’s totally up to you.
“Let’s face it: sometimes you just can’t really get away from your desk.”
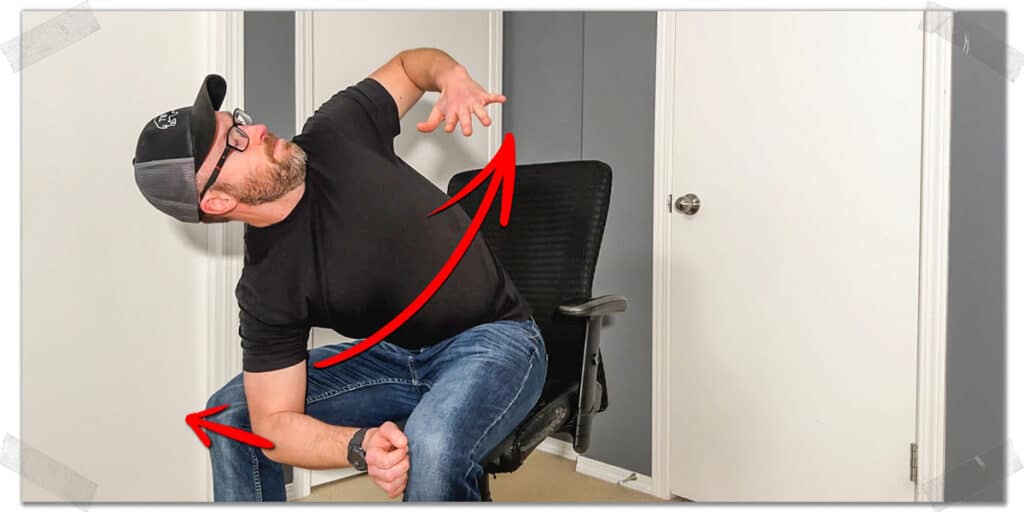
Exercise 1: Seated thoracic spine rotation
Let’s start with an absolute money-maker. The thoracic spine is notorious for becoming stiff, sore, and achy from prolonged sitting, so here’s what we’re going to do about it.
Spread your legs out and lean forward. Then, place your elbow on the inside region of your thigh. From there, push it into your thigh while you take your other arm and rotate backwards. Pushing your arm into your thigh will confine the movement to within the middle thoracic region, which should feel quite nice.
Also, if you want to learn some additional thoracic spine exercises that are easy to do at home (but require some basic equipment, check out my YouTube video below!
Rotate as far as you comfortably can. You can hold the end position for a few moments for a longer stretch or perform this exercise as a continual movement.
Once you’ve achieved all of your repetitions on one side, repeat the process on the other side.
Exercise 2: Seated internal hip rotations (glute medius & minimus)
Hip muscles, notably the deep hip stabilizer muscles, are prone to becoming inhibited, dysfunctional, and even painful if they undergo tons of sitting without adequate physical activity to keep them strong and healthy.
One of the ways you can sprinkle a bit of low-grade muscle activation into these muscles while at your desk is through an exercise known as seated internal rotations.
Pro tip: I’ll briefly mention that performing this exercise with a mini-band around your feet is your best bet for a bit of strengthening, as you will absolutely light up your glute medius and minimus muscles without bringing any other muscles into the equation using this movement, making it a highly effective strengthening exercise for these muscles.
I’ve got an entire article to walk you through how to do this movement with a mini-band, including why it’s literally the best exercise out there if you need to perform isolated strengthening of your glute medius and minimus. Also, thank you very much to everyone who’s viewed it and let me know how much it’s helped with their hips. I truly am honoured that I can help you live a stronger life!
So, it’s worth picking up a mini-band or two, which you can easily keep at your desk, but since we’re going equipment-free here, I’ll show you a way we can replicate this, albeit to a smaller extent, without a band.
But, since we’re going to do everything in this article in an equipment-free manner, we’re going to modify this movement by performing it without a band, as this will still put a bit of activation into these muscles.
To do this hip movement:
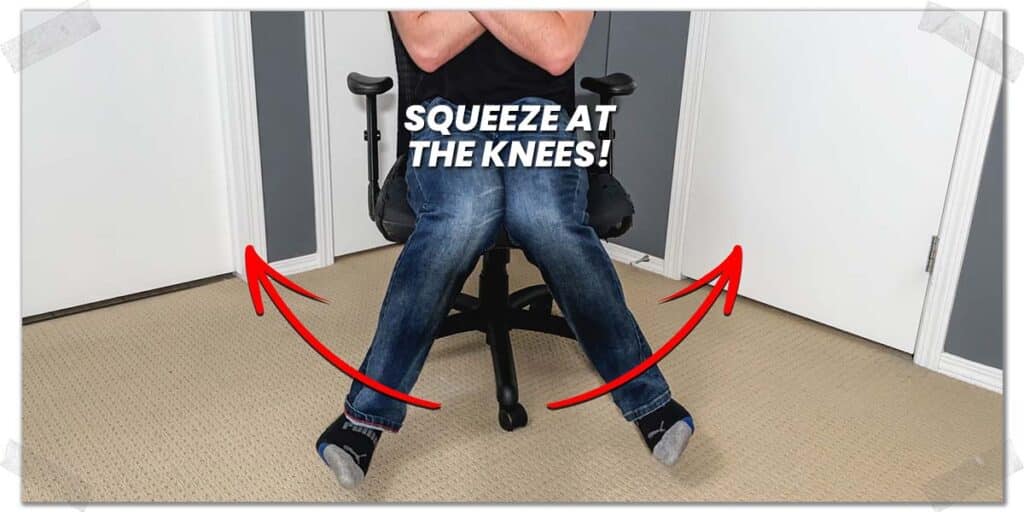
- Bring your knees together and keep them in this position as if trying to pinch a piece of paper.
- While holding this position, pull your feet as far apart from one another as possible.
- Pull as hard as you comfortably can and hold this position for a second or two, then come back to the starting position and repeat.
You should feel a sense of tension or effort taking place around your back pocket or side pocket region of your hips.
Exercise 3: Preventing gluteal amnesia (sleepy glutes)
This exercise is about as simple as it gets, but don’t let it fool you; it has massive implications for keeping your lower back healthy and pain-free.
This is because whenever we sit, the glute max muscle is placed into a stretched position, and this prolonged stretched position can lead to inhibition of the muscle, essentially meaning the muscle doesn’t operate as effectively as it should, largely because prolonged stretching will neurologically fatigue or tire out a muscle. It can lead to a symptom sometimes casually referred to as “glute amnesia” or sleepy glutes.
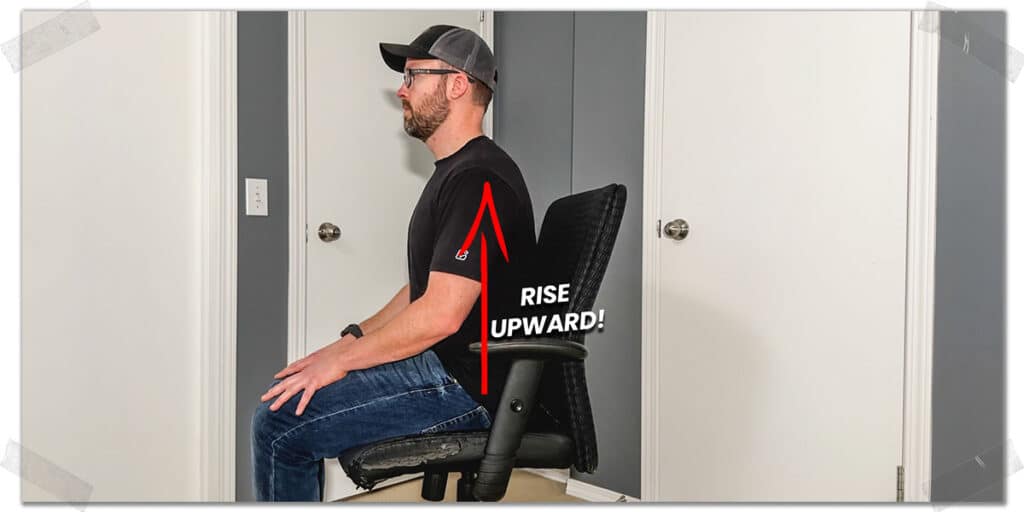
So, to get some heightened neurological drive into your glute max, squeezing your butt is actually a rather beneficial activity to perform. Simply sit up tall and clench your butt. If you do it right, you’ll feel yourself rise upwards when the muscles contract. So, squeeze your butt as hard as you comfortably can when performing this little activation exercise.
If you can’t seem to contract your butt, it likely means you’ve got some work to do and might be at risk of experiencing some lower back discomfort as time goes on. But as always, if you regularly experience lower back pain, be sure to get an assessment with a qualified healthcare professional for your personal situation.
Bonus tip: if you want to kick it up a notch, try squeezing one glute at a time. This can be tricky to do, and if you find that it’s much easier to squeeze one side than the other, it can again suggest there’s some dysfunction going on. In that case, it may be worth working on in order to improve the issue and to avoid any potential issues further down the road.
Exercise 4: Seated knee slides
The seated knee slide is the PERFECT movement to perform if you notice that your knees feel rather stiff, sore, or even painful when getting up out of your chair after a prolonged duration of sitting.
It allows you to repeatedly move your knee in ways that promote increased fluid dynamics within the knee joint and the nearby tendons, which can all become stiff and sore when experiencing a prolonged lack of movement.
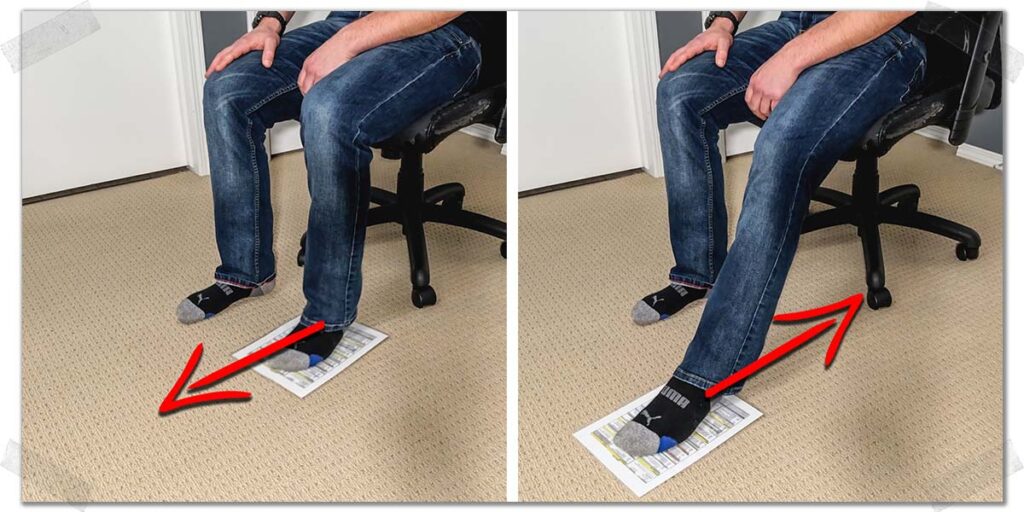
To do this movement, you’ll need a smooth object that will allow you to slide your foot along the floor. You can use a dedicated exercise slider pad, but since we’re in an office setting and we’re doing this equipment-free, I’d suggest grabbing a sheet of laminated paper, which works great, or a small book to get the job done.
Simply slide your knee forwards and backwards as much as you want. I often mindlessly do this while working on tasks at my desk as a simple way to keep my knees feeling happy. If you know your knees will feel sore or stiff when getting out of your chair, perform this movement for a minute or so on each knee before you plan to get up and move around.
To learn more about it, check out my YouTube video above, where I walk you through all the details regarding why it can be so helpful.
“The seated knee slide is the PERFECT movement to perform if you notice that your knees feel rather stiff, sore, or even painful when getting up out of your chair after a prolonged duration of sitting.”
Exercise 5: Seated neurodynamics
This next exercise will likely seem a bit unconventional, but it is a very highly beneficial exercise that can help optimize movement and reduce sensations of tension that we may experience in our lower back or in the back of our legs.
The key here is that we are not trying to stretch muscles with this movement but rather to mobilize the nerves within your back and the resulting sciatic nerve that runs down the back of your leg. Nerve mobilizations, which can also be known as nerve flossing, nerve gliding, or tensioning, are profoundly beneficial when dealing with nerves that have lost their ability to accommodate lengthened positions within the body.
What’s critical to note here is that you do not want to invoke ANY pain with this movement, and you only want to produce a very mild sensation of stretching. Do not make this an aggressive stretch.
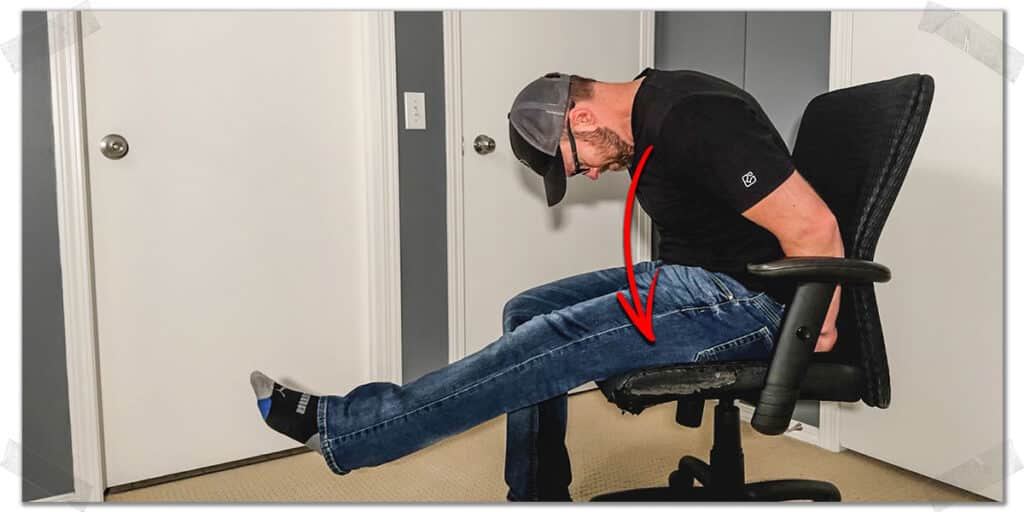
To do this movement, start by sitting up straight and straightening one of your legs. From there, slowly slump yourself downward by bringing your chin to your chest and then curling yourself forward. If you feel a stretching sensation arise in the back of your leg, then congratulations — you’ve put tension into your sciatic nerve. From there, return to the starting position and repeat for fifteen or so repetitions.
An additional way you can perform the movement is to straighten your leg while curling yourself downward at the same time. This is known as tensioning the nerve, and it’s a bit more aggressive than the previous version, so only try this version if you don’t feel much of a stretch with the initial version I just showed you.
If you want to learn more about nerve mobilizations, you can check out this outstanding video by the Physiotutors. These folks produce some great content and can provide you with some visualizations of what’s occurring during this type of neurodynamic exercise.
Exercise 6: Rotator cuff triple threat
To give your shoulders some love, we’re going to do some unique movements that come from Dr. Tom House, someone who is highly respected in the world of rotator cuff health for throwing athletes.
I personally love his shoulder routines, and if you want to see a full routine of some great movements, you can check out my equipment-free rotator cuff warmup video below or check out my article here, where I walk you through an entire series of these exercises.
But for this article, we’re going to perform a little movement called the push-pull.
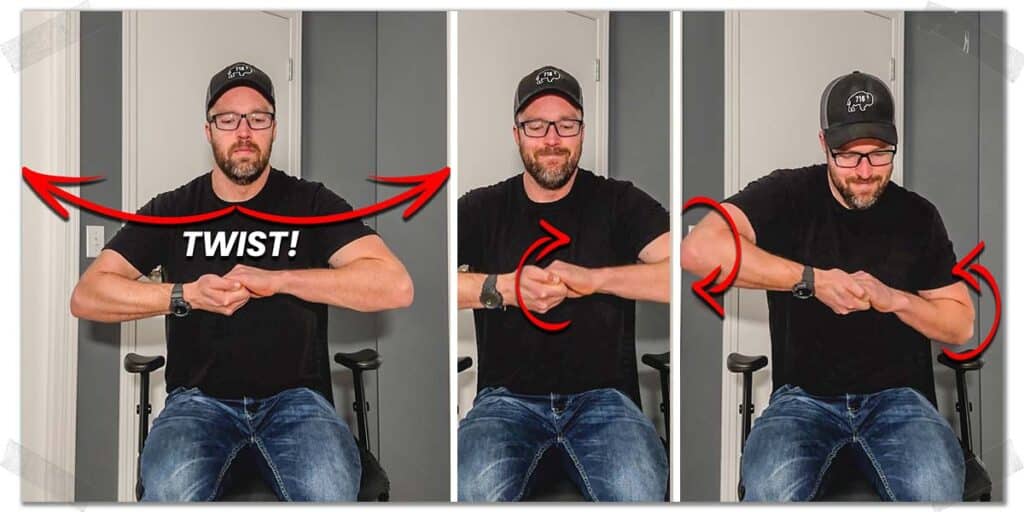
To do this series of movements, clasp your hands together as shown and pull them apart as aggressively as possible without any pain arising. Then, while holding this tension, twist your upper body left and right about five times each way.
Next, perform a series of circles, making them as large as you comfortably can. After a handful of repetitions, reverse the direction and repeat.
Lastly, you’ll now get to perform a swimming motion with your shoulders. Perform a handful of repetitions going forward, then switch the direction and perform them in the opposite direction.
And once you’ve done that, switch your hand positioning and repeat the entire process. By the end of this, your shoulders should feel like they’re awake and have just received a hefty dose of therapeutic movement and muscle activation.
Final thoughts
We aren’t made to sit still at a desk all day long, so giving your body a bit of love with some extra movement during a desk marathon can go a long way toward keeping the body from becoming stiff and sore. This series of simple yet beneficial movements you can sprinkle into your day while sitting at your desk can go a long way in making this happen.
But there’s still a bit more to learn because if you’re interested in becoming a bit more active and committing to a more physically active lifestyle, i.e., not sitting at your desk all day long, then you’ll need to check out this article here, where I share some juicy tips on what it will take to be successful with making this happen.

Hi! I’m Jim Wittstrom, PT, DPT, CSCS, Pn1.
I am a physical therapist who is passionate about all things pertaining to strength & conditioning, human movement, injury prevention and rehabilitation. I created StrengthResurgence.com in order to help others become stronger and healthier. I also love helping aspiring students and therapists fulfill their dreams of becoming successful in school and within their clinical PT practice. Thanks for checking out my site!
