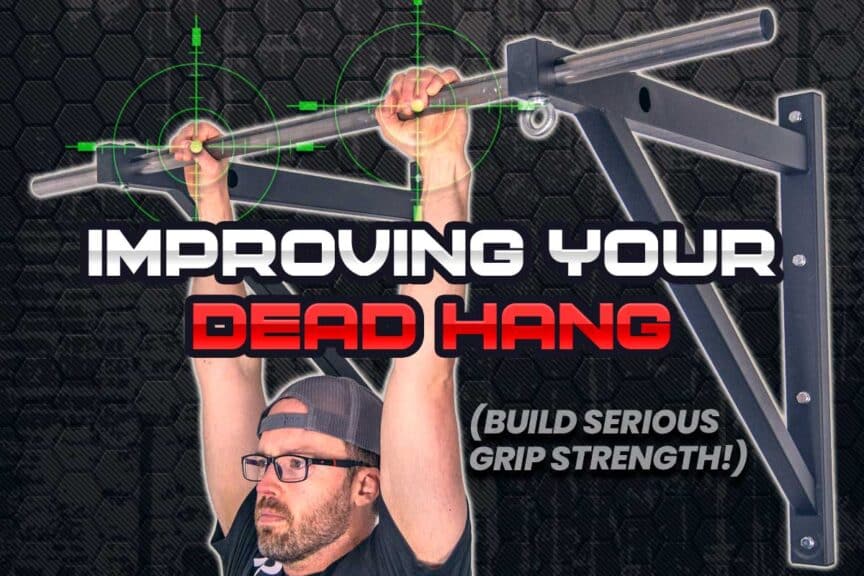
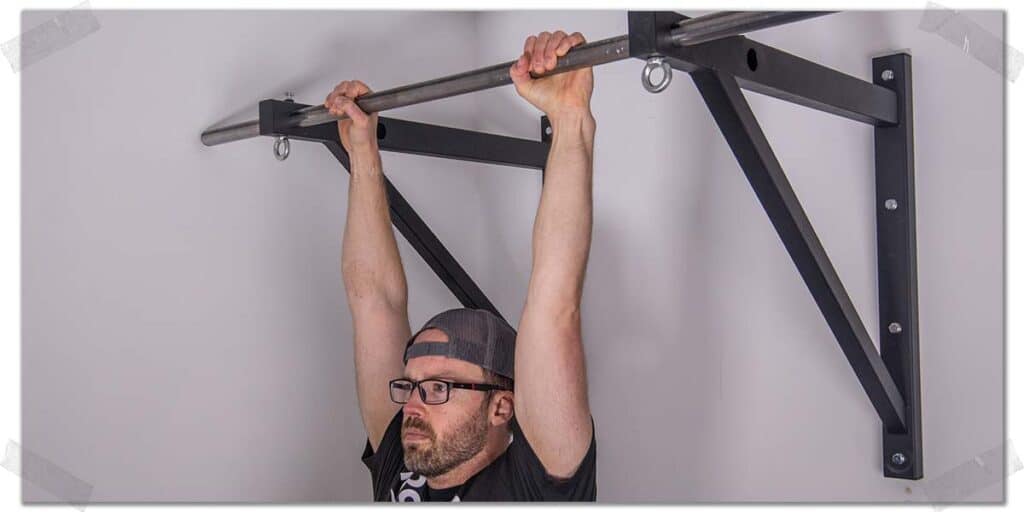
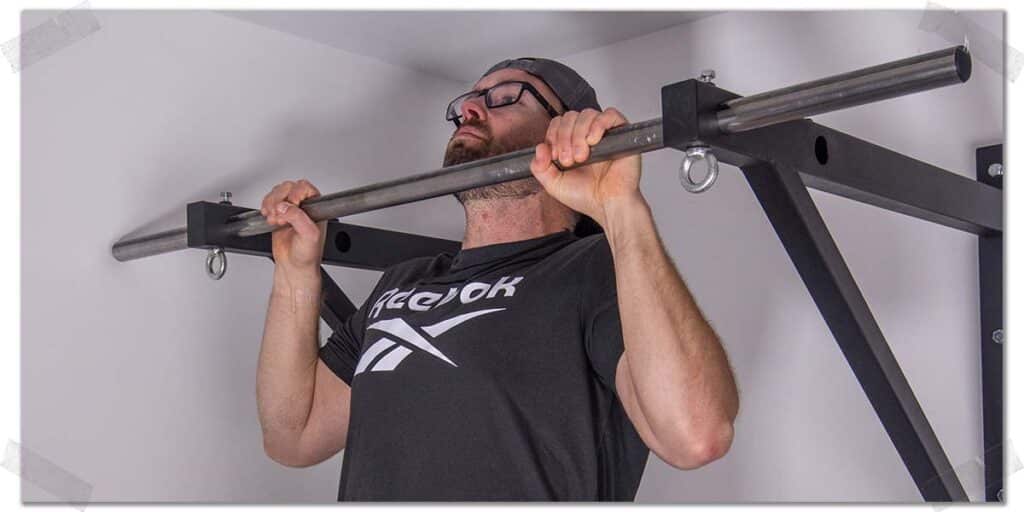
The dead hang is one of those exercises that can reveal a lot about your overall physicality. Not to mention, having an iron grip comes in handy for all sorts of life circumstances far beyond hanging onto a bar in the gym. As such, it’s worth building up a respectable dead hang for nearly every lifter. So if you want to know how to take your dead hang time from lousy to legendary, you’re on the right page!
In this article, you’ll learn how you can shift up and optimize your training to improve your dead hang time. You’ll also learn about direct and indirect grip training, functional crossover, and a lot more. But for now, here’s the two-sentence answer on how to increase your dead hang time:
Improving your dead hang time can be done by implementing specific hanging variations, using direct and indirect grip-strengthening techniques, and training your dead hang and grip exercises at an ideal weekly frequency and intensity. Results should be quite evident within a handful of weeks.
There’s a whole lot to unpack with this topic, so let’s waste no time—let’s get right to it!
A small request: If you find this article to be helpful, or you appreciate any of the content on my site, please consider sharing it on social media and with your friends to help spread the word—it’s truly appreciated!
Related article: Why You Have Back Pain From Dead Hangs (And How To Fix The Problem)
Requirements: What it takes for an effective dead hang
If you’re serious about a better dead hang, you need to know that it’s about more than just training for grip strength. The strength of your grip is important, yes, but that’s only half the battle.
The other half of a long hang comes from muscular endurance (the muscles’ ability to resist becoming tired). When hanging onto a bar, all the strength in the world doesn’t mean much if that strength is short-lived.
Think of it this way:
Grip strength refers to how much force your gripping muscles can produce (i.e., how hard they can clamp down on the bar)
Grip endurance refers to how long those muscles can maintain their intense clamp before slowly loosening up.
As a result, the tips and training strategies below are optimized to enhance both of these necessary muscular requirements because if you don’t have both, you don’t have much!
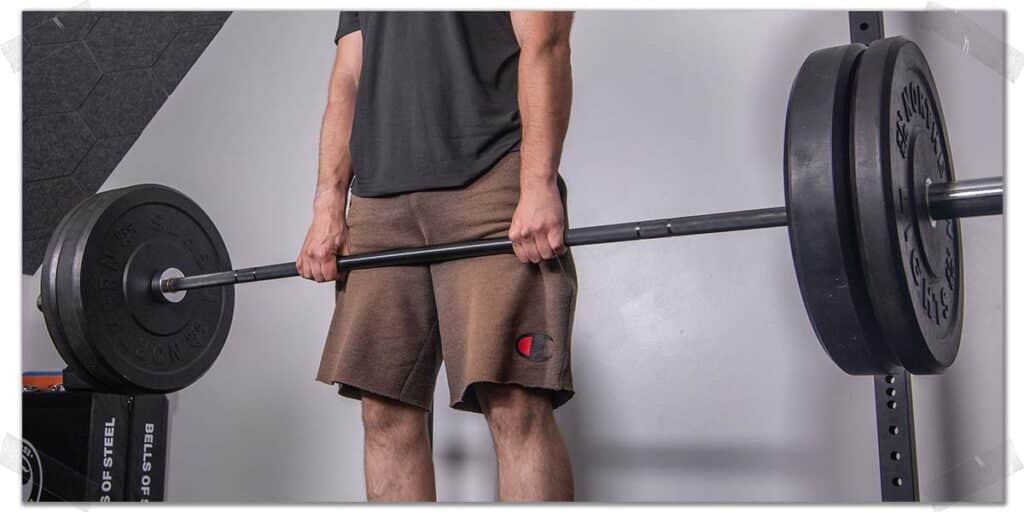
“Remember, if you want to hold onto a bar for longer, you don’t have to hold onto it with your arms above your head; you can certainly hold onto one with your arms by your side holding a barbell (doing a timed deadlift hold).”
Two quick initial tips
Before we dive into the exciting stuff, I’ll mention two quick points right away, as they’ll notably improve your ability to increase your dead hang time. Neither are sexy tips, so we’ll just get them out of the way right off the start.
The first initial tip (which can be applied to all of the following dead hang strategies below) is to use chalk. You can have the strongest forearms and grip strength on the planet, but if you have sweaty hands and are holding a buttery smooth or greasy bar, you’ll have a lousy dead hang time. Chalk is a game-changer for all grip-related endeavours.
The second initial tip is to consider losing weight if you’re overweight. I’m not telling you what to do here. But if you’re dead-set on improving your dead hang, and you’re carrying an extra twenty pounds of adipose tissue around your midsection, it will only serve to hinder your hang time; a lighter frame will lead to a longer hang.
Let’s be clear, though: improving body composition or losing weight isn’t everyone’s goal, so only consider this tip if you’ve been striving to lose weight or want to lean up in the process of getting a better dead hang time.
Alright, onto the fun stuff!
Strategy 1: Do a dead hang (or two) at the end of every workout
This is a low-hanging fruit, meaning it’s an incredibly easy strategy to reach out and grab (i.e., to put into practice right away). So, I’m starting off with this one.
If there were only one strategy to help improve your dead hang time (thankfully, there’s more than one), this would be the one to implement. Why? The body will always respond to the specific demands that are imposed upon it. In the world of strength and conditioning, it’s known as the specificity principle or SAID principle (specific adaptations to imposed demands).
If you want your body to get better at something, the best way is to replicate the physical challenge as specifically as possible. Don’t get me wrong; training grip strength through other means can certainly be helpful. But repeatedly exposing your body to the exact demands of what you want it to get better at.
In other words, practicing the dead hang on a consistent and repeated basis will absolutely improve your hang time. It will challenge your forearm muscles and grip strength in the exact same way they need to be challenged; it will expose your shoulders to the position they need to be comfortable within while hanging; it will expose your body to the prolonged discomfort it needs to become familiar with (and tolerate) that builds up through your hands, arms, and shoulders.
So, there’s no substitute for the real thing. Thankfully, you can use the dead hang variations I discuss below to further assist you, help you break through plateaus, and make the training process to increase your dead hang time more enjoyable.
Strategy 2: Practice THESE dead hang variations
So, you now know that you’ll experience significant results by simply and repeatedly exposing your body to the dead hang. But there’s more we can squeeze out of this strategy to ensure you’re making the most of your grip-strengthening endeavours.
I’m talking about hanging variations. Each variation below will place some added challenge into your hang in a unique way, providing slightly different stimulation from the standard hang, which will help to keep you holding onto the bar longer.
“If you’re serious about a better dead hang, you need to know that it’s about more than just training for grip strength. The strength of your grip is important, yes, but that’s only half the battle. The other half comes from endurance.”
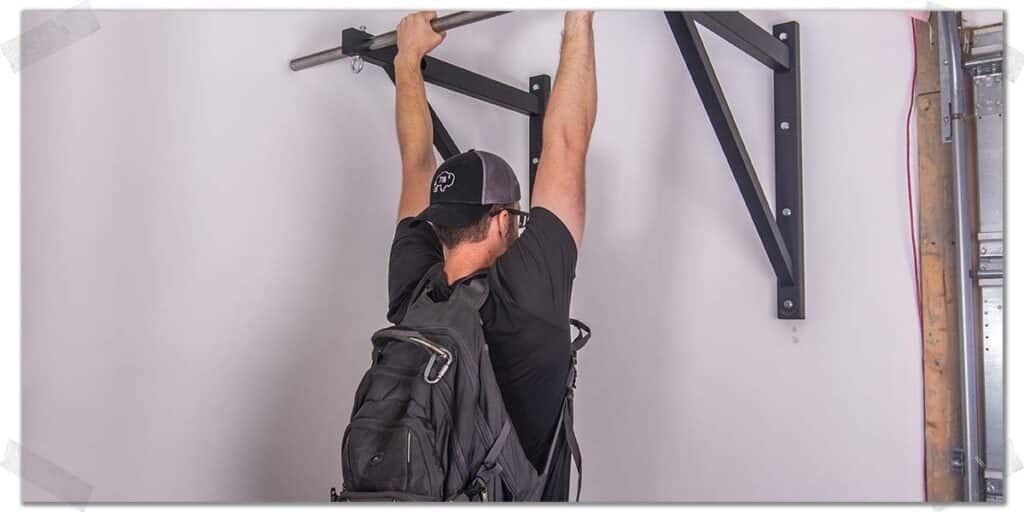
Heavy variation: weight vest (or use a backpack)
Dead hangs can be hard enough—and we’re about to make them harder. But, we’ll keep it within reason. The goal of this variation isn’t to emasculate your physicality but rather to do the opposite. This technique will absolutely help improve your hang time.
Think of this entire technique this way: If you’re capable of doing a bodyweight deadlift or squat for a few reps, you’re capable of lifting more, albeit with fewer repetitions performed. This is the same concept with weighted dead hangs—if you can hang onto the bar with your body weight for multiple seconds, you can hang onto the bar with extra weight for a shorter duration of time.
The added weight—in both scenarios—serves as an added stimulus to challenge the body even further, meaning you will experience greater improvements to your strength as your arms and hands learn to more effectively deal with a heavier load.
Pro tip: A backpack will work just fine if you don’t have a weight vest. Just load it up with anything from a medicine ball, kettlebell, dumbbell, or a few heavy textbooks, etc., and you’ll be good to go!
How much weight should you use?
This isn’t a perfect science here, particularly since each reader of this article has different dead hang abilities; some readers can likely hold on for a couple of minutes, while others might be for only a handful of seconds.
Nonetheless, I’d suggest using enough so that it cuts down on your hang time by around 50%.
In what is an undoubtedly oversimplified example, think of it this way: if you were always deadlifting in the eight-repetition range and increased the weight so you could only do half as many reps, it would provide a different stress or mechanical stimulus to your muscles than when training in the eight repetition range.
The result is a more intense load that your muscles need to deal with, which could be a great way to bust through any plateau you have with your timed hangs, allowing you to achieve the strength and endurance required to hold on for longer.
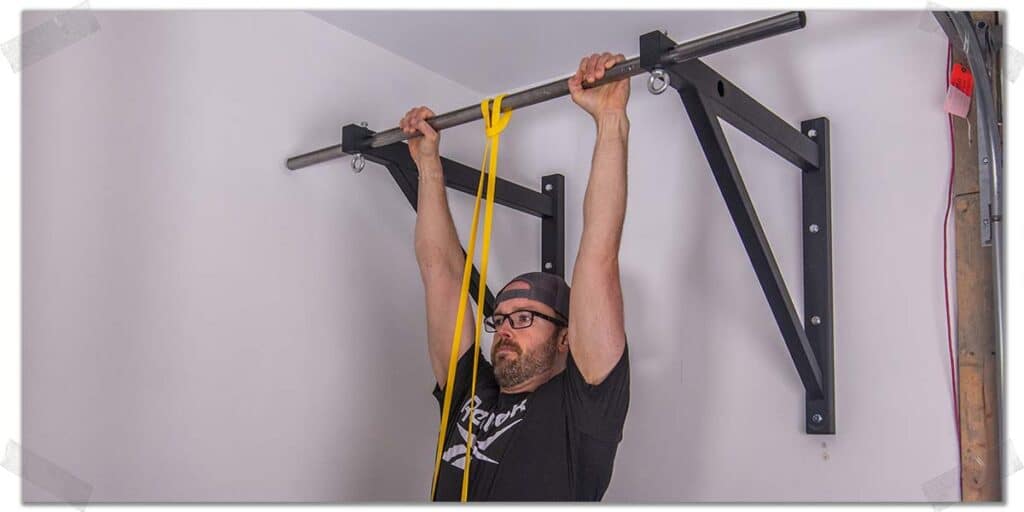
Light variation: offloaded dead hangs with bands
Wait, why are we using a lighter variation? Won’t that make the hang less challenging and therefore, less effective? Kind of, but not really. If we offload only a slight amount of your body weight, things will get challenging in a brand new way, and you will expose your body to a new stimulus that you’d otherwise be missing without this technique. Let me explain:
Your grip strength will likely get taxed the most throughout the dead hang, meaning it’s often the limiting factor to the entire exercise. But improving other aspects of the hang, such as shoulder endurance and general forearm fatigue (a different aspect than rapidly overloading your grip strength), will help to physically and mentally improve your ability to hold onto the bar for longer. But those aspects can’t be improved if your raw grip strength gives out before those other aspects can be adequately challenged and tested.
This is where using a band to slightly offload your body weight comes into play. Notice that I said “slightly”; you probably won’t get much benefit if you use a resistance band that offloads half of your body weight and lets you hold onto the bar for five minutes.
There’s no scientific literature to back this dead hang variation up (at least, that I’m aware of), so you’ll need to play around with the percentages, but I’d suggest using a band that offloads 10-15% of your body weight or lets you hold onto the bar for an extra 30-45 seconds from what you otherwise could with the traditional unsupported hang.
Spending a bit more time with your arms overhead while squeezing the life out of the bar with a slightly offloaded body weight will go a long way to improve arm and grip endurance, providing one more enhanced avenue to helping you hold onto the bar for longer.
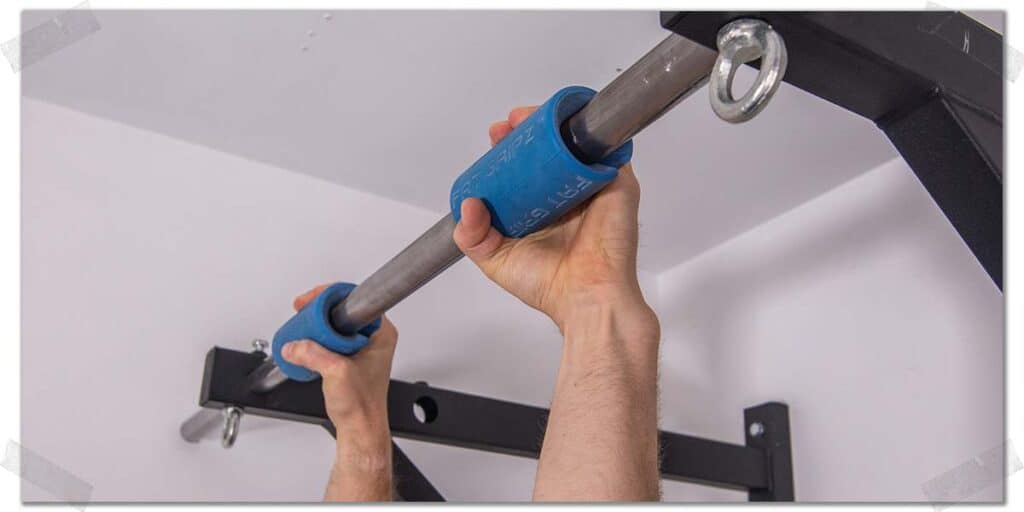
Grip variation: use Fat Gripz or towels
One incredibly effective way to increase grip strength is through grabbing and holding onto objects of different sizes (in this case, thicker bars). It challenges the forearm flexor muscles and intrinsic muscles within the hands to a different extent than with smaller or standard-diameter-sized bars. It can add serious strength to your grip and even size to your arms, with plenty of science to back it up.
The easiest way to utilize this strategy is to use Fat Gripz, which are thick rubberized grips that can be placed around a traditional bar or barbell. It should go without saying that a thicker bar is much harder to hold onto.
Your hands won’t be able to wrap around the now thicker bar in the same manner as a traditional diameter bar, which means your hands will have to work more aggressively and in a slightly different position, which can help to boost your grip strength and grip endurance.
If you don’t have Fat Gripz, you can make do without them by wrapping hand towels around the bar; this will not only thicken up the diameter of the bar you’re holding onto, but it will also force you to squeeze harder since the towel will likely roll on the bar ever so slightly.
Pro tip: You can combine using Fat Gripz with other strategies in this article, such as when doing lighter or heavier dead hangs.
Strategy 3: Train grip strength directly AND indirectly (here’s how)
There are essentially two ways to train and improve your grip strength:
- Direct training to the forearm and hand muscles
- Indirect training to the forearm and hand muscles
Direct grip training refers to performing exercises that have the primary intention of increasing muscular gripping strength and endurance. Indirect grip training refers to exercises that require the forearm muscles to be utilized to achieve a different primary objective other than strengthening the grip.
Both direct and indirect grip training is immensely important for athletes and individuals looking to build the strongest set of hands, forearms, and grip-sustaining abilities possible.
Arguably, the most significant benefit of incorporating indirect grip-strengthening exercises into one’s improved dead hang pursuits is how it affords ways to work on improving grip strength and endurance while carrying on with regular strength training workouts; direct grip training can often cut into precious gym time required for other aspects of training.
Since every individual has different needs, abilities, and training goals, the ideal frequency and intensity of either of these training interventions will often be different from one individual to the next. Nonetheless, there are some common principles that can be followed:
- Direct grip work can likely be performed three times per week, with two or three dedicated exercises performed for each session. The exercises performed can be the same each time, or they can vary. There’s likely room for variety so long as you’re consistent and keep track of your exercises and parameters (sets, reps, time, etc.)
- Indirect grip work can likely be performed each training session. This will likely take place through heavier, compound movements, such as deadlifts, overhand rows, lat pulldowns, etc.
Below, I’ve listed two direct and two indirect exercises I’d personally give serious consideration to if you are serious about enhancing your dead hang.
There are essentially two ways to train and improve your grip strength:
1) Direct training to the forearm and hand muscles.
2) Indirect trianing to the forearm and hand muscles.
Indirect exercise 1: Double-overhand deadlifts
Deadlifts make the world go around; we all know this. And if you’re serious about holding onto a bar for longer, deadlifts are your best friend.
If you’re not yet performing them, consider starting. If you’re already routinely performing them as part of your strength training regimen, there’s no need to alter your deadlift frequency or intensity (you may have to use a lighter load, though).
Just make sure you don’t use straps or a mixed grip since both of those are meant for when you want to find a way around limitations in your gripping abilities. Keep it double overhand and sans straps.
Related article: Straps Vs. Mixed Grip When Deadlifting (Pros & Cons Of Each)
Indirect exercise 2: Pull-ups
If you’re serious about maximizing your time spent holding onto a bar above you, it’s worth finding ways to sprinkle pull-ups into your regular strength training program. Pull-ups will replicate the arm positioning and grip-sustaining demands required for the dead hang while allowing you to improve your overall upper body strength.
Pro tip: If you cannot do pull-ups, substituting them with overhand lat pulldowns (using a lat pulldown machine) will suffice. Both exercises will test your grip strength and endurance while beefing up your back and biceps in the process.
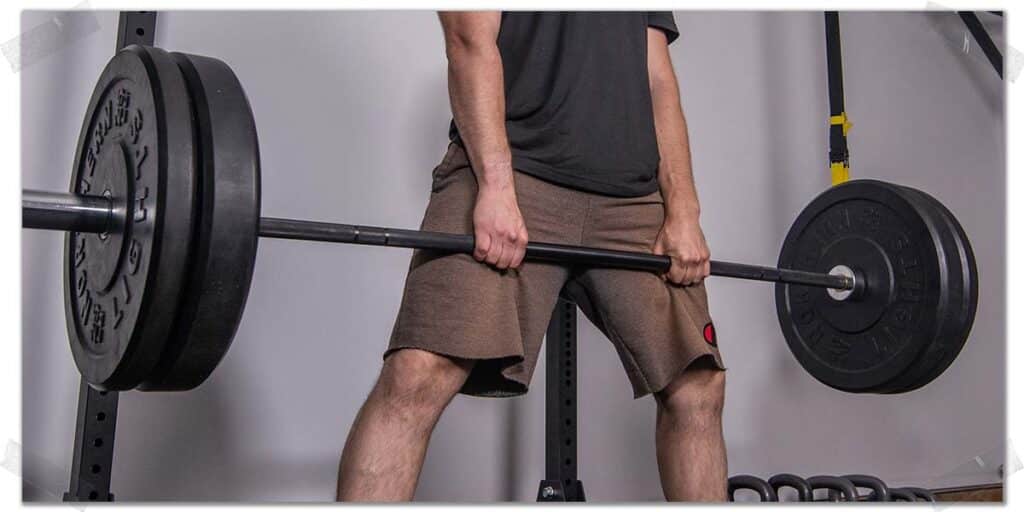
Direct exercise 1: Timed deadlift holds
Remember, if you want to hold onto a bar for longer, you don’t have to hold onto it with your arms above your head; you can certainly hold onto one with your arms by your side holding a barbell. I’m talking about performing some timed deadlift holds!
It’s pretty simple how it works: perform a deadlift and hold the bar at the finished position for as long as humanly possible, with a double overhand grip, of course.
A quick note: You can also perform farmer’s walks or farmer’s carries in place of timed deadlift holds (or you can even do both). Numerous articles on the internet talk about farmer’s walks for increasing dead hang time. Still, timed deadlift holds may be more practical for many lifters and, in theory, offer better functional replication of the overhand dead hang due to their similar overhand hand positioning.
Whether you want to perform these holds with your equivalent amount of bodyweight loaded or use even more weight, it’s up to you. These are a great way to finish off a workout, particularly if you want to change it up from hanging underneath a bar.
I’ve always liked performing three sets of timed deadlift holds for maximal time, with a solid two or so minutes of rest between each set.
Direct exercise 2: Plate Pinches (the forgotten exercise)
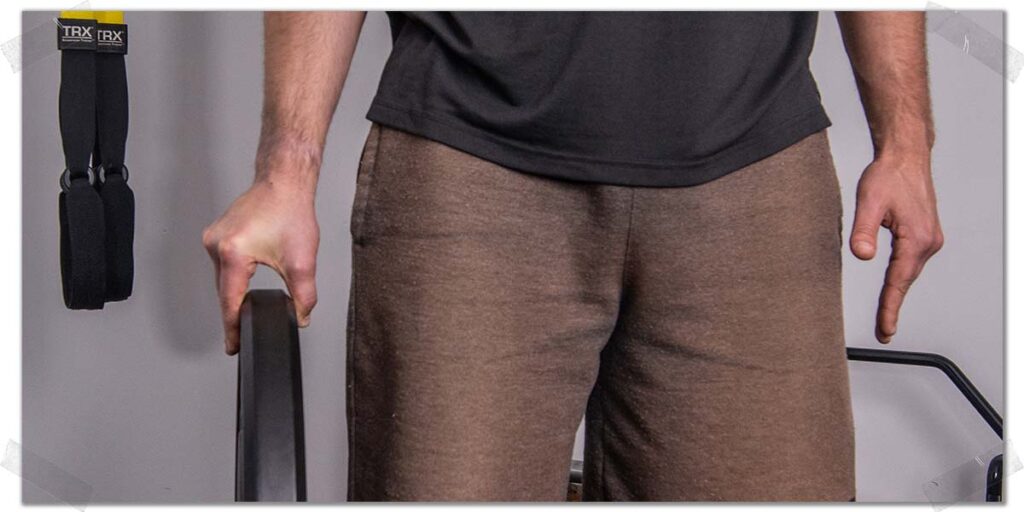
If you have a set of Olympic lifting plates, you can get some extra mileage out of your grip training by performing this lumbricals-strengthening grip exercise.
The lumbricals are a type of intrinsic muscle within each of your hands that produce a pinching-type grip. Think of pretending that your hand was a puppet mouth and you were to make the mouth talk—this motion is produced exclusively by your lumbrical muscles within your hand.
When it comes to a stronger grasp, you want every muscle involved with gripping to be as strong as possible, including the lumbricals, since these muscles, too, contribute to a stronger and better grip.
It’s incredibly simple to perform this exercise; just pick up an appropriately challenging plate by pinching it. Keep your fingers perfectly straight—don’t bend them at all! I typically use anywhere from a ten or fifteen-kilogram plate, as it provides a sweet spot of challenging weight and thickness.
Results: How long will it take to see them?
Nothing in this article (aside from the tip about using chalk) is meant to be a quick fix to your hanging abilities. Results take time, but they’re entirely achievable with consistent and sustainable effort.
For the average individual who already has been working on their dead hang for at least a few weeks, I’d be inclined to say that notable results (i.e., a 15-20% increase or more in their hanging time) should be evident within six to eight weeks.
It’s no guarantee, but between improving your neuromuscular efficiency and improving the contractile components of your forearm muscles and intrinsic hand muscles themselves, the process should likely take around this general timeframe to become rather evident.
Bonus: Avoiding overuse injury to your shoulder and forearms
After all this talk about training your grip, it would be remiss of me to not include a section on how to ensure you’re not overtaxing your forearm flexor and extensor muscles throughout your pursuits with improving your dead hang. These muscles, after all, are prone to becoming chronically overworked, leading to a type of injury known as a repetitive strain injury (RSI).
There are two very common elbow issues that can arise when excessive amounts of grip training take place. These conditions are:
- Medial epicondylalgia (Golfer’s elbow)
- Lateral epicondylalgia (Tennis elbow)
Both of these conditions are painful issues that arise when the tendons of the flexor and extensor muscles of the forearm (respectively), which run down into the fingers to provide us with our hand-closing and opening abilities, become unhealthy.
If you start noticing one or both of your elbows becoming sore or painful throughout your grip training, it may be a sign you’re overworking your flexor or extensor tendons.
If this is the case, you’ll need to dial back your grip pursuits for a short while until you get things under control. It can be a tricky situation to navigate, but getting help from a qualified orthopedic physical therapist can certainly help. You don’t want a minor case of either of these conditions to turn into more significant cases; this can be stubborn stuff that takes time and consistent effort to get rid of, believe me (I treat it all the time in the clinic).
The earlier you nip any of these issues in the bud, the less of a hassle they will be to resolve.
The key to treating these stubborn overuse conditions is to perform your grip training at an intensity that causes only mild discomfort at most. You don’t want to try and push through pain, but mild discomfort will likely be necessary to provide adequate mechanical stress and subsequent signalling to the unhealthy tendon fibers.
To read more on overcoming tendinopathy, check out this fantastic journal article (link takes you to a PDF) covering all the details: Tendinopathy (Millar et. al, 2021)
You may also find it helpful to read my related articles, where I discuss these issues in greater detail:
Why You Have Elbow Pain With Chin-ups & Pull-ups (And How To Fix It!)
Tennis Elbow: How To Tape Your Elbow All By Yourself
Final thoughts
If you lack the pure grip strength required to keep your hands locked onto the bar, or you have a strong grip but no muscular endurance to maintain that hold, you’re going to have a hard time with dead hangs.
Use the tips and strategies in this article to build a dead hang that could go on for days. With consistent training and effort, you can take your hang time to one that far outlasts anyone else in the gym.
Frequently Asked Questions
Since this article is all about the dead hang, I’ve included some brief answers below to some commonly asked questions folks often have regarding the nature of the dead hang. I hope they’re helpful!

Hi! I’m Jim Wittstrom, PT, DPT, CSCS, Pn1.
I am a physical therapist who is passionate about all things pertaining to strength & conditioning, human movement, injury prevention and rehabilitation. I created StrengthResurgence.com in order to help others become stronger and healthier. I also love helping aspiring students and therapists fulfill their dreams of becoming successful in school and within their clinical PT practice. Thanks for checking out my site!
