Tennis elbow (also known as Lateral Epicondylitis) is quite an annoying condition to have. And while it isn’t the most devastating condition in the world, it can certainly be painful and can absolutely interfere with all sorts of activities you wish to partake in. Thankfully, there are some straightforward things you can do to help treat it on your own, with one of those things being applying Kineso Tape (also called K-tape) over the painful area.
While there are plenty of different ways (and beliefs behind how) to tape your elbow if you have Tennis elbow, this post will cover a straightforward K-taping method that you should be able to apply yourself. I will guide you through a step-by-step process to give you the most confidence possible in your application in order to help give you some relief to this stubborn condition.
Keep in mind that there are dozens of ways to tape for Tennis elbow, and it can largely depend on all sorts of individual factors along with the taping doctrine that one subscribes to. Taping is really half science and half art.
This way I’m showing you in this blog post is nice and simple (but still quite effective) since this post is all about doing this yourself.Also, if you need to do this for the other side of your elbow (a condition known as Golfer’s elbow, or medial epicondylitis), be sure to check out my blog post: GOLFER’S ELBOW: HERE’S A GREAT WAY TO TAPE YOUR ELBOW ALL BY YOURSELF, where I’ll walk you through a very similar process.
Disclaimer: While I am a physical therapist, I am not YOUR physical therapist. As a result, I cannot tell you whether or not any treatments mentioned on this website may or may not be appropriate for you, including taping your elbow. By following any information within this post, you are doing so at your own risk. You are advised to seek appropriate medical advice for any pain you may be experiencing.
Article overview (Quick links)
Click/tap on any of the bulleted headlines to instantly jump to that particular section of this article.
Evidence for Kinesio tape helping with tennis elbow
Precautions & considerations for using Kinesio tape
Step by step procedure for taping your Tennis elbow
Bonus: A little-known secret for ensuring that your tape stays on longer!
Concluding remarks
Related article: How to Voodoo Floss Your Own Elbow — Pro Tips For Better Results
Evidence for Kinesio tape helping with tennis elbow
It’s always nice to have some evidence behind an application, and while I won’t go into lengthy detail here, I believe that it’s quickly worth mentioning that there have been some studies done that have shown kinesio taping to be effective for decreasing pain, recovering grip strength and improving functional abilities. If you want to read up on these studies, just click on the respective links below to be taken to the PDF journal articles.
- Does Kinesiotaping improve pain and functionality in patients with newly diagnosed lateral epicondylitis?
- Kinesio taping in patients with lateral epicondylitis
- Systematic Review: Effects of Using Kinesio Tape on Treatment of Lateral Epicondylitis
Precautions & considerations for using Kinesio tape
One of the best things about using any type of Kinesio tape is that it is incredibly low risk while potentially offering incredibly high reward for the many people who use it. That being said, there’s a few quick things to keep in mind and look out for:
If you have any known allergies to adhesives, you may want to avoid using tape until you have found a tape that you know won’t irritate your skin. Once you’ve applied the tape, if at any point in time you feel that the tape is making your skin itchy or red/irritated, simply remove the tape – no point in keeping it on if it’s just being more of a nuisance than an assistance; you can still rehab this condition just fine without any tape.
Lastly, tape always sticks better when it has a greater amount of skin to stick to. So if you’re a male with some pretty hairy arms, you may want to buzz down the length of the hair over the area you’re needing to tape. No need to shave down to the skin (unless you want to), but the shorter the hair, the better the tape will stick. Sorry, men.
Also, try your best to avoid wrinkles when you do this taping procedure. Small ones aren’t a big deal, but big ones certainly won’t help anything.
Step by step procedure for taping your elbow
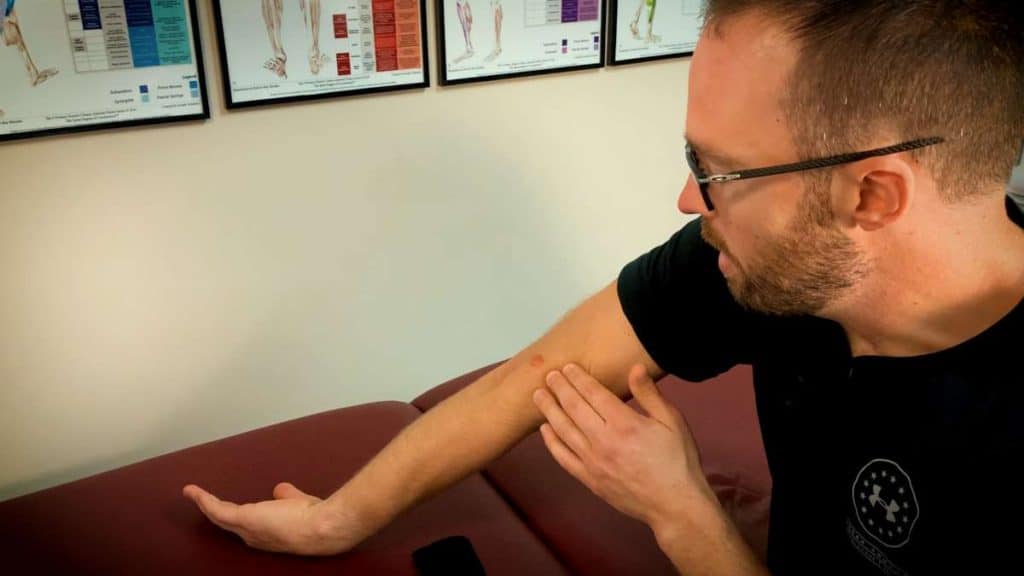
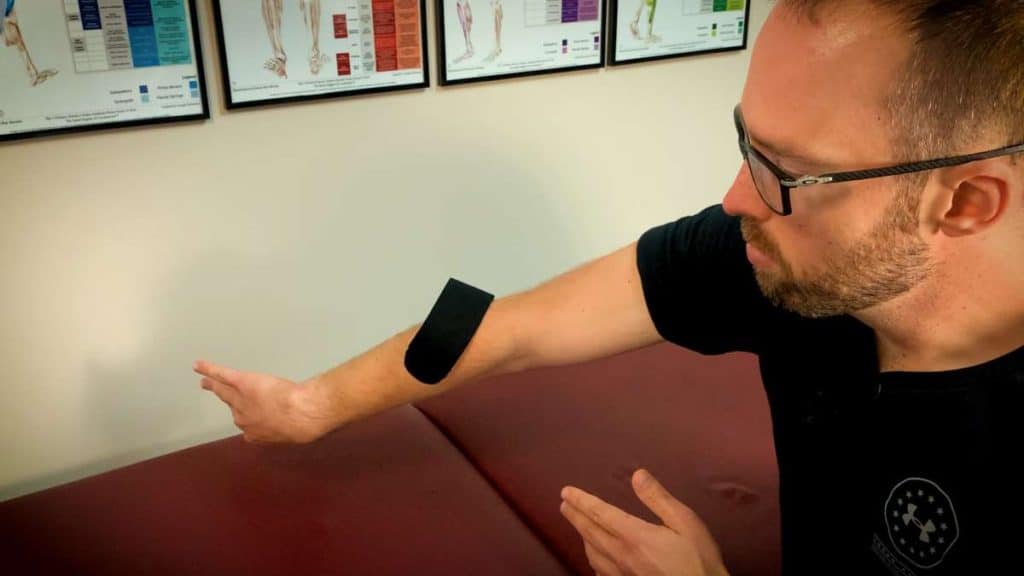
Step 1: The first thing to do is to locate the area(s) that are sore. You can mark them on your skin if you’d like so that you know where you need to lay the tape down, but you certainly don’t have to (I’ve done so here just for the sake of helping you better visualize the process). You’re going to want to apply tape over the epicentre of the pain, so knowing where you want the tape to land is important.
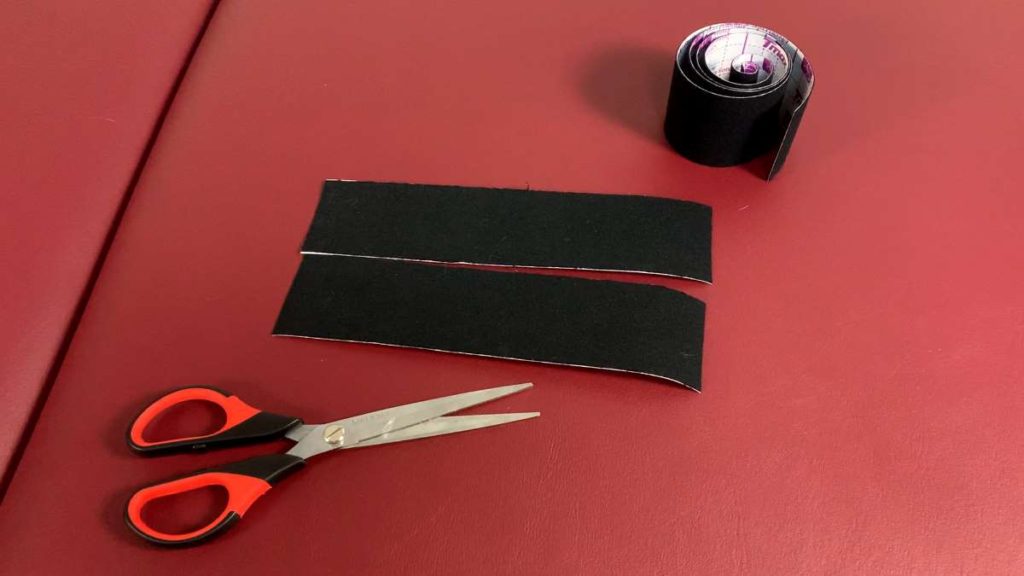
Step 2: The next step is to determine the length of tape strips that you need. An unstretched length of approximately eight inches should work just fine. You want this strip to be long enough to stick on appropriately without peeling off when you bend and straighten your elbow. For this taping technique, we will be using two pieces of tape of this length.
Don’t worry about which brand of tape is best – they’re largely all the same. In this blog post I used a brand known as T-Max tape. Rocktape, however, is always my preferred brand. If you’re looking to pick up some tape, I’d go for this particular roll (link takes you to Amazon). Great quality tape at a very fair price. Purchases made through this link help me earn a small commission at no extra cost to you, which help to cover the expenses I incur for running this website.
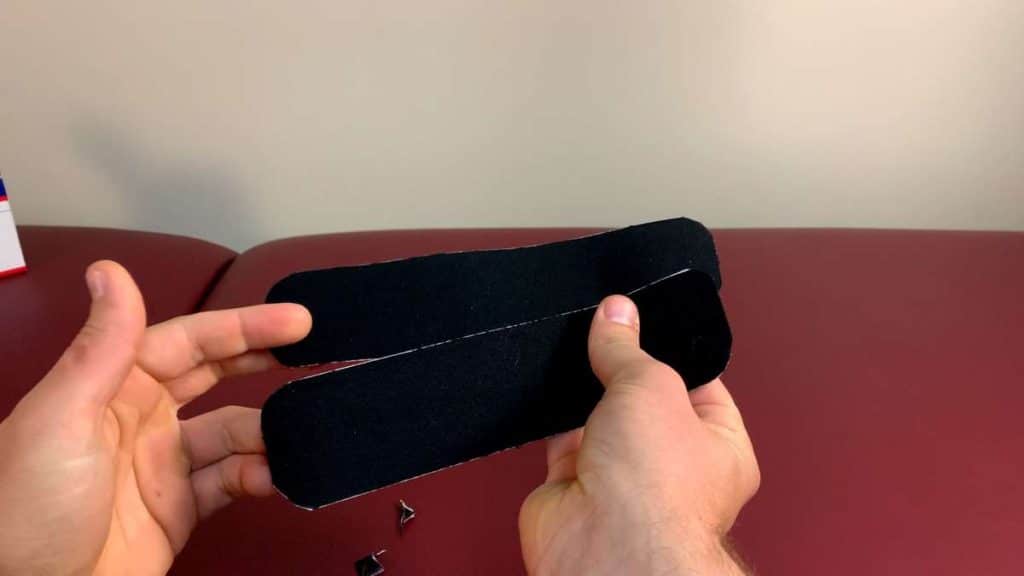
Step 3: Use some scissors to round off the corners of the tape. Rounding off the corners just ensures that the tape won’t peel up off the skin as easily.
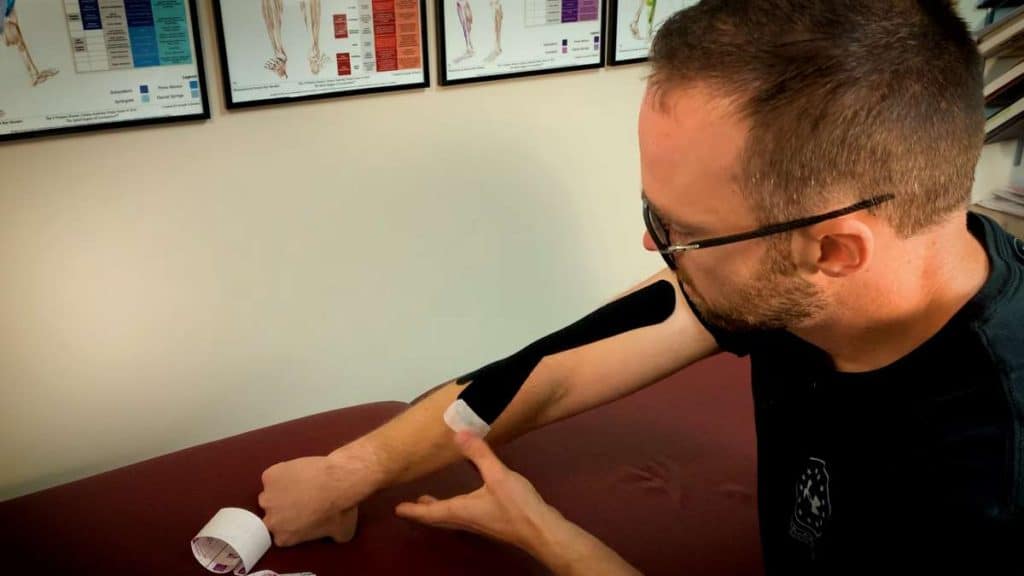
Step 4: Peel off one end of the tape and place it about half-way down on the back of your forearm. When you place the end down on the skin, make sure you place it at an angle that will allow the tape to travel over the sore spot as you begin to lay the strip down.
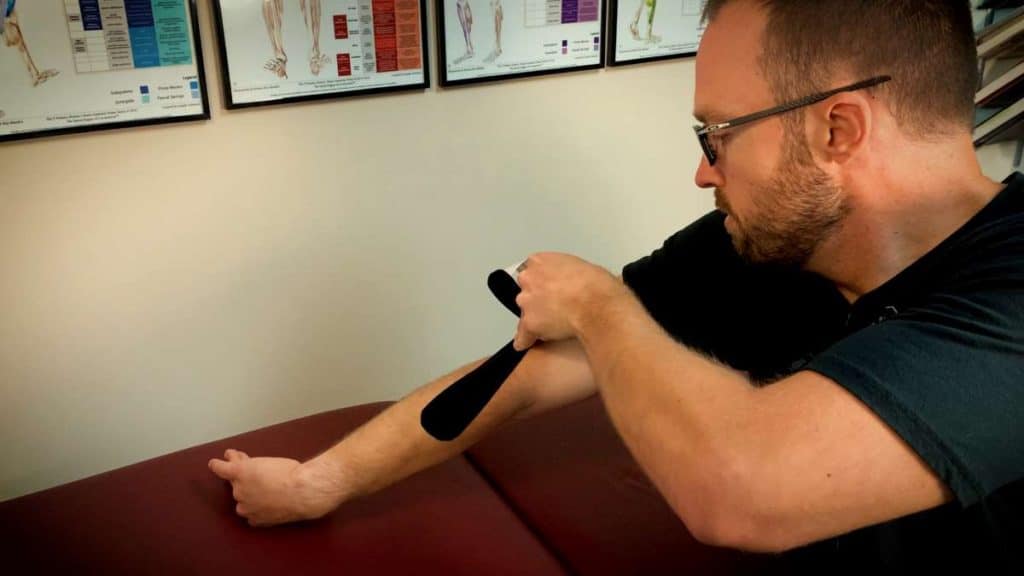
Step 5: To the best extent possible (only do so within a pain-free range of motion), straighten your elbow, rotate your arm inwards and pull your palm towards your wrist and hold it there as you begin to lay the tape down (next step). We want to apply the tape with the skin as stretched as much as comfortably possible. Hold the arm in this position as you perform step six.
Refer to the position of the arm in step 4 for the position you want to keep your arm in (as comfortably as possible) when applying the tape.
Step 6: Lay the end of tape down on the back of your forearm at an angle that will allow it to cover the sore spot on your elbow. The first inch of tape being applied to your skin should have NO STRETCH (may irritate the skin if the end is on stretch as the tape is placed down). Pull the tape up your arm with about 50% stretch on the tape. As you place it down, continue to pull off the paper backing. With about one inch of tape left, lay this end down on the skin without any stretch.
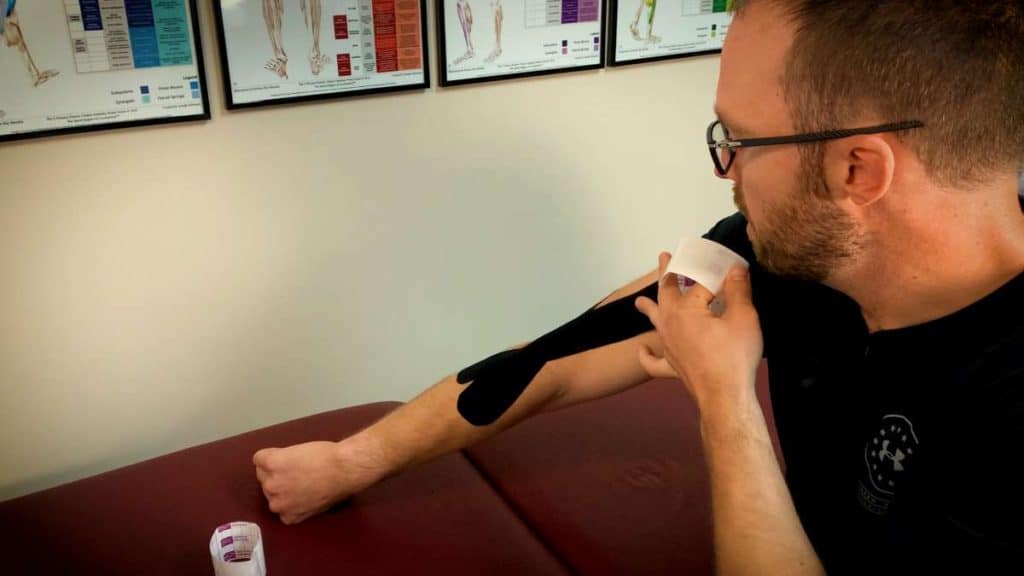
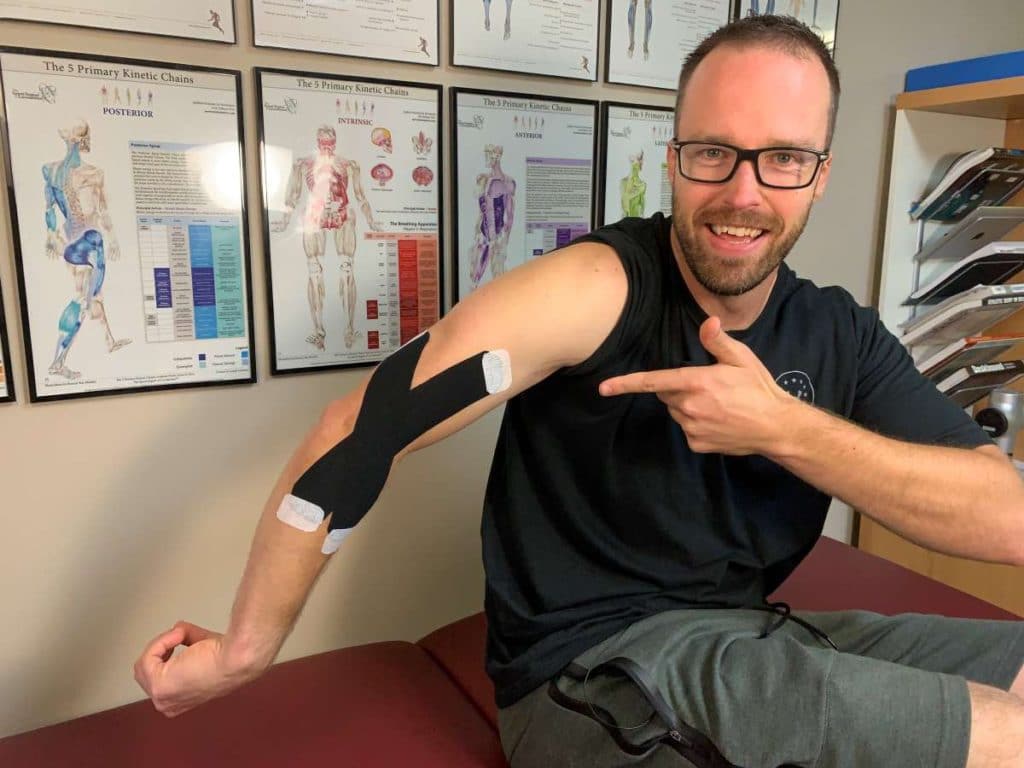
Step 7: Repeat this same process with the second strip of tape, but starting at a slightly different angle. The goal is to create an X pattern with the two strips of tape intersecting right at the highest point of pain in your elbow. This point of intersection should theoretically provide maximal skin lift over the painful, irritated area, which should help with maximizing fluid exchange/flow within the area.
Step 8: With the tape applied, quickly rub your hand firmly up and down the tape for ten seconds or so, as a means to help heat up the adhesive a bit more, in order to ensure that it’s really sticking to your skin and that you haven’t missed any spots where the tape could be pressed onto the skin more.
With the tape now firmly anchored down, you’ll notice that your skin (and the tape) gets a bit wrinkled when you bend your elbow. That’s what we want! This wrinkling of the skin helps to just lift some of the tissue layers within the skin and below just enough to give a bit better fluid movement and flow for fluids within the sore area.
Bonus: A little-known secret for ensuring that your tape stays on longer
K-tape usually stays on for a few days rather well without any problems, but if you want some re-enforcement, here’s a little trick that you can use:
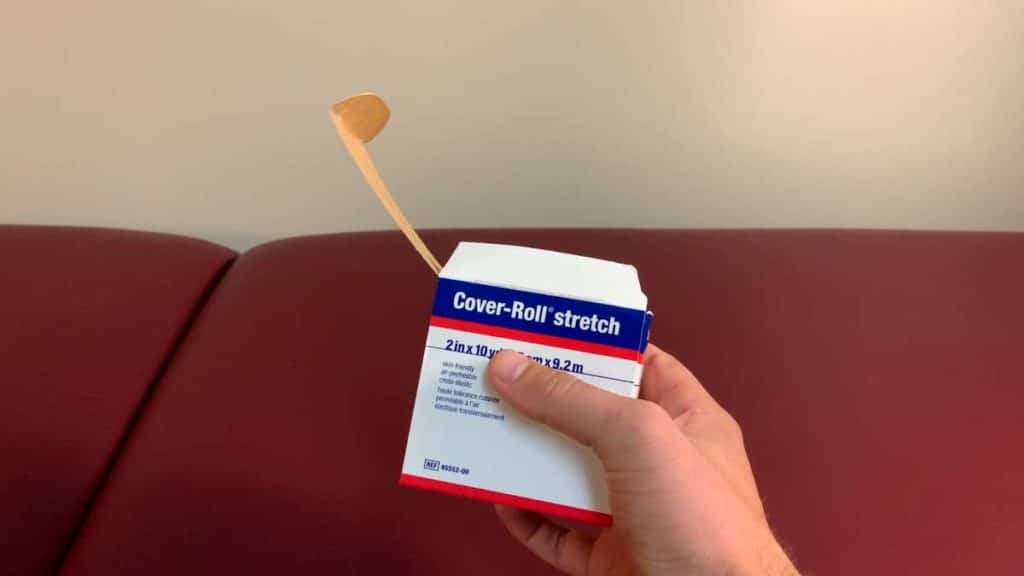
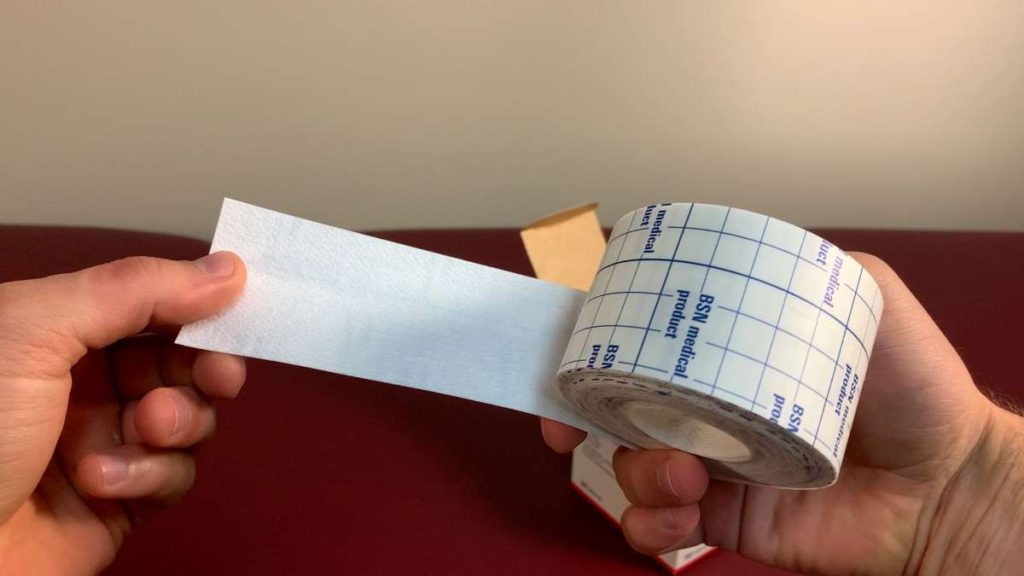
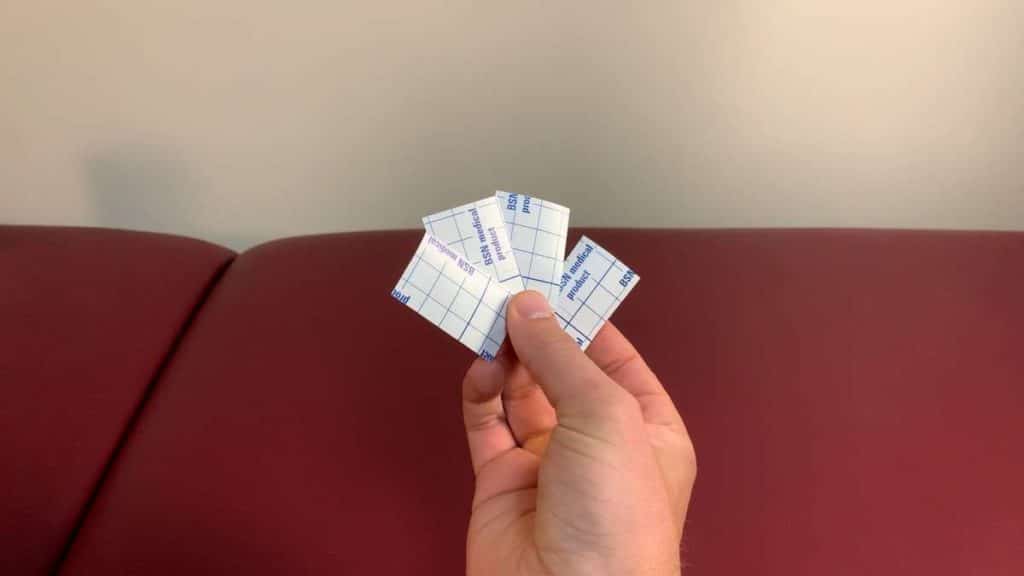
If you purchase a special type of hypoallergenic stretch tape, known as Cover Roll (also sometimes called Hypafix), you can cut off a few small squares, round their corners and then stick half of the square on the end of the tape and the other half onto your skin. Cover roll sticks to skin quite nicely and is hypoallergenic.
This isn’t a necessary step, but if you think you will need some re-enforcement, will be sweating a lot with the tape on, etc., then this is quite a nice little bit of added re-enforcement that takes only a few extra seconds to do!
Concluding remarks:
Tennis elbow is a stubborn condition, so seeking a qualified healthcare professional who can provide specific treatment is a wise move to make in addition to having some tape over the area.
That being said, having a bit of tape on the skin for tennis elbow tends to feel quite nice. In addition to the sensation of tape on your skin giving your brain something else to think about (i.e. the tape decreases nociception to the brain from the painful area), the theory is that the tape will help to enhance fluid dynamics around the area a bit more.
You can shower with the tape on (just pat it dry with the towel when you dry off) and it should stay on for a handful of days, but remove it at any point should you feel the need or desire to do so.
Keep making sure that any activities you do are pain-free. Having tape on your skin is not a license to be careless and ignore pain, and you’ll only set yourself back further if you keep repeatedly irritating the area. So, be smart, be safe and use the tape to help foster the recovery process to this stubborn (yet treatable) and common condition.
Related Articles:
- GOLFER’S ELBOW: HERE’S A GREAT WAY TO TAPE YOUR ELBOW ALL BY YOURSELF
- THE MASSIVE BENEFITS OF GOING TO PHYSICAL THERAPY BEFORE INJURY
- BLOOD FLOW RESTRICTION: EVIDENCE AND USES FOR INJURY REHABILITATION

Hi! I’m Jim Wittstrom, PT, DPT, CSCS, Pn1.
I am a physical therapist who is passionate about all things pertaining to strength & conditioning, human movement, injury prevention and rehabilitation. I created StrengthResurgence.com in order to help others become stronger and healthier. I also love helping aspiring students and therapists fulfill their dreams of becoming successful in school and within their clinical PT practice. Thanks for checking out my site!

