Voodoo flossing is a therapeutic intervention that can produce some powerful and positive changes in the health and function of the various tissues around your elbow. But it can only do so if you know how to perform it properly. While the overall flowing process is relatively straightforward, there are some highly effective techniques you must make sure your implement once you’ve wrapped the band around your elbow to get the most out of your flossing.
To effectively voodoo floss your own elbow, you must apply the band in the right location, with proper technique and the correct amount of tension. You must THEN perform fasciae shearing techniques with adequate force and in the right directions. Doing this will ensure optimal flossing success.
In essence, there’s really no need to overthink any of this. Still, it’s worth paying attention to the details, as these are what genuinely provide the therapeutic benefits that most people are after when it comes to flossing their own elbow. So, if you want to learn all about these finer details, be sure to keep on reading!
ARTICLE OVERVIEW (QUICK LINKS)
Click or tap any of the following headlines to instantly jump to that section of the article.
Universal rules to follow when flossing (safety info)
The wrapping process: doing it correctly
The shearing and mobilizing process: the fine details
Final thoughts
Disclaimer: While I am a physical therapist, I am not YOUR physical therapist. As a result, I cannot tell you whether or not any treatments mentioned on this website or in this article may or may not be appropriate for you, including voodoo flossing your elbow. By following any information within this post, you are doing so at your own risk. You are advised to seek appropriate medical advice for any pain you may be experiencing.
Universal rules to follow when flossing
Before we dive into the actual wrapping technique and the details of mobilizing your tissues, it would be prudent of me to brief you on a few critical principles to follow when you’re wrapping your elbow, or any other area of your body, for that matter. Doing so helps ensure optimal success and greatly reduces the risk for any adverse reactions or outcomes.
Related article: How Elbow Sleeves Can Help Your Tendonitis (And Which Ones to Wear)
Principle 1: Don’t use if you’re allergic to latex
This should go without saying, but just in case: don’t use floss bands if you’re allergic to latex, as that’s precisely what flossing bands tend to be made from. You’re going to be having a bad day if you wrap one of your extremities with a product that you’re allergic to
Principle 2: Always wrap towards the heart
Flossing bands should always be applied in what’s called a distal-to-proximal fashion. This just means that you start the wrapping process further away from your body and have the band wrap upwards, closer to your body during the process. This helps ensure the overall health of your blood vessels; you don’t want to push the blood away from the heart – this can damage some of the valves in your veins and produce more significant amounts of discomfort. So, a simple way to remember this is to “wrap the band towards your heart.”
Principle 3: Pins and needles (tingling is not allowed)
You’re not allowed to get pins and needles or tingling in your extremities when you perform flossing. If you do, don’t worry, you haven’t damaged anything or caused harm, but it’s simply your nerves’ way of letting you know that they’re not happy. And if you just try to ignore it, it may lead to a more moderate type of nerve irritation, known as neuropraxia. So, take the wrap off and try again if you’re getting any of these sensations.
If you are always getting this sensation despite multiple attempts at wrapping, you’re likely better off finding another tissue mobilization technique (don’t worry, there are plenty of them).
The wrapping process: doing it correctly
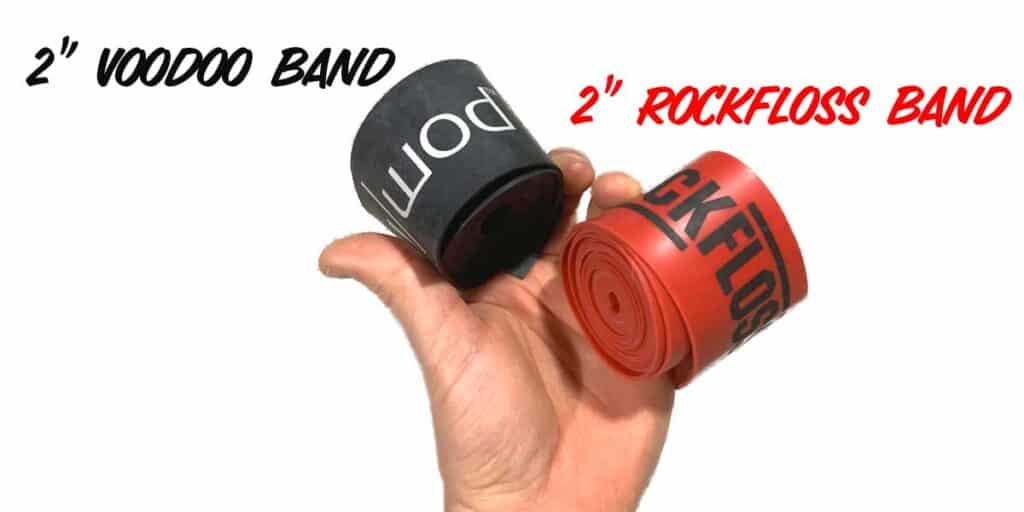
Flossing bands can come in different widths, but the standard 2-inch wide band is your best bet when dealing with the elbow, so make sure you’re using one of those.
Related article: Tennis Elbow: How to Tape Your Elbow All by Yourself
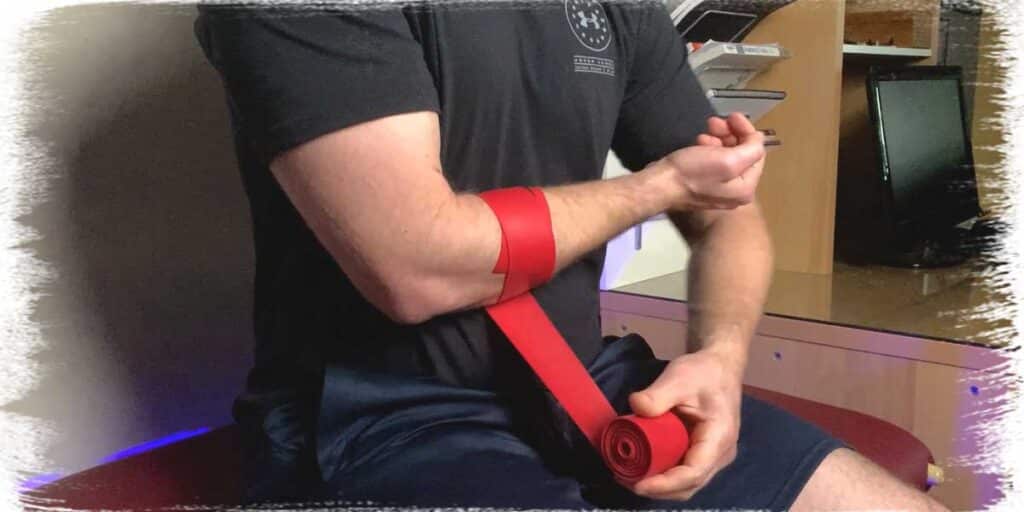
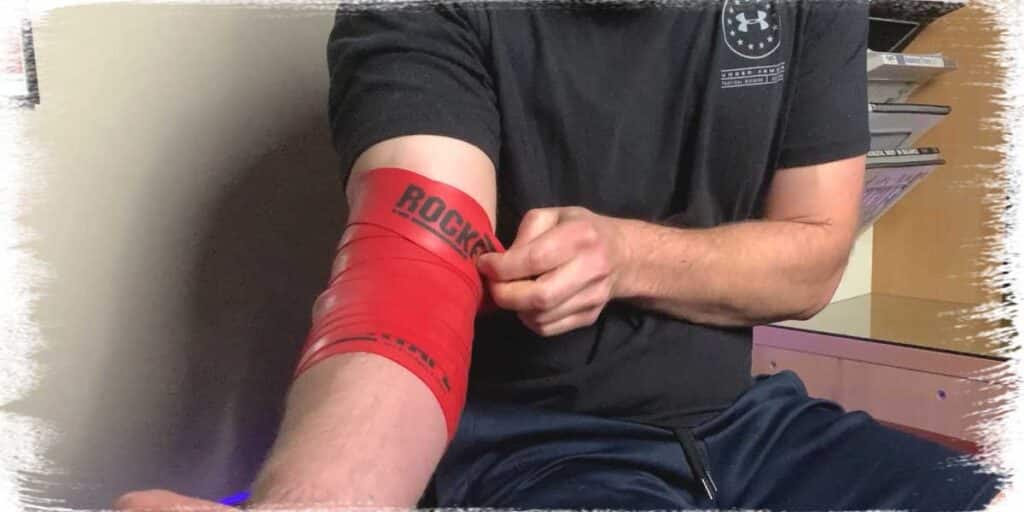
To start the wrapping process, take one end of the band and let it rest on your forearm. It’s easiest to have the natural curl of the end of the band face downwards across your forearm, as it will make the first wrap much easier. Make sure that the first wrap goes outwards (away from your body) rather than inwards, as this makes it easier to pin the free end of the wrap against your body.
Place the first wrap around four inches past your elbow. The first wrap doesn’t need to have a whole lot of tension; simply make sure that it’s secured to your forearm enough that it won’t slide around or come undone.
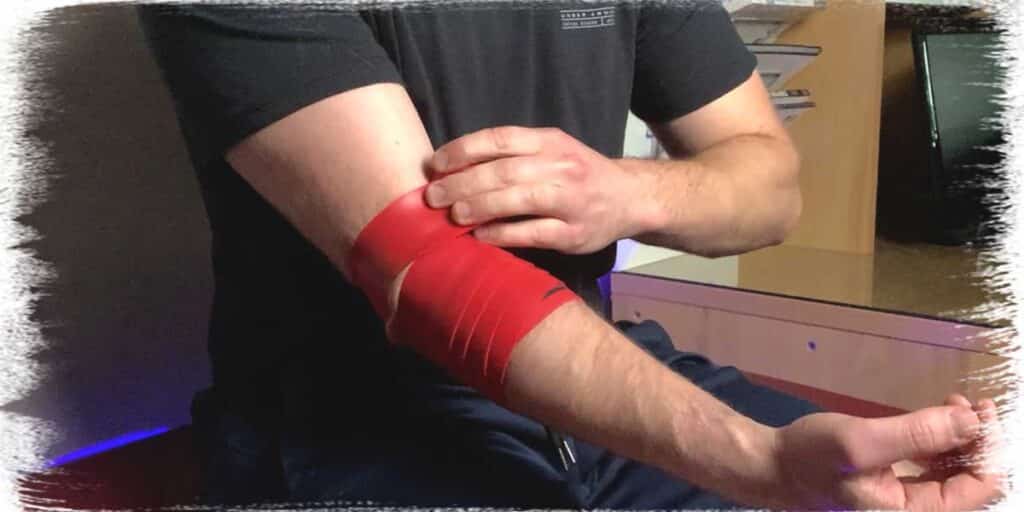
Next, pull the band to about 50% stretch and wrap upwards, making sure that with each wrap that half of the band covers the previous wrap while the other half makes contact with your skin. This allows the band to stay anchored in place while providing its shearing effects when performing tissue mobilization.
You should have enough band to make it about four inches above your elbow. With your last wrap, tuck the free end underneath the previous wrap. Once it’s tucked underneath, it will stay there until you decide it’s time for it to come off.
The shearing and mobilizing process: the fine details
With the band now in place, you’ve got upwards of about two minutes to perform any needed mobilization-based movement for your elbow tissues. It’s important to know that there’s no one single best way to mobilize your tissues; it all comes down to what you, the individual, needs.
Related article: Golfer’s Elbow: Here’s a Great Way to Tape Your Elbow All by Yourself
The following is a standard series of movements that I take most people through when the goal is to mobilize all of the key tissues around the elbow, particularly the commonly congested and affected spots, such as the extensor tendons and flexor tendons. These are key spots to go after with common conditions such as tennis elbow (lateral epicondylitis) and golfers elbow (medial epicondylitis). Feel free to do the following in any order that you choose; this is just my preferred, standard run-through:
Movement 1: Mobilizing the median and ulnar nerve
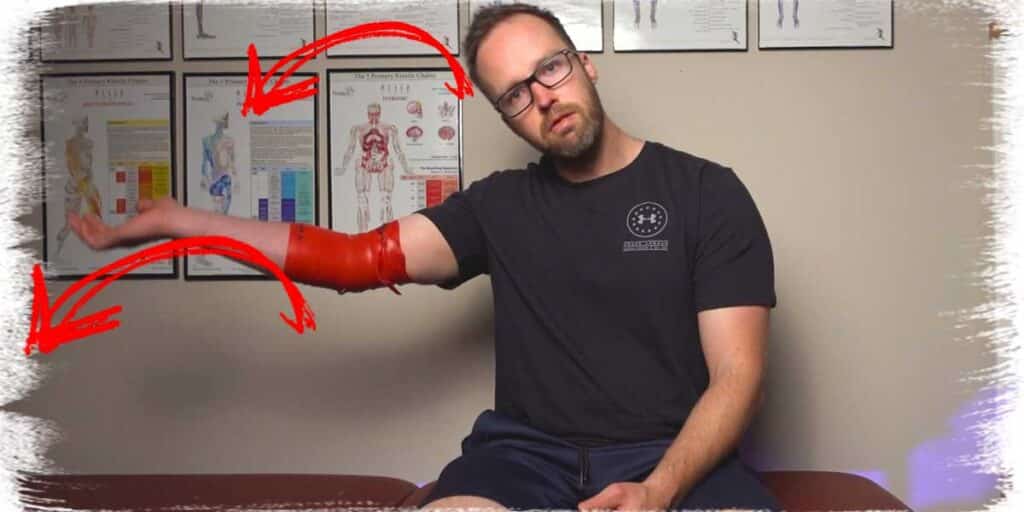
The median and ulnar nerve are two of the three major nerves that run through the elbow. Performing movements specifically designed to floss or mobilize the nerves can be an effective way to reduce the congestion or restriction of the nerves in this area.
To mobilize the median nerve:
- Place your arm up in the position shown in the position below.
- From here, push your arm out straight while keeping your wrist pulled back.
- As you do this, make sure that your neck bends sideways towards the direction that your arm is extending.
- Immediately return to the starting position, flexing your wrist in the opposite direction as you do so. Your head should “follow the movement” and return to an upright position.
- Perform for 10 – 30 reps.
To mobilize the ulnar nerve:
- Place your arm up in the position shown in the position below.
- Next, while keeping your wrist pulled back, pull your arm up towards the side of your head while moving your neck away at the same time.
- Then, simply rewind the movement and return to the starting position.
- Perform for 10 – 30 reps.
Movement 2: Active mobilizations of the flexor and extensors
For simple, active mobilizations of the flexor and extensor tendons (and muscles), I like to perform a series of wrist circles while I straighten and bend the elbow simultaneously. It’s a simple, non-specific way to force the muscles and tendons to slide and shear underneath the voodoo band.
Movement 3: Passive mobilizations of the flexors and extensors
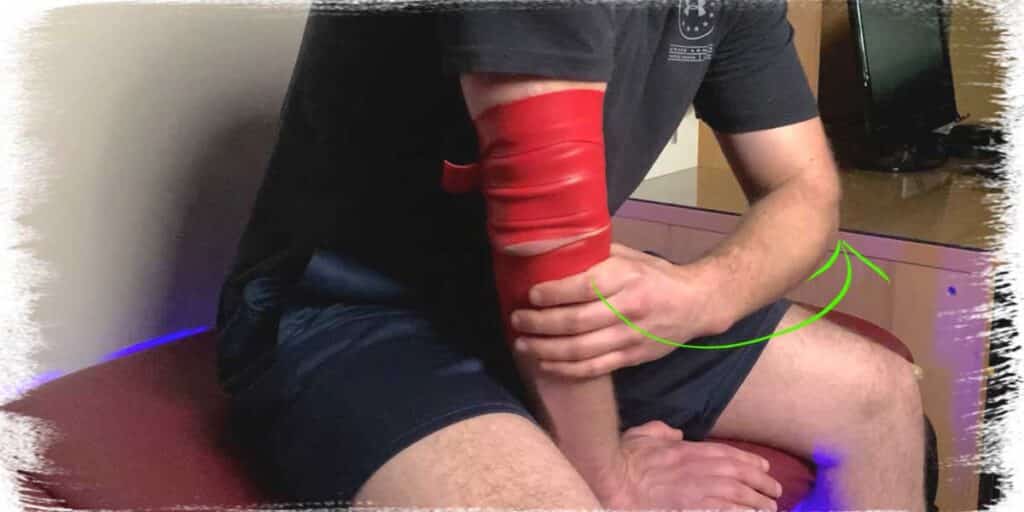
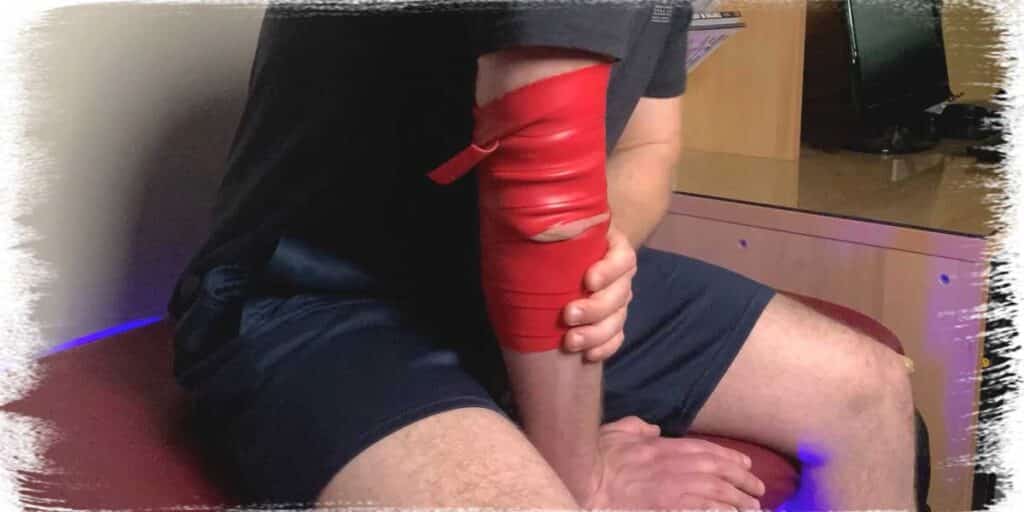
Passive mobilizations are where the money is at, in my humble opinion, of course. I find that these really target and challenge tissue mobility in noticeable ways.
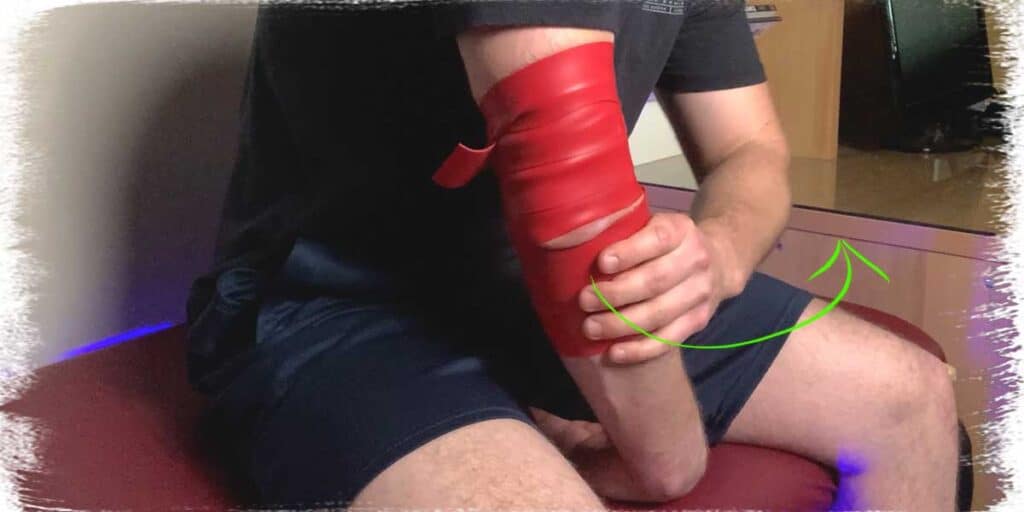
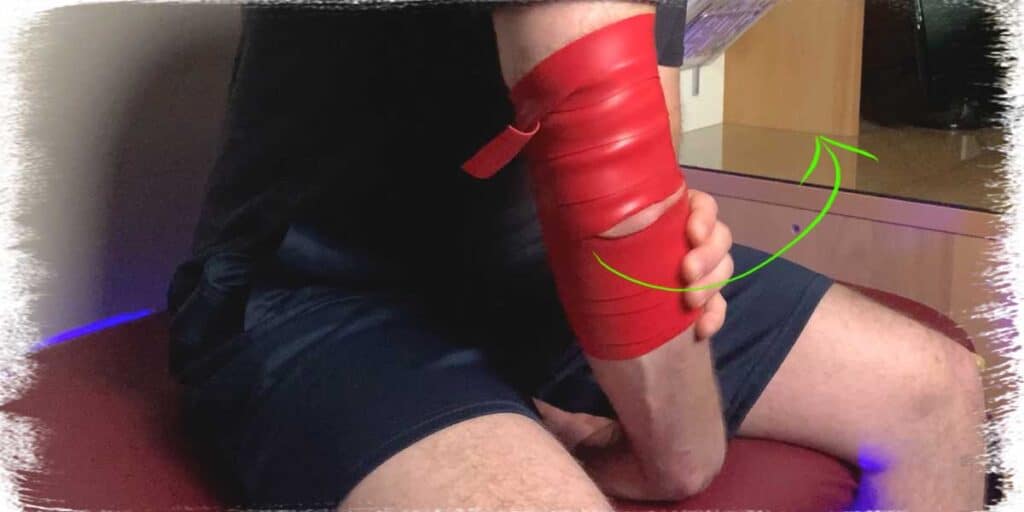
To start, place your palm on the ground or surface that you’re sitting on while trying to keep your elbow as straight as possible. This will force the flexor tendons to get a big stretch. Next, while holding this position, grab the meaty part of your forearm with your other hand and use it to twist your forearm inwards and outwards. You will likely feel a big stretch (it feels pretty nice) at the end of each twisting position. Repeat for 10-20 repetitions.
Next, place the back of your wrist onto the ground or surface that you’re sitting on. Again, try to keep your elbow as straight as possible, but don’t push through any pain. This will provide a big stretch for the extensor tendons on the back of your forearm. Next, perform the same twisting movements with your free hand that you did when you had your palm on the ground. Perform for 10-20 repetitions.
Time to take the band off!
The above series of movements should take about two minutes to complete. By this point in time, you should feel like the band is ready to be taken off. You should also feel like you’ve given your tissues underneath the band a decent amount of mobilization. Take the band off and re-check some of your movements. You’ll likely be surprised as to how much better it now feels.
And that’s the process! You can repeat this a few times each day if desired. After about a week or so, you’ll likely notice a night and day difference in terms of how your elbow is feeling and perhaps moving as well.
Final thoughts
Voodoo flossing your elbow is a pretty straightforward process. Just make sure that you follow the universal principles and that you run through a series of movements that feel good for you. Don’t be afraid to modify the movements in ways that work best for you.
Remember, just like your dentist always says: you should floss every day!
Have fun!
- Jim

Hi! I’m Jim Wittstrom, PT, DPT, CSCS, Pn1.
I am a physical therapist who is passionate about all things pertaining to strength & conditioning, human movement, injury prevention and rehabilitation. I created StrengthResurgence.com in order to help others become stronger and healthier. I also love helping aspiring students and therapists fulfill their dreams of becoming successful in school and within their clinical PT practice. Thanks for checking out my site!

