The TRX can be an absolutely brilliant piece of fitness equipment for injury recovery. Like anything else, it all comes down to how you use it and knowing what you can get out of it. And with the TRX, there is a world of effective injury rehabilitation to be had when you know these details. So, if you want to know some potent universal tips that can help with an assortment of injuries to the arms, legs, back, chest, and even torso, via the TRX, this article is for you.
The TRX can be highly effective for injury recovery due to its versatility for muscle strengthening, muscular endurance, joint mobility, and balance control. It can often be used on numerous areas of the body for various types of injuries and stages of injury rehabilitation.
Once you’re aware of and understand these universal principles, you’ll be able to intuitively apply them for several conditions and scenarios, which can help optimize recovery while also boosting your overall confidence in the process.
So let’s unpack everything and break it all down in a straightforward manner.
Disclaimer: As we start off, please be aware that I’m writing this article with the assumption that you have a basic understanding of what the TRX trainer is. If not, some of the concepts might be a bit difficult to piece together. However, if that’s the case, simply bookmark this article, read up a bit more on the basic premise of the TRX (and suspension training in general), and then come back. Once you know how to incorporate the injury recovery strategies below, you’ll likely be able to do some really cool things to optimize your injury recovery.
Please also keep in mind that the appropriateness of incorporating TRX training into your injury recovery is dependent upon a multitude of factors, such as the type of injury, the extent of the injury, the location of your injury, and many other factors pertaining to your overall health.
If you are uncertain about your injury or if using a TRX is appropriate for you, please get clearance from a qualified medical professional before proceeding.
Related article: How To Use A TRX For Injury Prevention (Superior Benefits)
Why use the TRX for injury recovery?
The TRX trainer has some incredibly unique and beneficial features that can make it an outstanding choice for various types of injury recovery, and it has been shown to be effective for various types of injury rehabilitation.1–4
For starters, it provides a nearly infinite number of exercises and movements that can:
- Strengthen muscles in the arms, legs, shoulders, and core
- Mobilize joints in the shoulders, elbows, knees, ankles, hips, and back
- Challenge (and improve) balance
- Challenge (and improve) proprioception
What’s even better: most movements and exercises that challenge any of the above aspects can be finely tuned to ensure the ideal amount of challenge (resistance, range of motion, coordination, etc.) is utilized. This not only ensures that you stay safe and avoid further injury but also that you dial in and deliver the ideal amount of stimulus to your body, which will optimize your overall recovery.
Additionally, the TRX allows the individual to precisely control the speed of their movement(s), which is critical for injury recovery. Early-stage rehabilitation requires slow and controlled movements, and depending on the individual and their injury, later-stage rehabilitation (such as with return to sport protocols) involves the need to perform quick (and sometimes even explosive) movements.
While this can be done with other pieces of equipment, the TRX often makes these factors incredibly convenient and practical; there’s no need to switch to various pieces of equipment, grab different sets of dumbbells, etc.
So, if you’re looking to use your TRX to help with your injury recovery, check out the principles below and consider putting them to use as you work on coming back stronger!
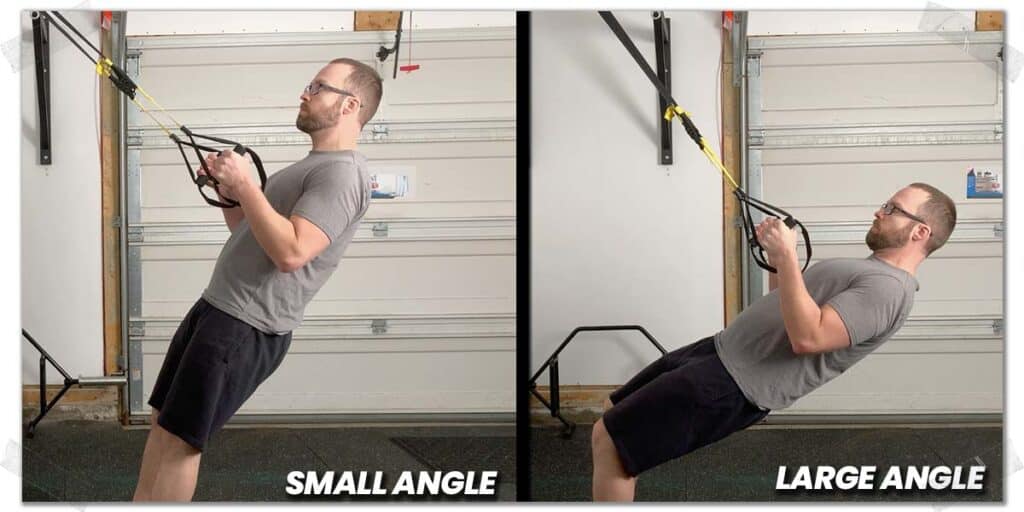
TRX Principle 1: Modify the angle of attack
Modifying the “angle of attack” is always the first principle to be aware of when using the TRX to recover from your injury. The “angle of attack” refers to how much or little you’re leaning when performing an exercise. Typically, the more you lean, the more challenging the movement will become from a resistance standpoint. Conversely, the less you lean, the easier it will become. Keep in mind, however, that for other exercises, it can be the exact opposite.
Leaning to make an exercise or movement more demanding or less may seem a bit obvious, but there are some critical details to understand with this principle when working to recover from injury.
First, injury recovery isn’t always about regaining strength; even when it is, strength isn’t always the top priority. There are times when you’ll need to optimize your TRX angle to challenge your movement control or mobility.
Additionally, you may need to pick an angle that allows you to feel confident with the exercise(s) or movement(s) you’re performing; it may not be physically challenging but rather mentally challenging.
So, from an injury recovery standpoint, the whole purpose of selecting the ideal angle of each exercise is to optimize either:
- The extent of resistance
- The range of motion you utilize
- Your confidence when moving through the exercise.
By challenging any or all of these factors, you can have more confidence in knowing you’re getting the most out of your TRX for injury recovery exercises.
TRX Principle 2: Know your ideal speed of movement
In the world of rehabilitative exercise, the speed at which you execute your movement is everything. If movement speed isn’t dialled in, at best, you will experience marginal benefits (and, therefore, a prolonged recovery). At worst, you will further irritate or injure the body part and the subsequent tissues you’re trying to rehabilitate.
Speed of movement is highly dependent upon the type, extent, and stage of injury, but whatever these variables may look like, the TRX can often accommodate accordingly.
Because the TRX allows you to precisely control the amount of resistance you use and the type of movement you perform, selecting the speed of your movement is a relatively easy task.
Selecting the ideal speed of movement
If you aren’t quite certain of the ideal movement speed to use for your exercise(s), I’ll lay out some general parameters below that are often used for various injuries and stages of rehab.
Please keep in mind that this is incredibly generalized and is not a universal rehabilitative strategy or protocol by any means. It simply represents general principles often seen in various stages of orthopedic injury rehabilitation.
Early-stage rehab and high pain levels (acute stage)
Early-stage rehabilitation for joints, tendons, and muscles involves gentle and slow movements, often within small ranges of motion. This is the stage in which an individual uses the lowest amounts of resistance (typically very low) for their exercises out of any stage of recovery.
Once pain permits, implementing a loading program (in this case, with the TRX) thereafter can be considered, as early mobilization of injured tissue can positively impact tissue healing and collagen reorganization.5,6
Related article: FREE Beginner’s Program to Bodyweight Exercise (Three Month Program)
If appropriate, TRX exercises within this stage will, therefore, likely involve very small angles of attack (minimal lean) and a wide base of support in addition to slower and smaller movements. The result of these two factors is very minimal resistance with high levels of control, allowing for slow movement.
Pro tip: acute phase rehabilitation often utilizes isometric exercises since they keep the injured body part from moving, which can be painful in this stage. Be sure to check out principle 5 for how these can be performed on the TRX!
All movements should be pain-free and not lead to any pain experienced after the exercise or exercises have been completed.
Once you are able to complete daily movements (often called activities of daily living) and can complete some isometric exercises within inner, middle, and outer positions of the injured muscle, you can likely progress to more intensive TRX exercises.5
Sub-acute rehab and mild-moderate pain levels
The term “sub-acute” essentially refers to a stage of an injury in which it’s no longer brand new but not necessarily old, either.
As a general guideline, an injury can be deemed to be in a sub-acute stage around the timeframe of 6-12 weeks; however, keep in mind that the definitions for this stage (and other stages) can vary within scientific literature.7
At this stage, since some injury recovery has now taken place, pain levels tend to be lower than when the injury initially occurred. However, they can still be somewhat elevated, particularly with physical movements.
Movements and exercises within the sub-acute phase of injury recovery still need to be slow and controlled. Since the newer tissue that is being generated and laid down by the body is still delicate, it can’t withstand the same internal and external forces that healthy, mature tissue can.5
One main difference in this stage compared to the acute stage is the range of motion through which the injured body part can be moved.
Generally speaking, larger (but perhaps not full) ranges of motion can be tolerated in the sub-acute phase than the acute phase (provided the movement remains slow and controlled).
This is often due to the lower sensitivity to pain and decreased swelling that is often quite high when an injury is in the acute phase.
Late-stage rehab and minimal-to-no pain
“Late stage” can be defined in numerous ways and is very dependent on the nature of one’s injury, which goes far beyond the scope of this article.
Still, in a general sense, it can often refer to the stage of injury recovery in which pain levels are quite low or absent (at rest and when performing activities) and when the functional capacity of the injured body part is near—but not entirely—back to pre-injury abilities.
This stage of recovery tends to have the greatest amount of variability in which exercises are performed, the range of motions used for exercises and the speeds at which they are performed.
Generally speaking, strengthening exercises in this phase are often performed at “regular” speeds since the new tissue can tolerate higher levels of force and strain.
Since pain is lowest at this stage of recovery and the functional capacity of the injured body part is at its highest, some movements might even be performed rapidly or in an explosive manner depending on the unique rehabilitative abilities and needs of the individual (particularly for athletes).
TRX Principle 3: Optimize the range of motion
Range of motion refers to how much movement ability a muscle (and the joint which it crosses) has.
The range of motion in which a muscle and joint undergo for an exercise has significant implications on various factors, including:
- The extent of stretch the muscle receives (which can stress the tissue).
- The extent of force the muscle can produce (due to a phenomenon known as cross-bridge cycling and optimal protein filament overlap).
- The amount of pain or discomfort that is perceived.
For the most part, a larger range of motion will be more aggressive on injured tissue, while a smaller range of motion will be less aggressive.
Finding the perfect range of motion
When using the TRX, it’s best to keep your exercises in ranges that feel challenging but not painful.
You’ll want to consider taking note of the ranges that you’re able to use as you can then track any progress you make with increases to your ranges of motion.
As your injured body part becomes stronger and healthier, you should notice that you’re able to use larger ranges of motion and that it feels less challenging to do so. It’s much like tracking the progress of your fitness gains – the more you stick with it, the easier it should become.
If you have any doubts about what an ideal range of motion may be for you, err on the side of caution – it’s easier to scale things up bit by bit than start too aggressively, which can lead to pain and worsening of an injury.
TRX Principle 4: Dial in the ideal balance point
One of the really cool things about the TRX is its ability to challenge your balance with nearly any exercise you perform.
This means that while working on your muscular strength or endurance, you can also pick on your balance as well. This is done by modifying your base of support. A more narrow base of support will create greater stability and balance challenges while a wider base of support will do the opposite.
Balance training is a fundamental component when rehabilitating lower extremity injuries, such as ankle, knee, and hip injuries.
Of the numerous therapeutic benefits of balance training, two of the more critical ones include:
- Regaining and enhancing proprioception
- Greater activation of intrinsic muscles from perturbations of the TRX
How to modify the balance point
From a balance perspective, most TRX exercises become easier as you widen your stance; this provides a wide base of support and is, therefore, most often used in earlier stages of injury rehab when requiring maximal stability and low intensity for exercises.
Conversely, maintaining balance on the TRX becomes more challenging as you bring your feet closer together, which narrows your base of support. You’ll often find your core muscles engaging much more aggressively as you fight to maintain control of your movement at all times.
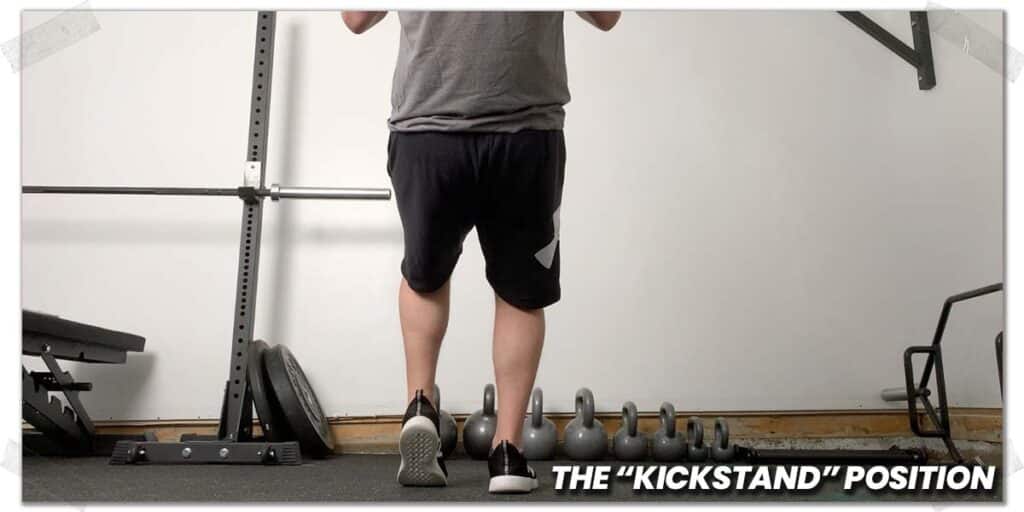
For certain exercises and injuries, you may even need (or want) to progress to a single-leg stance, where you hold your other foot off the ground.
Pro tip: if the single-leg stance is a bit too challenging, you can lightly rest your toes on the other leg on the ground. This allows them to act like a kickstand on a bike, where they provide you with the required balance to stay upright without directly assisting the other leg during the exercise.
Just be sure that you maintain control of your movement at all times; a narrow base of support can cause you to lose balance, which could irritate the injured area you’re attempting to rehabilitate.
TRX Principle 5: Make use of isometric contractions
An isometric muscle contraction refers to the process of a muscle contracting (and holding this contraction) without producing physical movement of the body.
Think of a bodybuilder flexing their biceps and holding them for the world to see as they stand on stage. This is an example of an isometric contraction from a muscle.
When it comes to using the TRX, isometric contractions can be performed with pretty much any traditional exercise you could perform.
The big deal about isometrics
In the world of orthopedic injury rehabilitation, isometric muscle exercises are often highly beneficial for optimizing and progressing recovery. While I alluded to incorporating them earlier in this article when discussing acute-stage recovery, they can likely be implemented throughout all stages of injury recovery.
For starters, isometrics are quite safe; they place minimal strain on the muscle(s) while keeping it within its inner (shortened) range of movement (isometrics typically aren’t performed with the muscle(s) in a stretched position, at least for injury rehabilitation).
Additionally, getting the muscle(s) to contract, and then hold this contraction is often an effective way to begin challenging its overall functional status. And, what’s even better, when using the TRX, you can effortlessly increase the challenge of your isometrics as you progress throughout your recovery.
Pro Tip: injured muscles oftentimes have difficulty contracting and producing force for many reasons. One of these reasons is due to a phenomenon known as myogenic inhibition.
Common TRX isometric exercises that can be quite beneficial for upper body rehabilitation can include:
- The isometric row (double or single arm)
- The isometric chest fly
- The isometric rear fly
- The isometric biceps curl
Common TRX isometric exercises that can be very beneficial for lower body injury rehabilitation can include:
- The isometric squat (double or single leg)
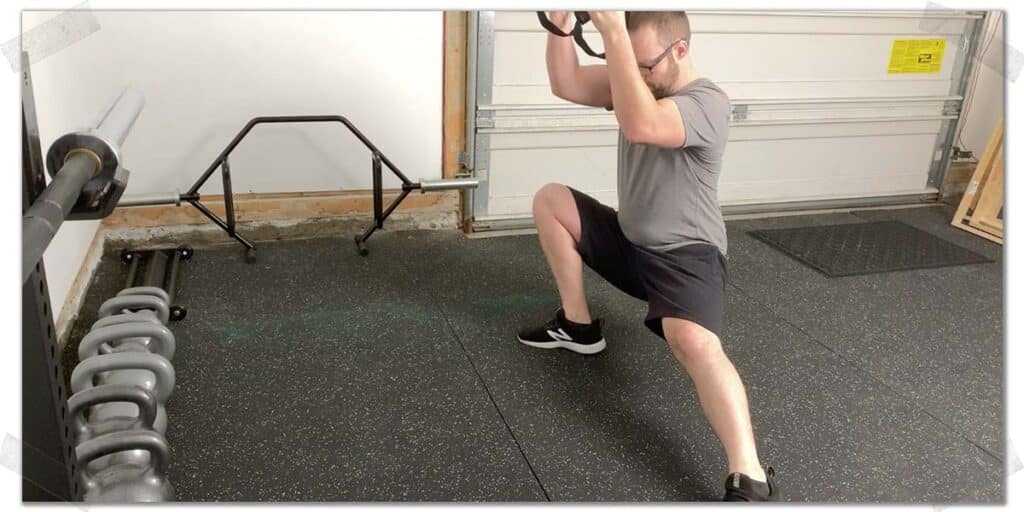
- The isometric side lunge
- The isometric glute bridge
You can Google any of these exercises and you’ll see numerous videos and photos that will demonstrate each of them for you.
How long to hold an isometric contraction
The length of time to hold an isometric contraction—like pretty much everything else—depends on numerous factors.
Generally speaking, for early-stage injury recovery, shorter contractions should suffice, likely holding the contraction between two to five seconds.
As your recovery progresses, the recovering tissues should be able to sustain longer contractions, which can also help with improving muscular endurance.
Remember: Any isometric contractions you perform shouldn’t be painful. If it’s painful, re-evaluate things and consider performing contractions that aren’t as intense (you don’t contract the muscle as hard).
Final thoughts
Incorporating TRX training into injury recovery is a strategy I often use with my patients within the clinic and the clients I train in the gym, when appropriate to do so. The TRX can be incredibly valuable for numerous injuries and various stages of recovery. If you understand the preceding principles within this article, you should have a solid foundation beneath you for knowing how to use a TRX to assist with your injury recovery.
References:
1. Shavikloo J, Norasteh A. Does TRX Training Reduce Injury Rates in Futsal Athletes, as Measured by the Functional Movement Screening Test?-. Published online 2019.
2. Khorjahani A, Mirmoezzi M, Bagheri M, Kalantariyan M. Effects of TRX Suspension Training on Proprioception and Muscle Strength in Female Athletes with Functional Ankle Instability. Asian J Sports Med. 2021;12(2).
3. Codorean H, Codorean IB, Cojocaru V. Functional rehabilitation of the knee joint after cruciate ligament reconstruction in the football players-recovery in therapy room. Sports Med JournalMedicina Sport. 2016;12(2).
4. Hugentobler JA, Vegh M, Janiszewski B, Quatman-Yates C. Physical therapy intervention strategies for patients with prolonged mild traumatic brain injury symptoms: a case series. Int J Sports Phys Ther. 2015;10(5):676.
6. Mueller M, Maluf K. Tissue Adaptation to Physical Stress: A Proposed “Physical Stress Theory” to Guide Physical Therapist Practice, Education, and Research. Phys Ther. Published online April 1, 2002. doi:10.1093/ptj/82.4.383
7. Nicholas MK. Time vs mechanism in chronic pain. Pain. 2022;163(9):1649-1650.

Hi! I’m Jim Wittstrom, PT, DPT, CSCS, Pn1.
I am a physical therapist who is passionate about all things pertaining to strength & conditioning, human movement, injury prevention and rehabilitation. I created StrengthResurgence.com in order to help others become stronger and healthier. I also love helping aspiring students and therapists fulfill their dreams of becoming successful in school and within their clinical PT practice. Thanks for checking out my site!
