With the Iron Neck Company releasing their new third-generation neck strengthening devices, this article will provide detailed information on what’s been improved on the Iron Neck Pro 3.0 and what makes it different from its predecessor.
The Iron Neck Pro 3.0 has some significant upgrades that make it more ideal for personal and professional use without compromising quality; it’s smaller and lighter, the fit is even more comfortable, you can now quantify the amount of rotational resistance you use, and it’s easier to clean.
By the end of this article, you’ll have solid insight into why these upgrades legitimately matter and whether or not it’s worth grabbing an Iron Neck for yourself if you don’t already have one. I’ll also give you my professional opinion on whether or not it’s worth upgrading to this latest generation from the previous generation.
And whether you’re looking to use the Iron Neck at home or for clinical practice, I’ll address the pertinent details from both sides of the aisle.
Also, if you’re not familiar with the second-generation Iron Neck Pro or are considering picking one up, you can check out my second-generation review, where I go over all of the pertinent details of the device.
Alright, let’s get to it!
Affiliate Disclaimer: I am affiliated with the Iron Neck Company, and they have sent me the 3.0 for my review. All thoughts within this article are honest, transparent, and my own; the Iron Neck Company does not have any input with what I say in this article, and they do not get to see this article before being published online.
I’m here to serve my audience and will always be honest and forthcoming in my reviews. I’m not here to push sales; I always want you to spend your money wisely.
That being said, I have had great success with the Iron Neck Pro on my patients (when appropriate for them). If you’d like to purchase any Iron Neck products, please consider clicking through this link that takes you to the Iron Neck website. (This link allows me to earn a small commission at no extra cost to you. I use these commissions to help offset the costs I incur with running this website and to continually enhance the quality of content I can provide.)
Packaging and contents
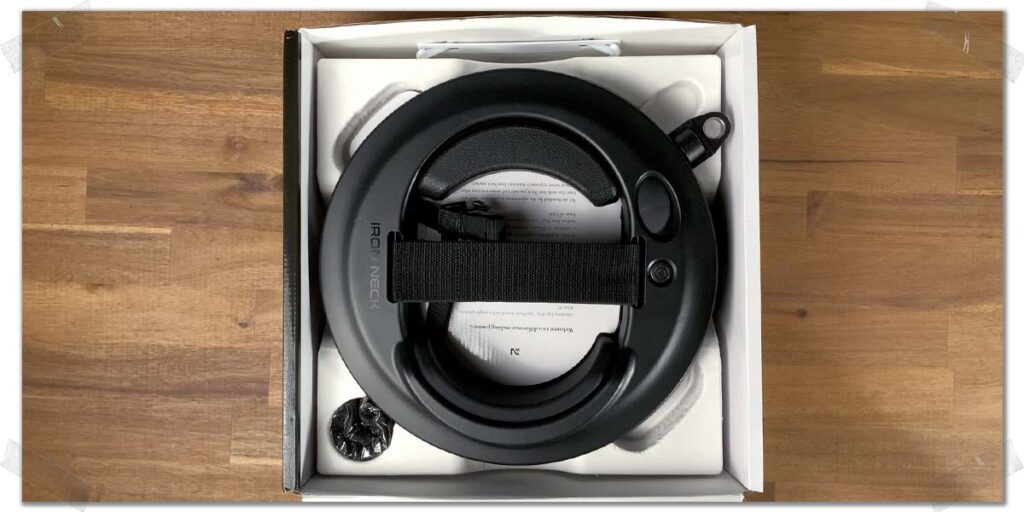
Just as with my second-generation review, there’s not much to say here; the Iron Neck comes nicely boxed, and attention to detail has obviously been taken when knowing how to pack this thing – which is what I would certainly expect for a device at this price point.
No issues with the packaging. It’s solid and looks great.
Let’s move on.
Similarities between both generations
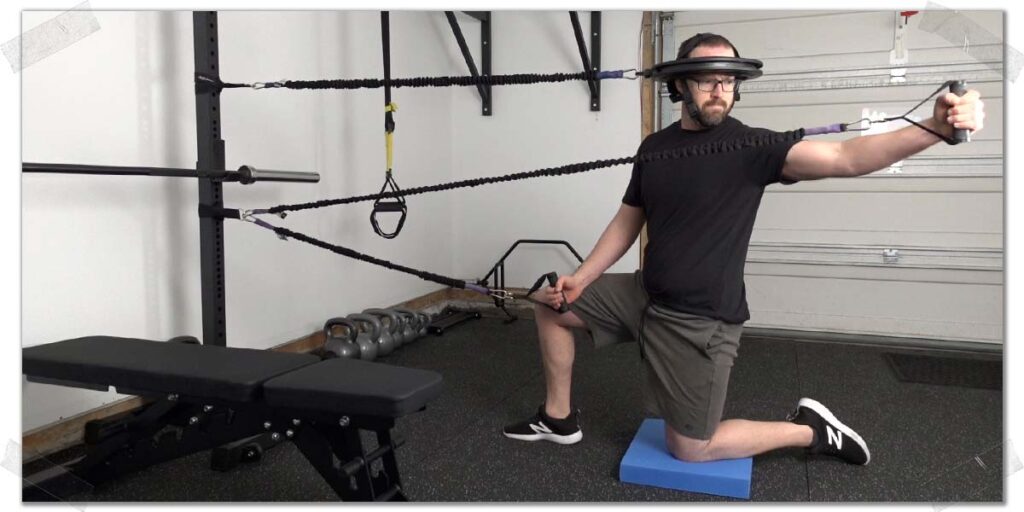
The general premise of new and previous generations of the Iron Neck pro are the same, so there’s not a whole lot that needs to be discussed here. Both work by ensuring a snug fit around the head and dialling in a precise amount of resistance when performing various cervical rotational and isometric exercises.
Both generations include:
- A plastic head frame (plastic is necessary as the device needs to be kept light)
- Interchangeable forehead pads to optimize device fit (see the upgrades section)
- An inflatable air bladder (via pump) in the back to further optimize device fit
- Chin strap for additional snugness
- Variable slider resistance (but notably different – see the upgrades section)
- An included blue 25-pound covered resistance band
What’s included with the Iron Neck Pro 3.0
Included within the box, the you receive:
- The Iron Neck 3.0
- A 25-pound covered resistance band
- One door anchor
- One door belt
- One cinch anchor (to wrap around a pole of some type, such as on a squat rack)
- One skull cap (to help provide an extra snug fit, if required)
- Three interchangeable forehead pads of varying size (based on your needs)
Notable upgrades on the Iron Neck Pro 3.0
Let’s dive right into the fun stuff here: the new Iron Neck model upgrades. After all, upgrades are exciting, and there are some exceptionally noteworthy ones to point out when compared to the second-generation model.
While the second-generation model is still a worthy piece of equipment, it wasn’t without some particular shortcomings, which I quickly pointed out in my previous review. For the most part, they weren’t major issues, but they still left a bit to be desired, especially given the unit’s price point.
I will be listing the upgrades on the new model in order of most significant to least significant. Keep in mind, however, this order is based on my personal needs, most notably for using it with my patients and not necessarily on myself. However, I use the device on myself as well and likely wouldn’t change the order, regardless. You may find that your order of significance with what’s below may differ based on your usage needs.
Upgrade 1: Improved tensioner design
Arguably, my biggest gripe with the previous Iron Neck Pro was its tensioner mechanism—a little wheel that, when turned, increases or decreases the resistance on the headpiece. It was effective and got the job done, but it left a few particular things to be desired.
It wasn’t horrible, but as a healthcare provider using the device with my patients, I was in a unique position compared to the average self-user since it’s ideal for me to objectively quantify (and track) the amount of resistance a patient uses for their exercises. Tracking the extent of resistance helps me to monitor the progress the patient is making (which is empowering for them to see while also providing me with quantifiable measurements of improvement, which I can provide to insurance companies when needed).
Keep in mind: the tensioner is unique to the Pro model and is not on the Starter or Varsity model.
With the second-generation’s resistance dial, there was simply no objective way to keep resistance consistent from one session to the next (aside from asking for the patient’s feedback). It made it incredibly difficult to quantify and track how much tension my patients would use from one session to the next. I would try my best, but it was often a futile attempt. Yes, I can always quantify by reps, sets, the resistance band being used, etc., but that does little to help me gauge rotational or isometric force through the neck.
The new Iron Neck Pro model has thankfully given practitioners like me a quantifiable way to track the amount of resistance being used for a patient. Unlike the previous generation’s wheel, the new model uses a twisting mechanism that produces an audible “click” with each twist. You essentially get 10 audible clicks as you go from no resistance to maximal resistance.
There’s no way to quantify how much the resistance increases with each click, mind you, but that’s beside the point; I can now record an ordinal scale (three clicks of resistance, five clicks of resistance, etc.) of resistance, which allows me to better track the resistance I’m using and progressing with my patients.
Note: It’s possible that the tensioner mechanism inside will likely wear out a bit after excessive use, slightly changing the overall amount of resistance set with each click, but I’m in no way concerned about this if it were to happen. This hasn’t happened on my second-generation unit despite high levels of use in the clinic this past year.
Additionally, I found the sensitivity of the dial on the previous generation to be too sensitive to resistance adjustments for my personal liking; it seemed to go from zero resistance to a high level of resistance with very little turning of the dial (it was, essentially, a non-linear resistance increase). That was not a dealbreaker by any means, but rather a minor issue I had with it. (But for what it’s worth, as I said in my review of that version, I’d rather have it too sensitive than not sensitive enough.)
So, in case you can’t tell, this upgraded tensioner is a very well-welcomed upgrade for my usage with the device in the clinic.
Upgrade 2: A non-porous forehead pad
If you use the Iron Neck on yourself, this may not be an issue, but again, as a practitioner implementing the device within our clinic, I have multiple patients using a single model.
The previous generation of the Iron Neck Pro has interchangeable forehead pads made from a porous material, making it more susceptible to absorbing dirt, oil, and makeup and much tougher to clean. Thankfully, at least my patients don’t get sweaty when using it; otherwise, that would have been another issue altogether.
Related article: How to Fix Neck Pain from Squats (and why it happens) | Expert Insight
Cleaning and sanitizing any piece of equipment after each patient is a clinical priority, especially in the COVID and post-COVID era. Thankfully, the new interchangeable forehead pads on the new Iron Neck model are non-porous, making them a breeze to clean and dry off.
As an added bonus, so far in my early days of use with the third-generation, I am finding the new forehead pads to be more comfortable than those of the previous generation. As time goes on, I’ll gather further insight from my patients and get their feedback as well.
Upgrade 3: Reduced overall weight
You might not think it, but a lighter Iron Neck is a significant upgrade. It’s significant since a lighter weight will be less troublesome or stressful on a weak or dysfunctional neck. For the average individual looking to prevent neck injuries, this likely isn’t an issue. Still, it can make a notable difference for many of my cervical rehab patients for their first few sessions using the device.
For around 10 percent of all my patients I had used the previous generation with, I’d often start by letting them perform gentle, multidirectional movements without the iron neck being hooked up to a resistance band. For some of these patients (who were quite banged up but still appropriate for using the Iron Neck), it would take a session or two of just getting used to the weight of the device on their head (yes, people’s necks can be extraordinarily deconditioned).
To be clear, it’s not that the previous generation is too heavy—its weight is perfectly acceptable. Still, an even lighter model simply opens up the door even further as to when I can begin using the device on certain patients (when appropriate), so this is a big win.
Upgrade 4: Reduced overall size
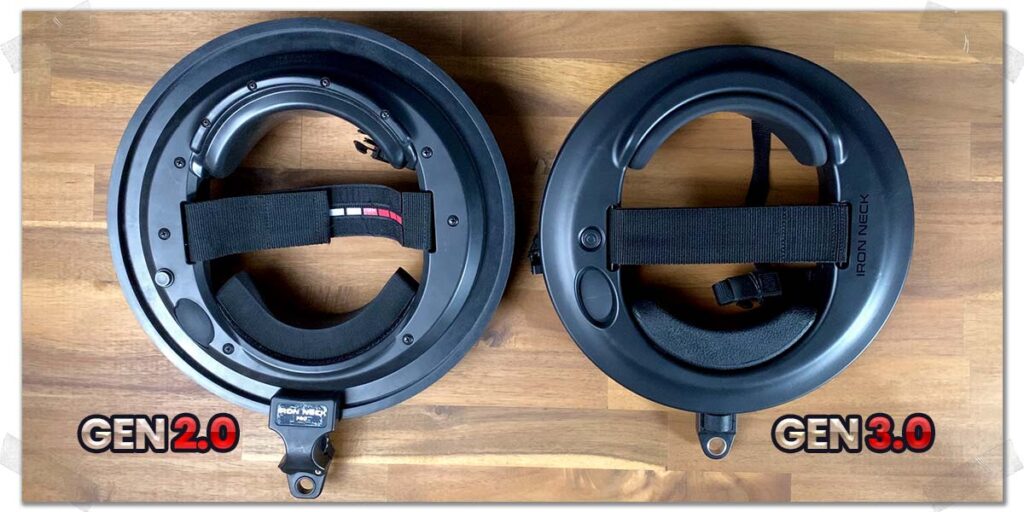
When comparing sizes between the previous generation to the current generation, the new Iron Neck Pro 3.0 is notably smaller in diameter compared to its predecessor.
A smaller overall diameter, to me, is a notable upgrade. Still, some people may not perceive this to be anything noteworthy. Personally, the less space my equipment takes up, the happier I am, provided there’s no sacrifice to its quality in the process (which there doesn’t seem to be with the 3.0).
Additionally, this newer generation looks more aesthetically pleasing (in my opinion, anyways) and less intimidating to new users within the clinic. Yes, the intimidation factor can be an issue for certain patients. If you’re using the Iron Neck on yourself, I doubt that size will make any sort of impact for you, personally.
Build quality on the new Iron Neck Pro 3.0
If you’ve read my review of the previous generation of the Iron Neck Pro, you’ll know that it’s been put through its paces and held up great; I’ve long lost count of how many patients I have used it with and how many dozens of sessions many of them have had with it. Even after a year of solid use within the clinic, the 2.0 version is holding up just fine.
This means that the 3.0 has some big shoes to fill. So far, so good. But this 3.0 will need a full year of use in the clinic before I can make a direct “how does it hold up?” comparison.
Comfort and fit of the new 3.0 model
The previous generation Iron Neck Pro model did a pretty notable job of providing adequate fit and comfort around the noggin of myself and those of my patients. Designing a piece of equipment that can feel snug yet comfortable (or at least tolerable) cannot be easy, as I would imagine.
I never had any gripes with comfort or fit when using the second-generation device on myself, and the vast majority of my patients reported the same. I’ve always said that it won’t be as comfortable as wearing your favorite ball cap, but it should by no means be uncomfortable, either.
Related article: Neck Pain with the Bench Press | Causes | Solutions (A PT Explains)
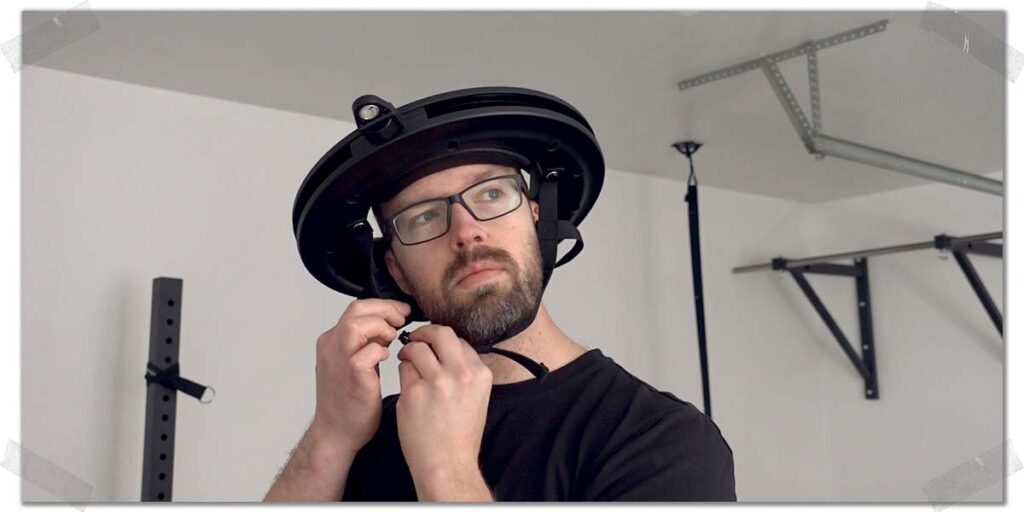
The 3.0 model so far is quite comfortable on the head. In fact, I’d go so far as to say it’s notably more comfortable. Additionally, it feels like a different type of comfort in that I can wear it for a more extended length of time before feeling the desire to take it off. I chalk all of this up to the interchangeable forehead pads feeling softer, allowing them to conform to my forehead better than the pads of the previous generation.
I haven’t had any issues with ensuring the device stays securely in place around my head when performing various rotational and isometric exercises, and I haven’t experienced any discomfort with its use.
Is the Iron Neck Pro 3.0 worth the upgrade?
Now that I’ve gone over the main differences between the previous and current generation of the Iron Neck Pro, here comes the million-dollar question:
Is it worth picking up the new version of the Iron Neck Pro?
Here’s the answer: If you already have the second-generation Iron Neck Pro, you can likely suffice with what you have. Yes, the 3.0 is quite a nice upgrade in a few departments. However, unless money is simply not an issue for you, the second generation is still a solid enough device that you’ll get what you need with that (we still use it in the clinic).
The 3.0 version simply takes an already great piece of equipment and makes it better in a few key ways, which may or may not be all that big of a deal, depending on your needs.
If you don’t have the previous generation Iron Neck Pro and are deciding between that or the 3.0 version, I suggest opting for the 3.0. The only exception would be if the few extra dollars for the cost of the 3.0 truly stretch your budget beyond your allotted limit.
Again, you’ll be just fine with the 2.0, but since the 3.0 takes an already good product and makes it better, I’d go for the current generation for a few extra bucks.
Frequently Asked Questions
There are a number of frequently asked questions floating around on the internet about the Iron Neck. While I can’t address all of them, some common questions that my patients and my online audience have are listed below. I hope they can help provide you with further valuable information.
Final thoughts
I’ve had great success with the second-generation Iron Neck Pro, and the few shortcomings I found with that particular model seem to have been adequately addressed with its new successor. Time will tell if it holds up just as well as the model I’ve used within the clinic over the past year, but so far, I don’t have any reasons to suspect that it won’t.
If you feel the Iron Neck is something you’d like to add to your arsenal of strengthening equipment, and it’s appropriate for you, you’ll likely have a piece of equipment that will hold up well to what you put it through and gain a stronger, more robust neck in the process.

Hi! I’m Jim Wittstrom, PT, DPT, CSCS, Pn1.
I am a physical therapist who is passionate about all things pertaining to strength & conditioning, human movement, injury prevention and rehabilitation. I created StrengthResurgence.com in order to help others become stronger and healthier. I also love helping aspiring students and therapists fulfill their dreams of becoming successful in school and within their clinical PT practice. Thanks for checking out my site!
