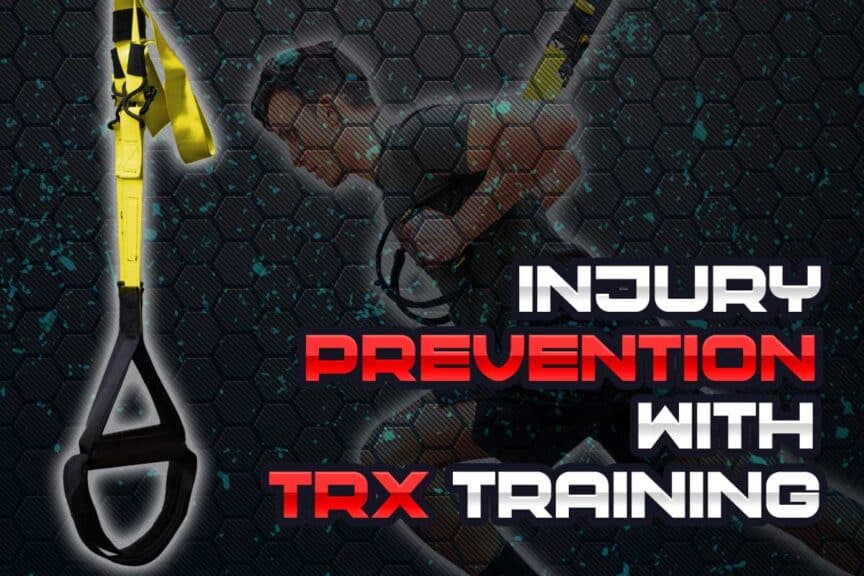
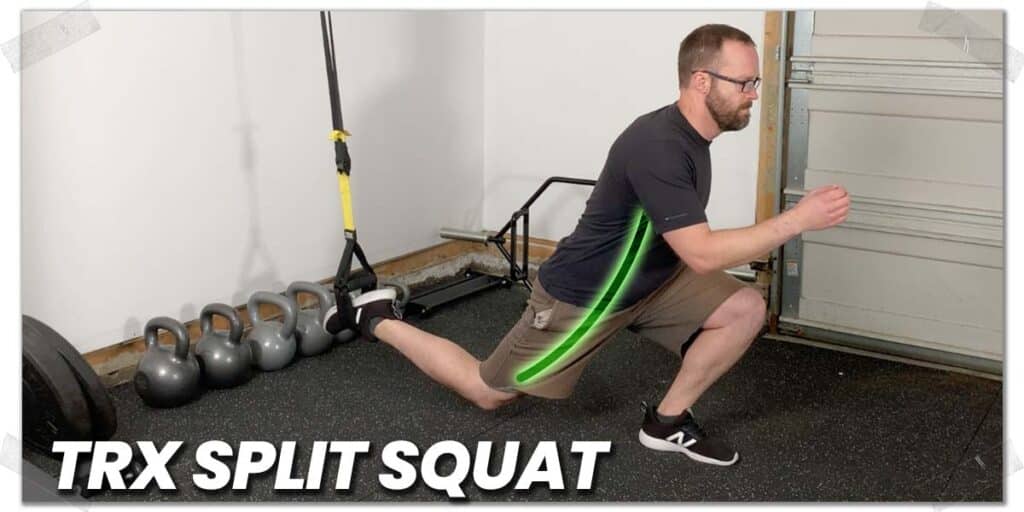
The TRX is an absolutely brilliant piece of fitness equipment. Whether you’re looking to perform functional movements, improve your mobility, increase strength and endurance, or simply become a bit more bulletproof against aches and pains, the TRX can be the ticket. So, this article is going to lay down the general information you’ll want to know for using a TRX for injury prevention.
And I’ll run you through a sample hybrid stretch-and-strengthen full-body TRX routine that is as simple as it is effective!
TRX training can help with injury prevention by strengthening muscles, improving endurance, and increasing mobility within your body. Enhancing three factors significantly reduces injury potential. An appropriately designed TRX routine performed a few times per week can help achieve these effects.
Since every individual has different physical abilities and overall health, the absolute best way to ensure you get the most out of your TRX injury prevention training will likely look a little bit different from one person to the next. And while I don’t know anything about your needs and abilities, I do know that injury prevention through physical exercise has universal concepts that can apply to nearly every individual.
So, let’s look at how to incorporate these principles into your TRX training for some serious results!
Principle 1: Use the TRX to challenge your strength AND endurance
Muscular strength refers to the amount of force a muscle can produce. Muscular endurance refers to a muscle’s ability to resist becoming tired (fatigued). Ensuring that your muscles have adequate amounts of both is critical for staving off injury.
Muscles that lack adequate strength and endurance are at greater risk of:
- Becoming strained, torn, or overworked (all of which can be painful)
- Becoming dysfunctional (leading to tightness, poor movement control, and pain)
- Becoming sarcopenic (lacking adequate mass, strength, and physical capacity)
To counteract these less-than-favorable conditions, your first line of defence will be TRX exercises that force your muscles to exert themselves against mild-to-moderate resistance.
Pro tip: If your leg muscles aren’t accustomed to resistance training, check out my article on how you can get your muscles to recover way faster after a workout.
There are literally thousands of exercises you can perform, however, picking and performing exercises with the following features will undoubtedly put you in the general ballpark for ensuring your muscles gain adequate strength and endurance:
- Perform your exercises in a slow and controlled manner. (The longer it takes to perform each repetition, the more challenging it will be for your muscles.) This concept is referred to as time under tension (TUT). Slower movements also help ensure you don’t strain a muscle by having it contract at a fast rate, which can sometimes strain the muscle.
- Pick some exercises that challenge multiple muscles at the same time (such as TRX squats). Challenging multiple muscle groups in a single exercise saves time during your workout and tends to be more functional (replicating the demands of everyday life and activities). This is often termed functional training and has some serious benefits for injury prevention training.
- Pick some exercises that challenge muscles you don’t often challenge much in your day-to-day lifestyle. This can include postural muscles in your upper back and shoulder region, arms, or other body parts you don’t routinely challenge.
- Pick some exercises that challenge your core muscles. The “core” refers to a general term for the muscles around your midsection, including your abdominals, obliques and lower back. If you want some outstanding core exercises that don’t involve a TRX, check out this article of mine, where I’ll show you how to safely blast your core!
- Stick to three or four sets per exercise. You can start with fewer than this and then work your way up as your body adapts.
- Each set should consist of between eight to fifteen repetitions. This is widely variable, however, stick within this general range for most exercises if you’re a beginner.
- The last repetition or two on each set should be challenging but be able to be completed with perfect form. If your form is breaking down, try to make the exercise or movement a bit less demanding for the time being.
Principle 2: Use the TRX to challenge your mobility
Muscular strength and endurance don’t mean much if your body doesn’t have the ability to move those muscles and subsequent joints through appropriate ranges of motion.
Research has routinely shown that body parts that lack adequate mobility are at an increased risk of physical injury. Thankfully the TRX is an outstanding piece of equipment for enhancing your body’s movement abilities.
As such, injury prevention training should always address any inadequate mobility within the body. This can be done without a TRX, of course, however, what makes the TRX brilliant for mobility training is two particular factors:
Factor 1: The ability to stretch and mobilize all the major muscle groups of the body
Factor 2: The ability to precisely control how much or little stretch goes into each movement.
Therefore, you’ll want to pick some movements that allow you to stretch your muscles and move your joints through large (but controlled) ranges of motion. One of the secrets to this is to implement principle 3, as this will undoubtedly be something you feel for yourself if you try it.
How to challenge your mobility
If you’re looking to improve your mobility, you’ll want to consider following a few fundamental principles to ensure maximal success. While you can make all sorts of notable improvements to your mobility through various stretching routines, the TRX will serve you in some very unique ways.
- Focus on stretching joints, not muscles. By targeting a joint, you’ll be stretching all of the muscles that cross over that joint, which will be much more time-efficient and functional.
- Keep your stretches very slow; fast, ballistic stretching is unlikely to give you any benefits.
- Don’t be afraid to perform dynamic stretches with your TRX. These are stretches that involve producing movement through the availability of your range of motion rather than holding a motionless stretch (a static stretch). (If you want to learn to reap the power of effective dynamic movements, check out this article of mine on the science of dynamic warmups.)
Principle 3: Perform exercises in different planes of movement
This might just be the most valuable principle you can implement when using your TRX for injury prevention. Why? Many active individuals make the mistake of performing exercises that all fall within the same plane of movement.
While exercising primarily within a single plane of movement is absolutely better than not exercising at all, a training routine that lacks multi-directional movement likely won’t reduce your chances of injury as much as one that incorporates such movements.
Why might this be? Well, the more balanced our movement abilities are from one plane to the next, the healthier our bodies tend to be. A training routine that optimizes your health and prevents injuries will challenge your body in three distinct planes of movement.
These planes include:
- The sagittal plane (forwards & backwards)
- The frontal plane (sideways movement)
- The transverse plane (twisting or rotating)
While the average individual produces a fair amount of sagittal-plane movement on a daily basis (squatting, lunging, walking, jogging, etc.), they often don’t perform much (or any) movement in the frontal or transverse plane. As such, the muscles responsible for moving and stretching in these planes can become tight, stiff, weak, and otherwise painful.
So, the solution is to grab hold of your TRX and move sideways, diagonally, and even rotate for some of your exercises.
Thankfully, it’s not overly complicated. Much of it comes down to taking traditional exercises or movements and performing them in a different direction. Here are some examples:
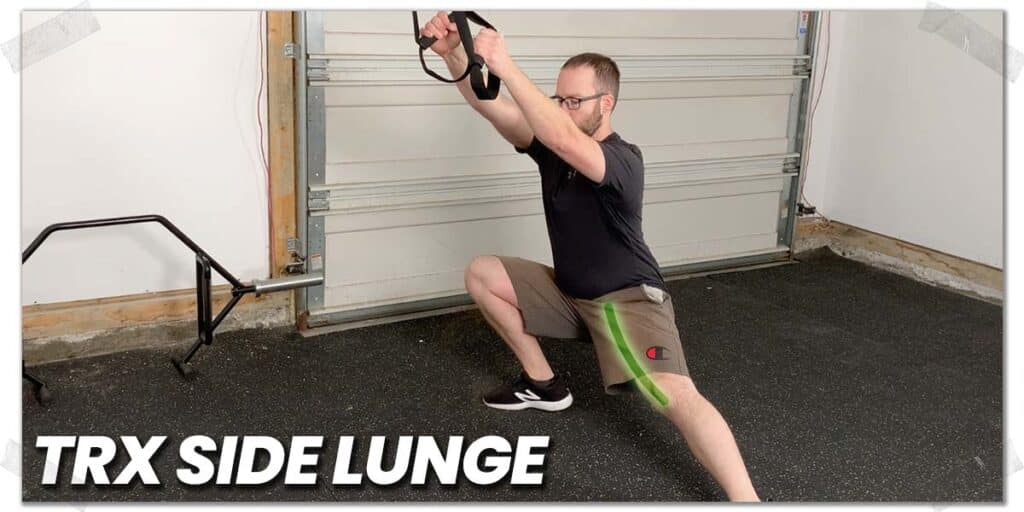
- Perform sideways lunges while holding onto the TRX (lunging from one side to the other).
- Perform single-arm rowing exercises where you reach backwards with your free arm, then rotate as you pull upwards with your rowing arm (see photo below). These types of rows can put some rotational (transverse plane) movement into your training.
- Perform chest flys or stretches. These movements open up your chest and stretch your shoulder joint (and pectoral muscles) by moving into the frontal plane.
Principle 4: Perform a consistent routine
The most effective TRX movements and exercises won’t mean much if you don’t perform them consistently. Once you have a series of exercises that you can put into a routine, you’ll need to stick to that routine; physical adaptations through exercise take time and consistent effort.
Whether you want to perform a full-body routine or opt for a training split (such as a lower-body routine, upper-body routine, etc.), you won’t have much success if you don’t stick to it.
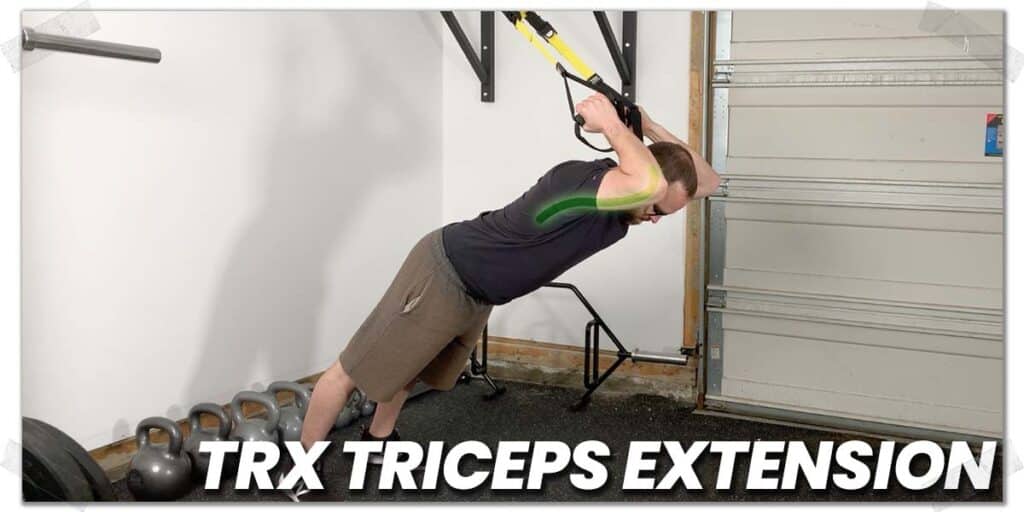
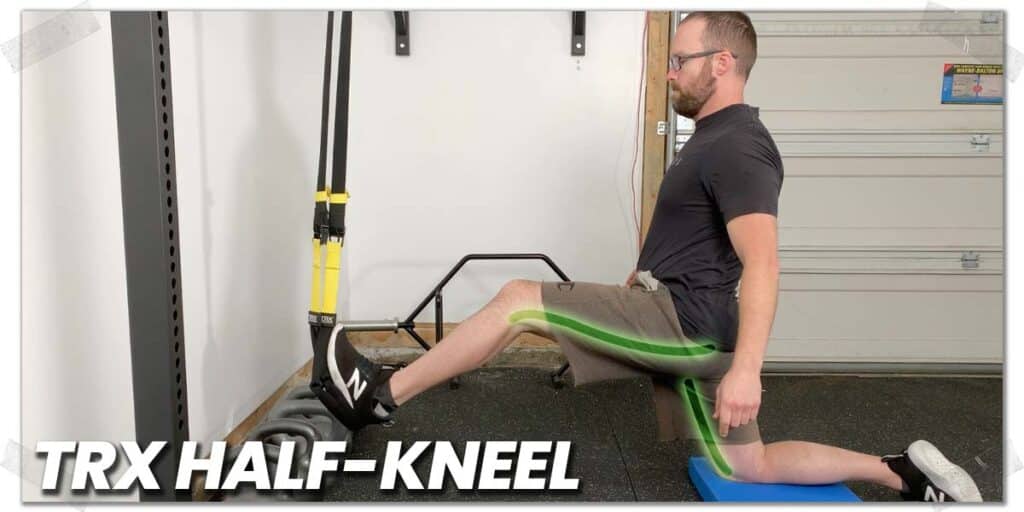
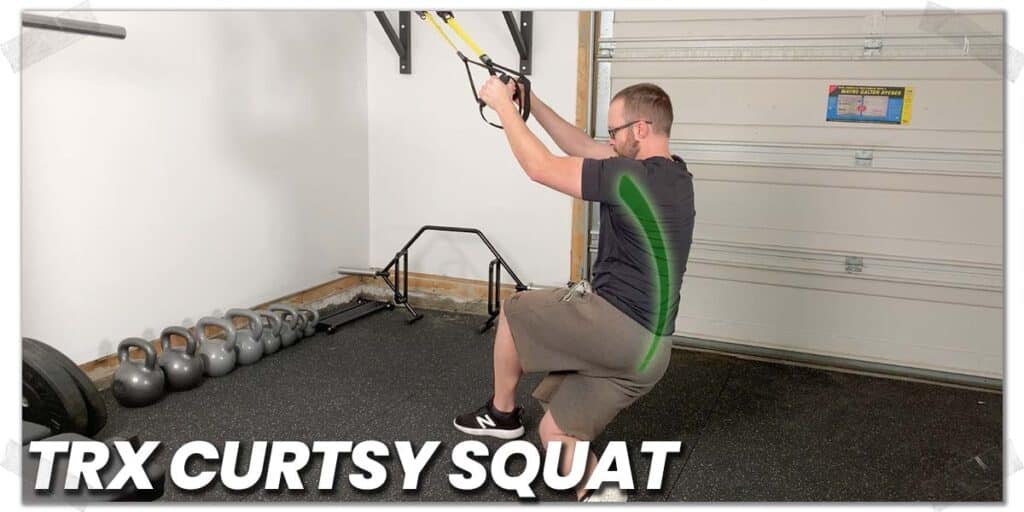
Sample routine 1: Full-body circuit (hybrid stretch-strengthen):
Notice how these exercises heavily use principle 3 (moving in different planes)? This multi-planar series of movements will help you challenge your muscles, tendons and joints in numerous directions, drastically reducing the likelihood of sustaining an injury from not moving well—or lacking strength—in these positions.
As a general rule: Muscles need to be exposed to resistance exercises two or three times per week for around six weeks for results to become evident (either visually or perceived).
The key to performing a consistent routine is to implement and follow principle 6, which I’ll talk about in a moment.
Principle 5: Look for your weak points
We’ve all got ’em. What might be a perfectly healthy, functional and adequate body part on my body might not be the same for you. And, of course, vice versa. As such, you’ll want to learn how to individualize and fine-tune your TRX training to best suit your needs and your body.
And, just so we’re clear: by “weak point,” I don’t necessarily mean physically weak; I mean a body part that doesn’t move well, feels stiff or tight, has been previously injured, or lacks muscular strength and endurance.
This can take a bit of practice and effort, but it’s worth doing — the more you can individualize your TRX exercises for your own needs, the better off you’ll be.
Here are some key points to be aware of when learning to look for your weak points:
- Compare your movement from one side of your body to the other. Small movement discrepancies aren’t likely a big deal, but if your movement is noticeably asymmetrical from one side to the other, you’ll want to select and perform exercises and movements that can help even out your movement.
- If a body part or group of muscles seems to tire out quicker on one side of your body than the other, it can signify a lack of muscular endurance. Since lower muscular endurance can increase the risk of injuries, you’ll want to perform exercises that specifically work to address this issue.
Principle 6: Pick movements you enjoy!
The process of becoming a healthier, stronger, and less injury-prone individual should be enjoyable. After all, the less enjoyable an activity or process is, the less likely you are to stick with it and see it through to the end.
So, it’s a much better idea to pick movements and exercises that are moderately helpful but highly enjoyable than movements that are highly beneficial but not enjoyable in the slightest.
The reason being is this is all about the long term; improvements to health and wellness take both time and consistent effort. This includes training for injury prevention as well.
So, the long road that needs to be travelled here should be one that’s fun, engaging, and gives you energy when you think about performing your next TRX session. At the end of the day, don’t complicate it; pick movements that feel good, are challenging, and keep you engaged in the process. If you can do this, you’ll have solved at least 80% of the equation for performing an effective TRX injury prevention routine!
Final thoughts
I cannot overstate enough just how downright effective the TRX can be for preventing injuries to your muscles, tendons, and joints. What’s even better, its effectiveness applies to highly athletic individuals, those brand new to fitness, and everyone else in between.
So, now that you know the general principles of using a TRX to keep yourself pain-free, go put them to use!

Hi! I’m Jim Wittstrom, PT, DPT, CSCS, Pn1.
I am a physical therapist who is passionate about all things pertaining to strength & conditioning, human movement, injury prevention and rehabilitation. I created StrengthResurgence.com in order to help others become stronger and healthier. I also love helping aspiring students and therapists fulfill their dreams of becoming successful in school and within their clinical PT practice. Thanks for checking out my site!
