The reverse Nordic curl (often shortened to “reverse Nordics”) is an exercise making its way up the ranks in popularity within the fitness community these days.
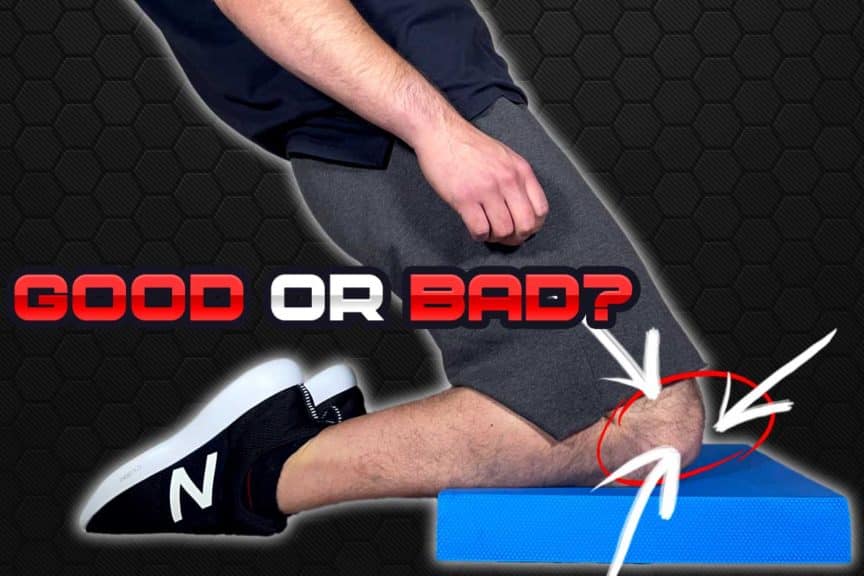
As many people begin to incorporate this deceptively challenging movement into their training, they often wonder if it is generally bad for the knees. While there can be a decent bit to unpack with this question, the general answer is relatively straightforward:
Reverse Nordics are not bad for your knees when performed with correct intensity through a range of motion appropriate for the tissues around your knees. Knowing how to modify the exercise to make it appropriate for you is the cornerstone for keeping your knees safe and the exercise effective.
Want more of the specifics? Keep on reading!
ARTICLE OVERVIEW (Quick Links)
Click/tap on any of the three following headlines to jump to that section of this article!
Basic anatomy: how and why reverse Nordics challenge the knees
Common issues: pain experienced with the reverse Nordics
How to: reducing knee pain with reverse Nordics
Related article: Six Practical Benefits of Reverse Nordic Curls (Are You Missing Out?)
Disclaimer: While I am a physical therapist, I am not YOUR physical therapist. As a result, I cannot tell you whether or not any treatments or training methodologies mentioned on this website or in this article may or may not be appropriate for you, including performing reverse Nordics. By following any information within this post, you are doing so at your own risk. You are advised to seek appropriate medical advice for any pain you may be experiencing.
Bad anything is bad for you. Nitroglycerin can save your life (best thing ever) in the moment of having a heart attack, but dosing it incorrectly, which is bad, can absolutely kill you (worst thing ever).
Exercise is the same way — it’s a physical medicine that can have therapeutic benefits when dosed properly with the right intensity, frequency and type of medicine (movement is medicine). This is exactly how you should view reverse Nordics.
- The reverse Nordic (the exercise) is the type of medication
- The intensity of the exercise (range of motion & resistance) is the concentration or potency of the medicine
- The volume (sets & reps) you do is the dosage of the medicine you’re taking
- How often the exercise is performed (frequency) is the dosage schedule
Get any of these wrong, and things can go south on you, making it “bad.” But dial them all in appropriately and you can reap some serious rewards (the same is true for any exercise).
Alright, with that analogy now having set the stage, let’s dive into the critical details.
Basic anatomy: How and why reverse Nordics challenge the knees
If you understand the basic anatomy of the knee (the joint and the muscles that cross the joint), not only will it be much easier for you to understand why the reverse Nordic can be challenging for your muscles, but it will become incredibly intuitive as to how to modify it to be appropriate for your own knees, ensuring you avoid pain while maximizing effectiveness.
The knee joint
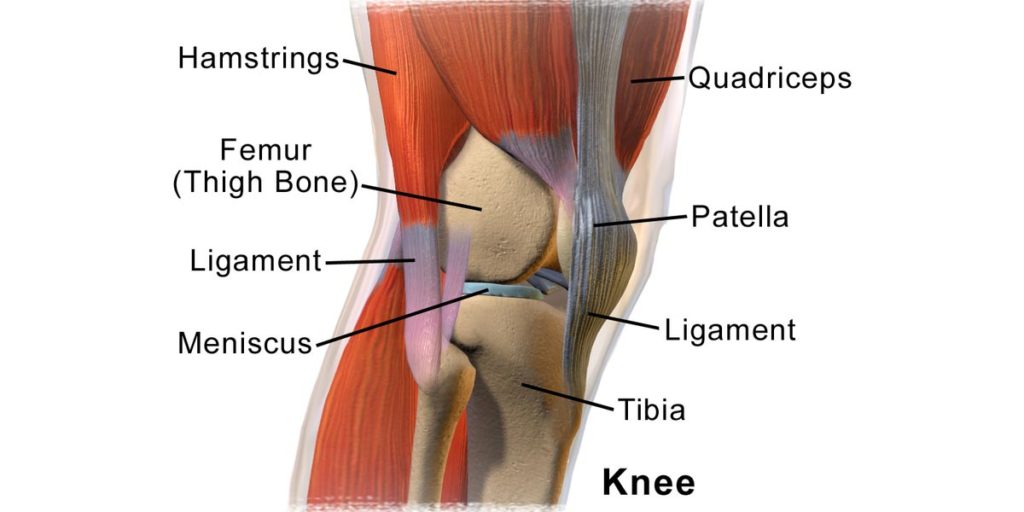
The knee joint is classified as a hinge joint, which means that it really only wants to move in one single plain (just like a door hinge). For our joints to move, the muscles that cross over that joint must contract (shorten), which results in movement.
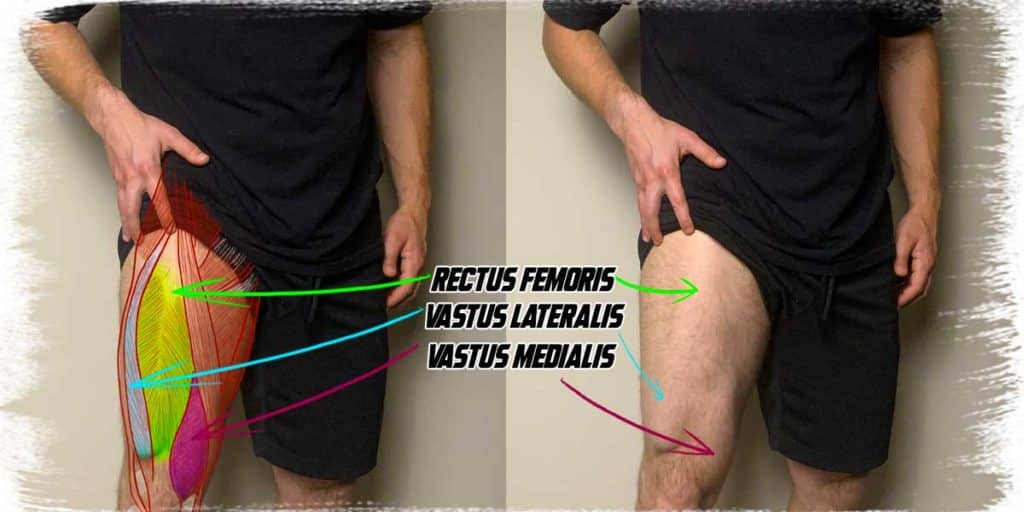
With the reverse Nordic, there’s a key group of four muscles (the quadriceps muscles) we’re interested in, with one of those four muscles in particular (the rectus femoris) playing a very unique role in this exercise (more on that in a bit).
When we bend our knees (for any movement, not just specifically with the reverse Nordic), the quadriceps muscles must lengthen out to allow this to occur. Then, when they contract, they pull the knee out of this position and, thus, straighten it out.
The rectus femoris muscle
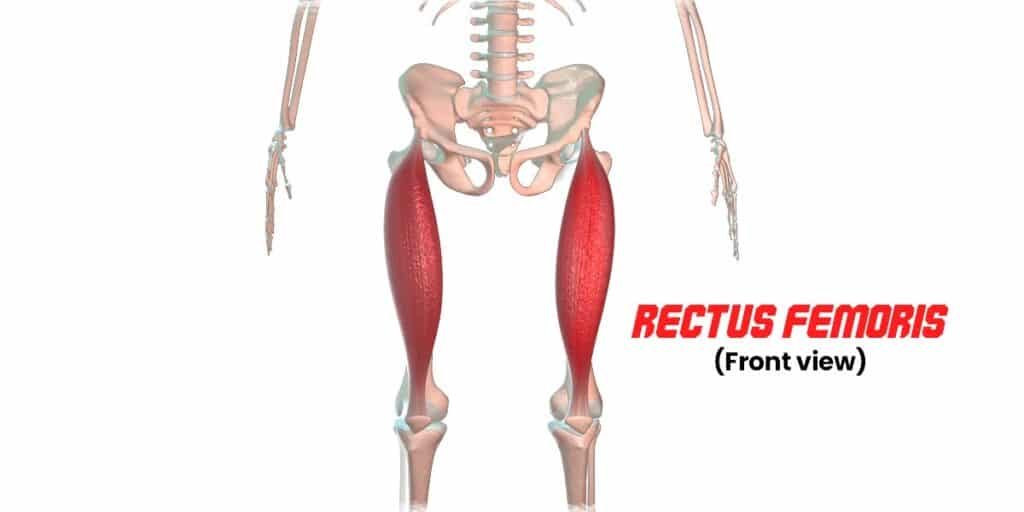
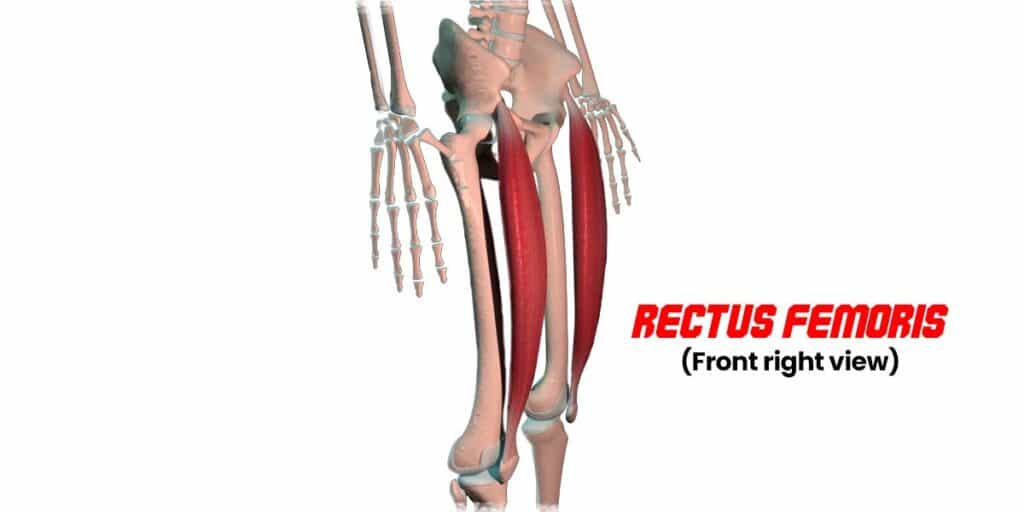
The rectus femoris is quite interesting when it comes to this knee-bending process occurring, especially with the reverse Nordic. Why? Because it is the only muscle of the quadriceps muscle group that crosses the knee joint AND the hip joint, making it what’s called a two-joint muscle. All of the other three quadriceps muscles attach onto the femur (thigh bone).
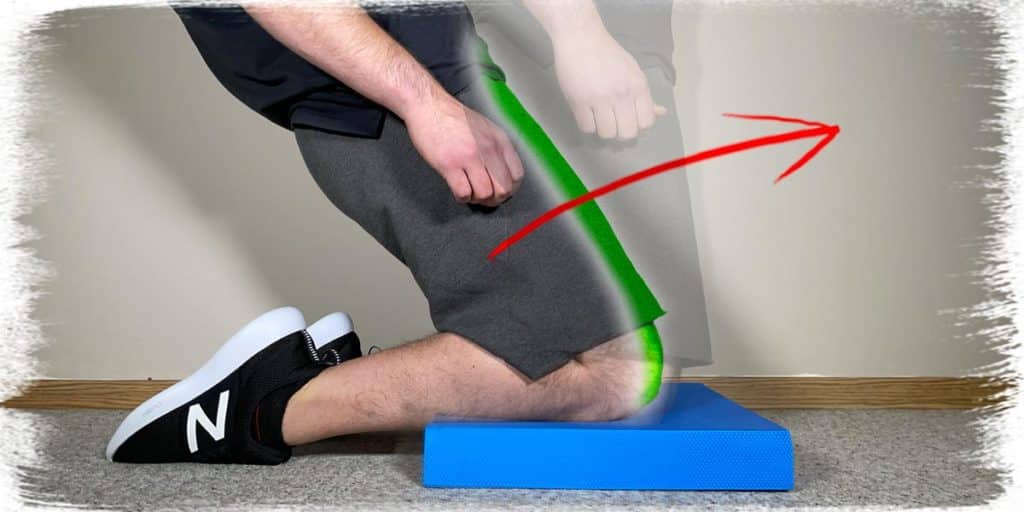
The reverse Nordic is an exercise that’s performed in a position of full hip extension (where the hips are pushed forward as far as possible). This makes the top portion of the rectus femoris have to stretch out. But since the knee is already bent, the bottom portion of this muscle is already stretched out. The result is that both ends of the muscle are now experiencing an intense stretch (since all the “slack” is taken out of the muscle from the knee being bent).
And since knee flexion continues to increase (as we lean back into the exercise), an even greater stretch goes into the bottom portion of this muscle, particularly just about the knee joint, where the muscle blends into what’s known as the common quadriceps tendon. This is why you feel an intense stretch at the top of your knee/bottom of your quadriceps as you lean back and perform the exercise.
When the rectus femoris is taut, it pulls on the quadriceps tendon, which then pulls on the remaining tissue beneath it (the patellar tendon), which attaches to the shinbone (the tibia).
Keep in mind that all three of the additional quadriceps muscles are lengthening and contracting to a certain extent throughout the movement, but the rectus femoris is taking the brunt of the stretch and producing a decent proportion of the quadriceps muscle contraction throughout the movement.
Common knee issues & pain experienced with the reverse Nordics
With otherwise healthy knees (knees that do not have arthritis, previous injuries, etc.), the most common issue that tends to present itself with the reverse Nordics is an overly intense stretching sensation or sensation of tightness in the front of the knees or just above the front of the knees (the quadriceps tendon region).
While there can be a variety of other reasons as to why knee pain is experienced with these exercises, the most common occurrence (in an otherwise healthy knee) is due to inadequate tissue extensibility (your muscles and tendons don’t have the supple, relaxed qualities they need).
Related article: Why You Have Reverse Nordic Knee Pain (And How to Fix it)
This inadequate tissue extensibility ultimately leads to to the inability of the muscle or tendon to lengthen out to an adequate extent. Regarding the reverse Nordic, it most often affects the rectus femoris and the common quadriceps tendon to which it attaches. The overstretching of these tissues produces pain that can be felt directly in the region that lacks proper extensibility; however, pain that is somatic in nature (i.e. pain arising from muscles and tendons) can refer elsewhere in the body. However, with reverse Nordics, this pain will often be felt in the lower portion of the thigh just above the knee joint.
If you happen to feel tension arising at the front, upper portion of your thigh, you’re very likely feeling the upper portion of the rectus femoris muscle receiving a stretch.
How to reduce the chances of knee pain with reverse Nordics
If you want a much greater in-depth breakdown of the specifics towards what you can do to reduce and hopefully eliminate reverse Nordic curl knee pain, you’ll want to read my article: Why You Have Reverse Nordic Knee Pain (And How to Fix it), where I talk about different strategies in much more detail.
However, if you’re looking for a quick rundown on things, I’ll list a few quick points below. So, to reduce the chances of incurring knee pain when performing the reverse Nordic curl, you’ll want to keep the following in mind:
Don’t skimp on the overall warmup
Make sure that your knee tissues and quadriceps are well prepared and warmed up for the exercise. A thorough and effective warmup will increase tissue extensibility to these muscles and tendons by enhancing blood flow to the region, elevating body temperature and decreasing fluid viscosity of the synovial fluid within the knee joint and surrounding tissues. A good warmup gets you to the point of breaking a mild sweat and can be done through cycling, rowing, jogging or any other continuous full-body activity done for five or ten minutes.
Pro tip: Wearing a neoprene knee sleeve (or sleeves) for your warmup and throughout your workout is a great way to retain extra warmth around the knee joint, decreasing fluid viscosity around the joint and help muscles and tendons to operate more effectively.
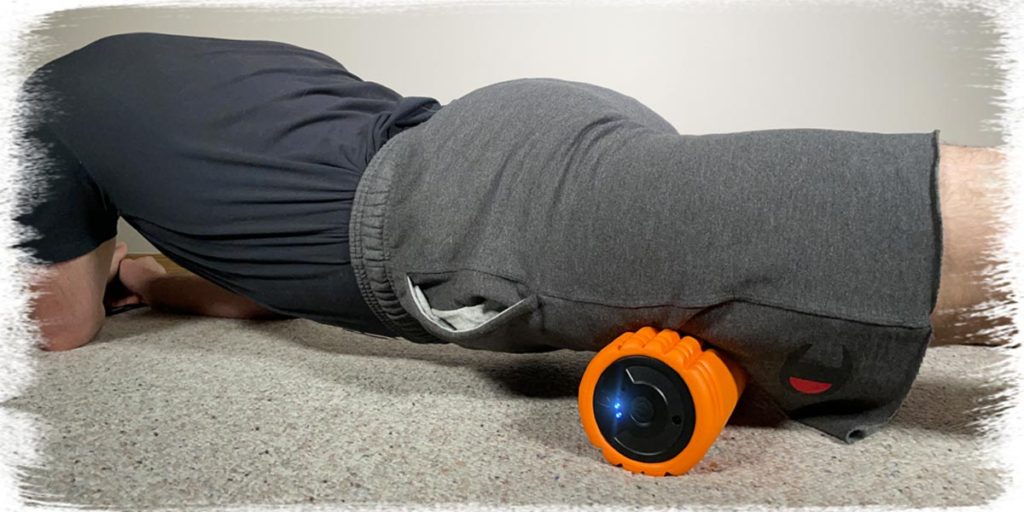
If you really want to warm up the tissues, you can consider doing some foam rolling on your quads or using some heating agents of some kind (heating pads, as an example); you can drape over your knees for a handful of minutes. This concentrated heat source can make a big difference in helping the quad tendon and quadriceps muscles improve their extensibility and fluid dynamics, which can reduce (or even eliminate) any knee pain that you may experience through stiff, immobile tissue restriction.
Know how to modify the exercise based on your own needs and abilities
Knowing how to modify the exercise can not only help spare you from unnecessary pain, but it can also make the overall movement way more effective in improving strength and mobility. Modifying the movement consists of finding ways to offload the demands that are creating the painful issues. If pain results from the range of motion you’re moving through, you’ll want to modify the overall range or stretch for those tissues.
If the pain occurs when your quadriceps contract (pulling yourself back up), you’ll need to find the appropriate modification to make without losing the overall efficacy of the exercise. Pain when the muscle or tendon contracts tends to signify an issue with the overall strength or health of the muscle and tendon, so you’ll likely need to make the exercise less demanding until they become strong enough to meet the more intense exercise demand.
Knowing how to individually tweak and tailor movements and exercises to the needs of your own body is one of the greatest skills you could ever have as an individual who works out and challenges their body regularly. There’s no point in doing an exercise if it’s painful or ineffective. Follow the tips in the more detailed article (mentioned above) to ensure you can keep performing these exercises in effective, healthy, and pain-free ways.
Perform working warmup sets
You also want to start in smaller ranges for your first one or two sets. These don’t have to count as actual “working sets” if you’re using this exercise as a part of an overall formal training program. Instead, you can perform your first one or two smaller range of motion exercises as part of a “working warmup” set.
Perform your first warmup set by staying within a range of motion in which you feel absolutely no stretch on the leaning back phase and only minimal muscular effort on the way back up to the starting position. No matter how small this range is, it will likely further help prepare your muscles and tendons for the following sets to come.
A second warmup set that uses about half to three-quarters of your normal range of motion is likely a good idea as well. Again, this further prepares your muscles, tendons and knee joint for your actual working sets. It also provides a nice opportunity for you to “check-in” with these tissues and structures to make sure that things are feeling good overall and that there will be no “hidden surprises” once you dive into your first working set.
Perform targeted tissue mobility tactics to the quadriceps
Targeted tissue mobility tactics such as IASTM, voodoo flossing, and decompressive cupping can significantly benefit the quad muscles and tendon for decreasing knee pain during this exercise. If you want the specifics, check out my article: Knees Over Toes Mobility: Unlock Your Mobility with these Techniques , where I give a detailed breakdown of specific self-treatment strategies you can use to improve the mobility and health of the tissues around your knees and ankles.
Start with lower volume and work up from there
Training volume refers to the overall number of sets that you perform multiplied by the overall number of repetitions you perform. If you’re unaccustomed to performing movement similar to the reverse Nordic curl, starting with a smaller overall training volume may be a wise move to make to ensure that you don’t over-exert any of the tendons or muscles of the quadriceps. Consider increasing your repetitions each week or adding in an additional set every other week if you’re just starting out but notice some discomfort.
Be patient
Getting your tissues healthy again so that they’re not painful in any way when performing reverse Nordic curls takes a bit of time in addition to continual effort. It’s not uncommon for this exercise to feel a bit aggressive on your knees or thighs as you first start out. Don’t try to be a hero and blatantly push through pain/discomfort, thinking that doing so will solve the problems. You’re much better off acknowledging that it will take some time for your tissues to adapt to the demands you’re imposing on them.
Final thoughts
Reverse Nordics aren’t bad for your knees. While no single exercise is appropriate for every individual, the reverse Nordic curl — when implemented appropriately and modified as needed on an individual basis — is a great exercise to consider for improving overall tissue strength, mobility and resiliency in the quadriceps muscles and the quadriceps tendon.
If you’re having some discomfort or pain with this movement, it doesn’t necessarily mean that you should never do the exercise; instead, it’s a good idea to work to understand why you’re experiencing the pain and how to go about eliminating its presence. It may not be the exercise for you if you have a history of various knee injuries or have osteoarthritis. But if your knees are otherwise healthy, it can be a great movement to incorporate into your training.

Hi! I’m Jim Wittstrom, PT, DPT, CSCS, Pn1.
I am a physical therapist who is passionate about all things pertaining to strength & conditioning, human movement, injury prevention and rehabilitation. I created StrengthResurgence.com in order to help others become stronger and healthier. I also love helping aspiring students and therapists fulfill their dreams of becoming successful in school and within their clinical PT practice. Thanks for checking out my site!
