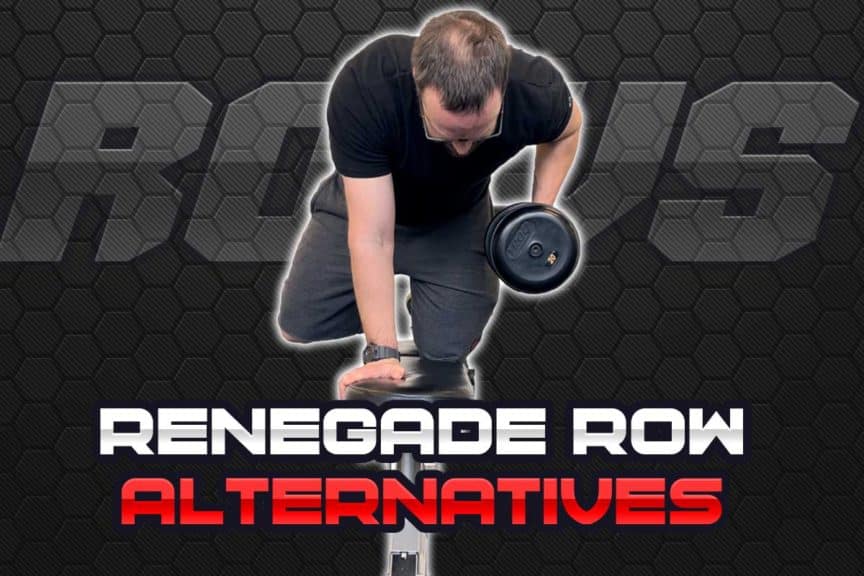
The renegade row is a great exercise, but it’s not for everyone. Sometimes even the fittest and most experienced individuals tend to avoid this exercise due to abnormal discomfort their bodies experience, a lack of enjoyment from the exercise, or any other variety of reasons. Whatever the reason(s) may be, there are plenty of great alternative exercises that can be performed that are very similar to the renegade row.
The best renegade row alternatives are:
- The bird dog row
- The planked vertical row
- The prone incline row
- The planked rotational row-to-press
- The planked horizontal row.
Each of these exercise variations greatly mimics the renegade row while simultaneously providing unique benefits of their own.
If you want to know the specifics of performing each of these great exercises, including how each one is similar to the renegade row while also being unique, be sure to keep on reading this article. This article will cover all that you need to know to perform each exercise with supreme confidence. Confidence will allow you to not only stay safe but to get the most out of each exercise as well.
ARTICLE OVERVIEW (Quick Links)
Click/tap on any of the following exercises to instantly jump to that section of the article!
Exercise 1: The bird dog row
Exercise 2: The planked row-to-press
Exercise 3: The planked vertical row
Exercise 4: The prone incline row
Exercise 5: The planked horizontal row
Related article: The Six Best Alternative Exercises to the Ab Wheel | You Will Feel It
Disclaimer: While I am a physical therapist, I am not YOUR physical therapist. As a result, I cannot tell you whether or not any treatments or exercises mentioned on this website or in this article may or may not be appropriate for you, including rowing exercises. By following any information within this post, you are doing so at your own risk. You are advised to seek appropriate medical advice for any pain you may be experiencing.
Exercise 1: The bird dog row
This exercise is the result of crossing a traditional bird dog exercise with a classic single-arm bent-over row. The traditional single-arm row is often performed with one arm and the knee of the same side resting on the bench and the opposite foot on the floor. Nothing wrong with this, as it allows the lifter to focus on the rowing motion by having a stable surface to row from.
But let’s shake that up by performing the row while balancing from the traditional bird dog position.
Now we’re talking! The result is some major anti-rotational training for the core, meaning the body’s core muscles must resist rotating or turning to one side.
To perform the bird dog row:
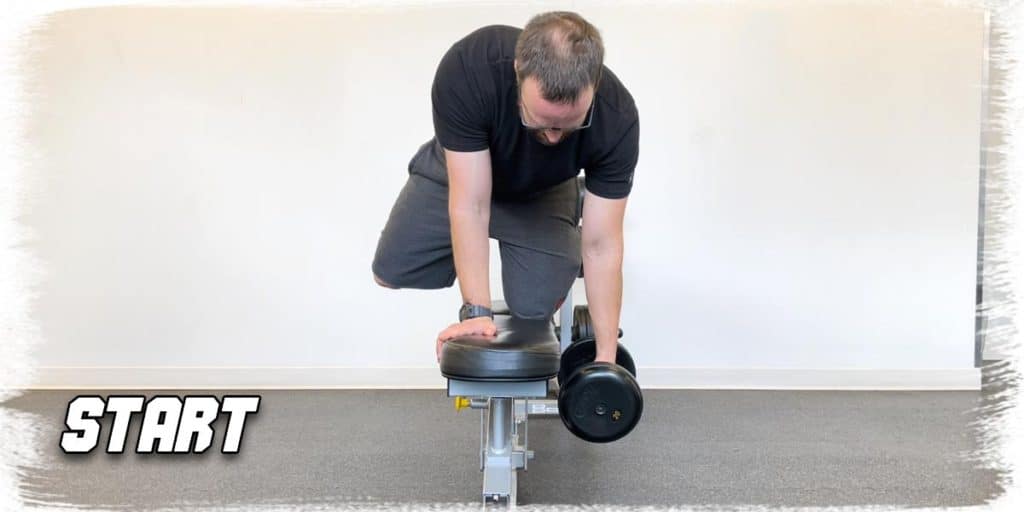
- Start with the dumbbell or kettlebell on the ground and have both knees and hands resting on the workout bench.
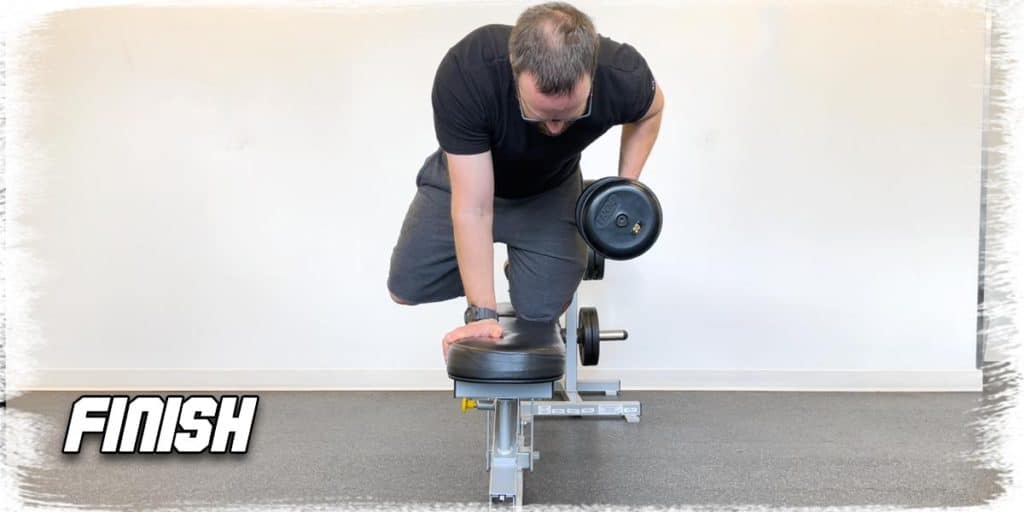
- Reach down, grab the weight and bring it up to the height of the bench. Next, lift your opposite-side knee off the bench. Hold your hips and spine level so that they don’t rotate or roll side to side.
- As you keep your hips level and your back flat, row the weight up as high as possible, slowly lower it down until your arm is straight (but don’t let your hips or back rotate).
- Repeat for as many reps as desired. Try to find the optimal weight that allows you to fight like crazy to stay stable while maintaining perfect form.
Pro Tip: If you need a bit of added stability, place your toe down onto the bench, which will help give you a bit of stability while still affording you a decent challenge.
Exercise 2: The planked row-to-press
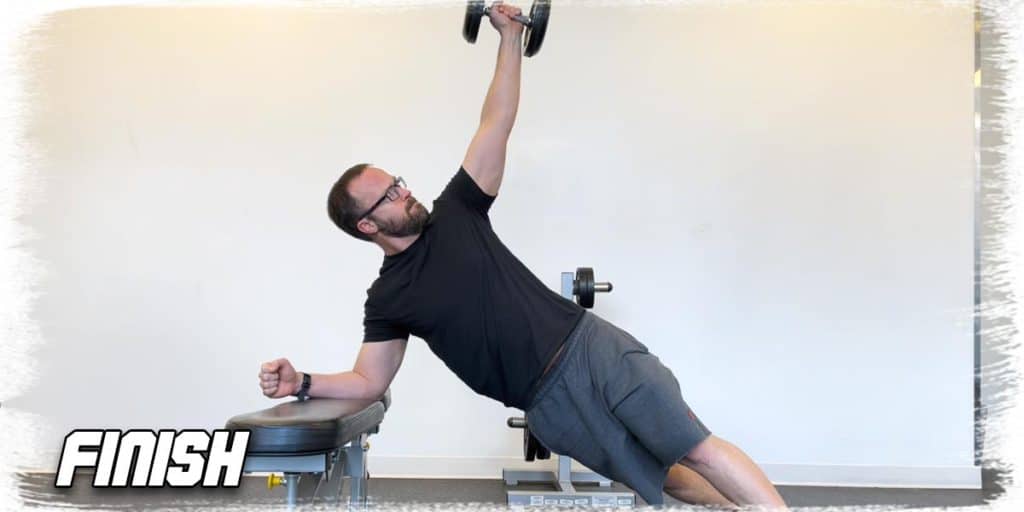
The plank row-to-press is one of my favorite exercises. There are different ways to perform it, but the way I’ll describe it below is my favorite version. It will tax your core and shoulders like crazy, all while also getting you to produce a single-arm row. This one is a moneymaker.
To perform the planked row-to-press:
- Rest one of your forearms on a workout bench while keeping your body in a plank position. Next, with your free arm, reach down to grab the dumbbell you’ll be using.
- While rowing the weight upwards to your chest, begin to rotate your body to the side that you’re performing the rowing action. You are performing a standard planked row, but will continue the motion upwards once you’ve rowed as high as possible.
- By the time you’ve rowed the weight as high as you can, your body should be rotated far enough that you continue the row upwards, quickly beginning to turn the pulling vertical pulling motion into a vertical pressing motion. Continue to press the weight upwards until your arm is straight.
- Make sure to keep your arm close to your side throughout the entire process and perform the entire row-and-press without stopping anywhere in between.
- Lower the weight back down in a controlled manner and repeat for your desired number of repetitions.
Related article: 5 Core Exercises WAY BETTER than Russian Twists (Save Your Spine)
Exercise 3: The planked vertical row
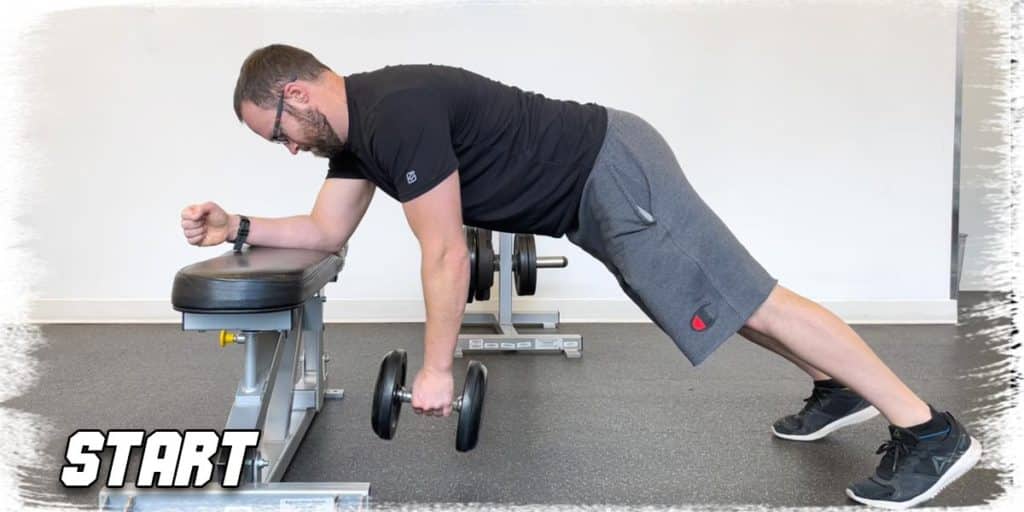
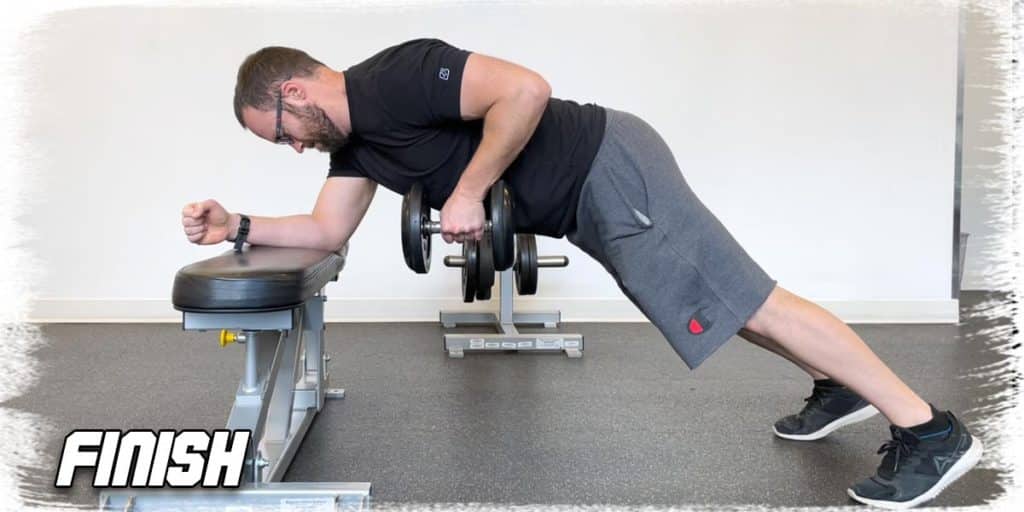
If you find the plank row-to-press a bit too challenging, a great alternative to try that is slightly regressed from the former exercise is the planked vertical row. This movement requires activation and control throughout the core, co-contraction (sustained contraction of multiple muscles at the same time) around the planking shoulder while requiring contraction of the muscles of the back for the rowing arm.
To perform the planked vertical row:
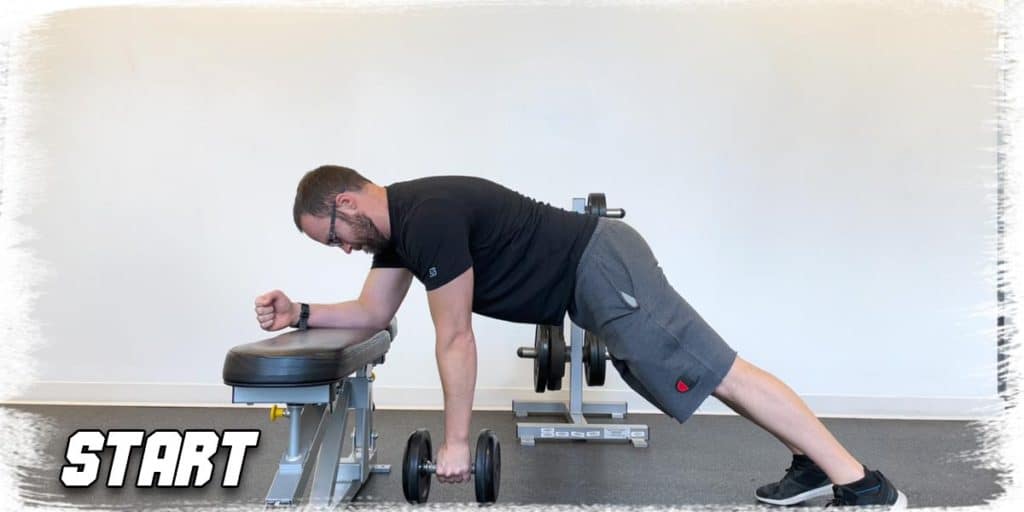
- Set yourself up into a plank position with one forearm (or hand) resting on a bench. Your other arm will be holding the weight (such as a dumbbell or kettlebell). Whether you choose to plank on the bench from your forearm or with your hand (a straight arm) is up to you. I personally like the forearm plank as I find it more challenging overall.
- Once you’re in a plank position, keep your hips level and your back straight (you can poke your butt up in the air a wee little bit if the full plank position makes your lower back feel tight).
- Let the arm holding the weight go as straight as it can without letting it rotate your hips or lower back.
- Hold the plank position as you row the weight up to our chest as high as possible. Slowly return to the starting position and repeat.
Bonus: If you’re looking for an added challenge, you can try performing the exercise with one foot lifted off the ground. The foot you lift will be the opposite side of the weight you’re holding in your hand.
This added challenge taxes the core and your overall movement control even more since you now only have two points of contact beneath you inserted of three!
Exercise 4: The prone incline row
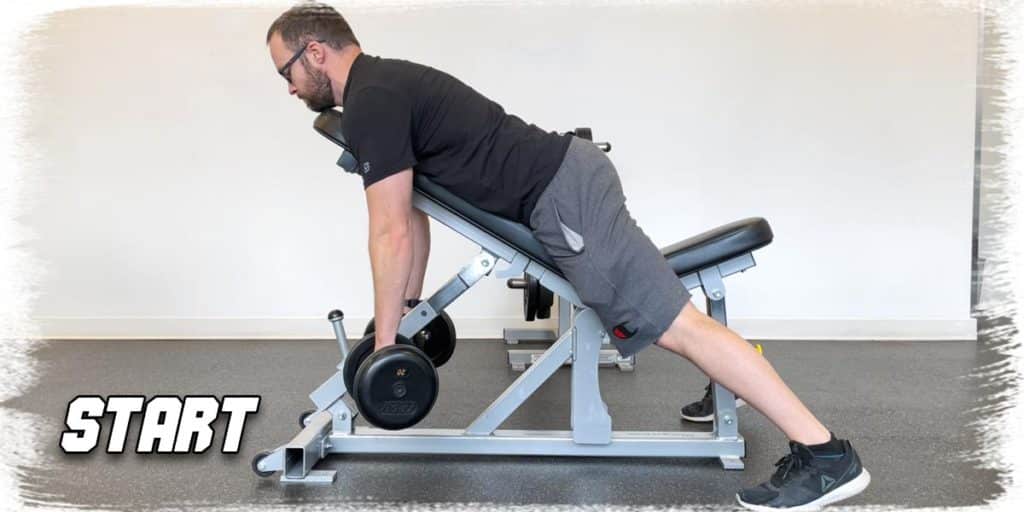
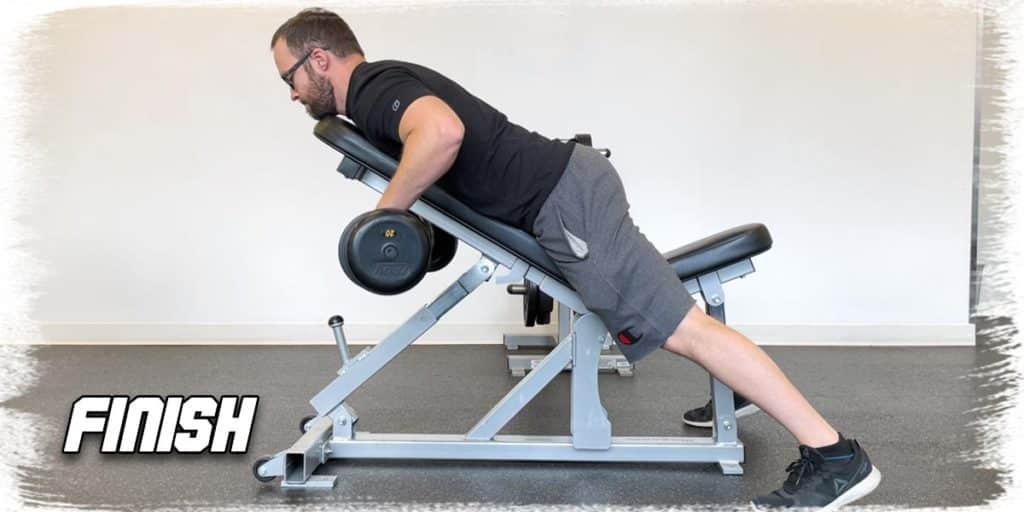
The prone incline row is a solid exercise choice if you want a row-dominant exercise that isn’t overly complex. It greatly mimics the horizontal rowing demands of the traditional renegade row but without any required core engagement throughout the process.
Consider this a great regression exercise for those who just find the renegade row a bit too taxing or challenging to perform.
To perform the prone incline row:
- Set up a workout bench at a moderate incline and lay facing forwards so that your chest is in contact with the bench’s surface.
- Let your arms hang straight beneath you while holding your weights
- Pull the weight directly upwards as high as possible while keeping your chest in contact with the bench.
- Slowly lower down and repeat.
Note: You can try various hand positions when performing the row; each one has its unique benefits. You can try underhand rows, overhand rows, or neutral-grip rows (where your palms face one another).
Exercise 5: The planked horizontal row
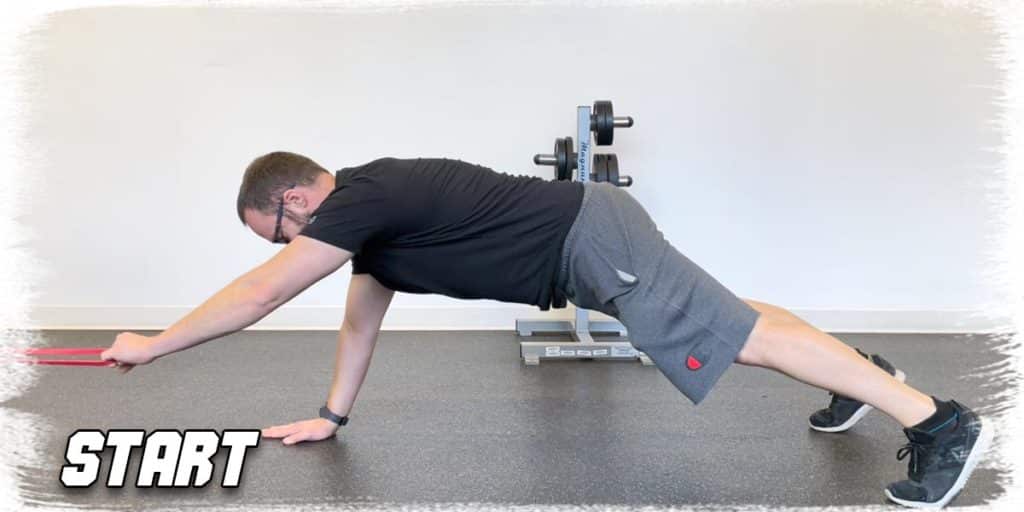
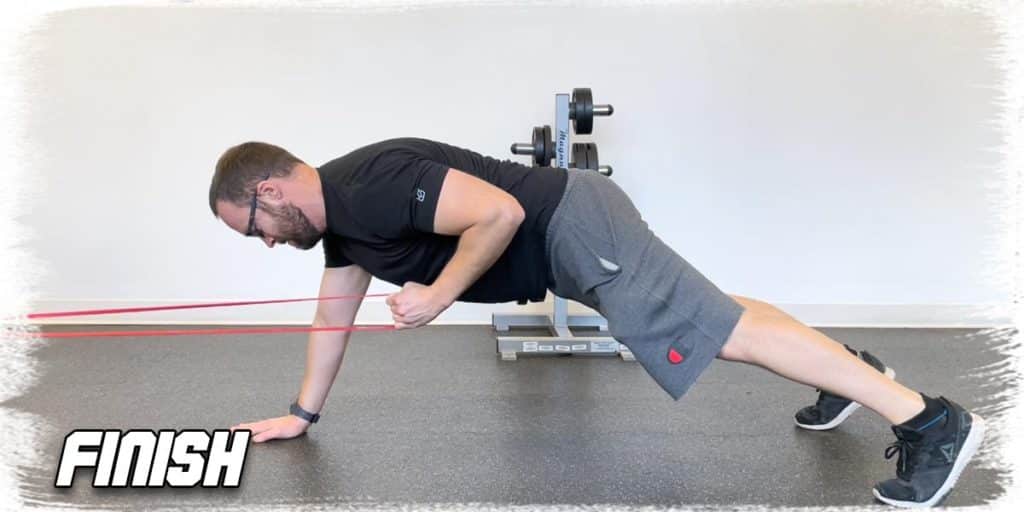
The planked horizontal row is unique from the other rows performed in this article since it’s the only row that has you pulling the resistance horizontally rather than vertically. While the back muscles are still working to produce the horizontal row, there’s a slight difference in terms of which back muscles are recruited and used.
Both the horizontal and vertical row will require the latissimus dorsi to do a lot of the work. However, the vertical row also recruits more of the rhomboid muscles (which sit between the shoulder blades). In contrast, the horizontal row forces most of the movement to be performed by the latissimus muscle itself.
Nonetheless, your core will still be working aggressively to hold you in a solid plank position as you perform the exercise.
*You can perform this exercise with either a cable pulley machine or a resistance band*
To perform the planked horizontal row:
- Anchor a resistance band to a stationary device that won’t move, and keep the anchor point at a height off the floor that will allow you to perform a horizontal row.
- Move back far enough that you will have appropriate resistance on the band when performing your row.
- Assume the plank position (from your knees or your toes).
- Let your rowing arm straighten fully, and then pull your arm down using the rowing motion.
- Slowly let your arm lengthen out again and repeat.
Remember: Be sure to keep your hips level and remain motionless around your midsection, as this will help to ensure that your core muscles stay engaged throughout the exercise!
Final thoughts
While the renegade row is an ideal exercise for many individuals, there are plenty of individuals who will likely be better off performing a variation of this movement instead; as is the case with any exercise, what may be appropriate for some won’t be appropriate for others.
Give the exercise variations within this article a try if you’re looking for some similar yet uniquely different rowing exercises when compared to renegade rows. You’ll likely get an effective challenge out of each one, allowing you to challenge your core and back muscles without having to do a single renegade row.

Hi! I’m Jim Wittstrom, PT, DPT, CSCS, Pn1.
I am a physical therapist who is passionate about all things pertaining to strength & conditioning, human movement, injury prevention and rehabilitation. I created StrengthResurgence.com in order to help others become stronger and healthier. I also love helping aspiring students and therapists fulfill their dreams of becoming successful in school and within their clinical PT practice. Thanks for checking out my site!

