Stiff ankles are no fun. And the only thing better than getting them un-stiffened is getting them un-stiffened with exercises that are simple, straightforward and easy to perform. And while there are numerous exercises and ways you can work on improving your ankle mobility all by yourself, the four easy exercises in this article can help improve your ankle mobility in all the general directions in which it can move.
The best exercises to improve general stiffness of your ankles in all directions are the dog leash exercise for improving dorsiflexion, the kneeling foam roller exercise for improving plantar flexion and the strap wrap technique for improving ankle inversion and eversion.
If you’re interested in learning the specifics of these rather straightforward, yet effective exercises, be sure to keep on reading as I’ll be breaking each one of them down in detail. This will help ensure that you have confidence in performing the movements in ways that are both comfortable and effective.
ARTICLE OVERVIEW
The following bullet points are quick links – simply click/tap on any of them to instantly jump to that specific section of the article.
- Exercise 1: The dog leash for improving dorsiflexion
- Exercise 2: The kneeling foam roller for improving plantar flexion
- Exercise 3: The wrapped strap for ankle inversion
- Exercise 4: The wrapped strap for ankle eversion
- Bonus: Using the MOBO board for improving joint mobility and more
Keep in mind that ankle stiffness can be the result of different factors, including joint stiffness and/or muscle stiffness. Each of these exercises below will help to target joint stiffness and muscle stiffness, which means that these exercises are also rather efficient in addition to being effective.
Related article: The Seven Best Ways to Massage Your Calf Muscles all by Yourself
Disclaimer: While I am a physical therapist, I am not YOUR physical therapist. As a result, I cannot tell you whether or not any treatments mentioned on this website or in this article may or may not be appropriate for you, including ankle exercises. By following any information within this post, you are doing so at your own risk. You are advised to seek appropriate medical advice for any pain you may be experiencing.
Exercise 1: The dog leash for improving dorsiflexion
The dog leash exercise is a great exercise you can use in order to improve dorsiflexion, which is the movement that occurs when you pull the topside of your foot up towards you.
This exercise helps to mobilize the talocrural joint, which is the joint that connects the bottom of your shin bone (the tiba) with the talus bone.
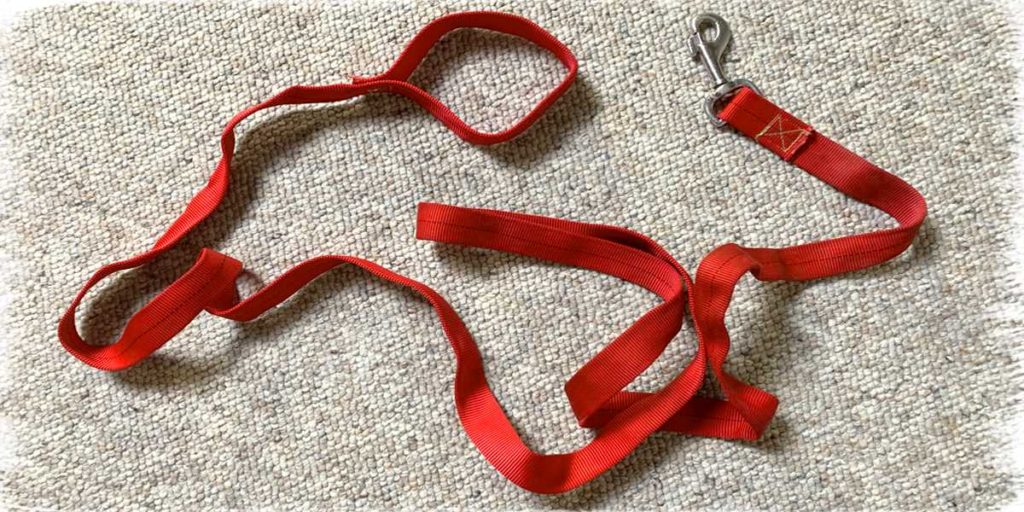
All you need in order to successfully perform this exercise is a strap with a loop on one of its ends (a dog leash works great, hence the name).
How to perform the dog leash exercise
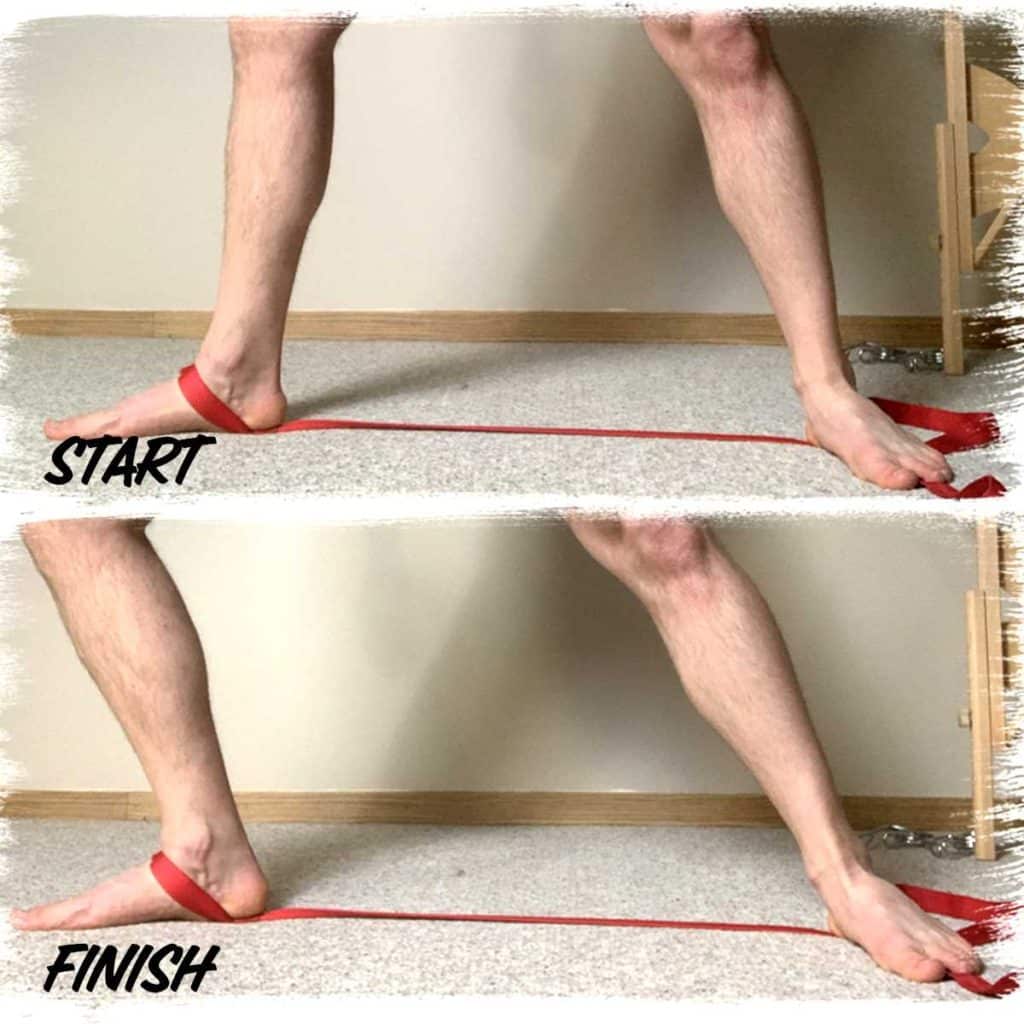
Put the looped end of the strap around the ankle you want to mobilize and make sure that the loop is sitting just beneath the bottom of your shin bone; if it’s sitting on your shin bone then the exercise isn’t going to help mobilize your ankle.
With the loop sitting in the right place, make sure the strap is running in the direction directly behind your ankle.
Next, take your other leg and step on the strap, making sure that there’s no slack in the strap between your feet.
Now slowly lunge forward while keeping your front foot flat on the ground. Try to push your knee out past your toes while doing so. If there’s enough tension on the strap, you’ll feel it pulling the top of your ankle (the talus bone) backwards while your shin tries to move forwards.
This is the mobilization force we are looking/feeling for.
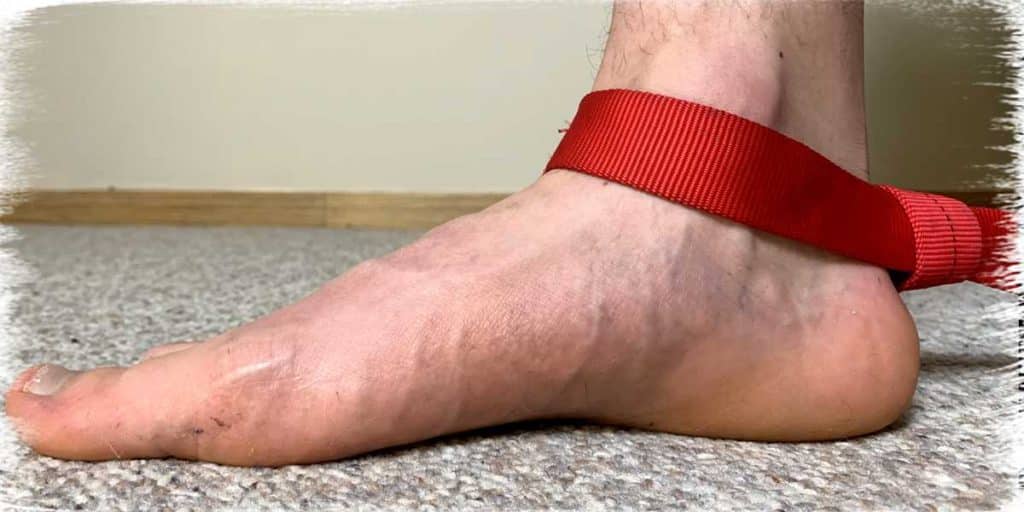
If you didn’t feel like the movement helped with mobilizing your ankle joint, you can try modifying the position of the leash to match the picture shown below. Just be sure to keep the loop beneath your inside and outside ankle bone (the medial and lateral malleolus, respectively).
Once you’ve reached as far as you can go, come back to your starting position and repeat the movement for your desired number of repetitions. Twenty or so is usually a good starting point if you’re new to the exercise.
Exercise 2: The kneeling foam roller for improving plantar flexion
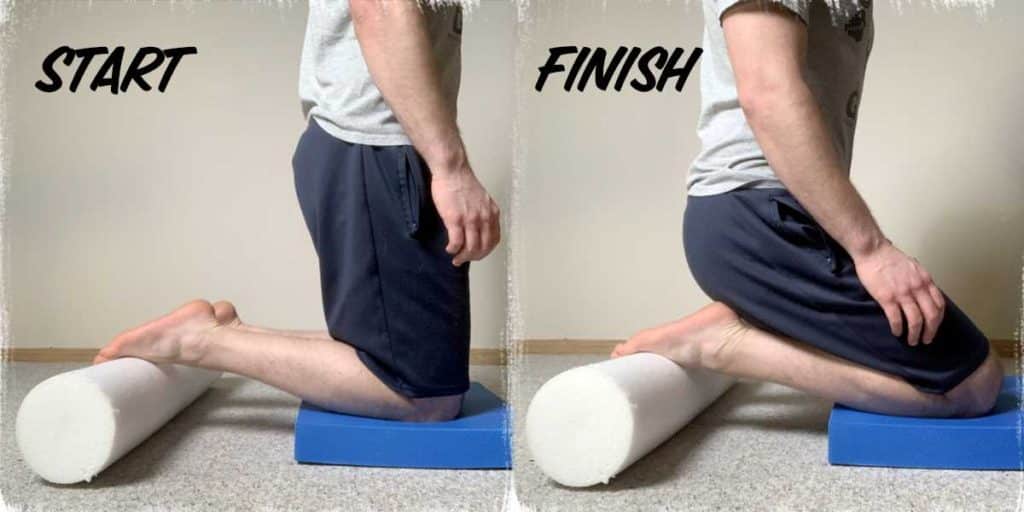
This is one of my favourite exercises to use on myself when I feel my ankles are stiff and in need of some fine-tuned plantar flexion mobilization. Plantar flexion is the movement of pushing the topside of your foot away from you (think of the motion of stepping on the gas pedal when you drive).
For this exercise, you’ll need a foam roller or something of similar size and firmness. I personally like using a standard foam roller since it’s the right height AND has some give to it, making the movement more comfortable when performing.
Related article: IASTM: Here’s How it Works to Decrease Pain and Improve Mobility
Make sure you have a soft pillow, folded towel, etc. to kneel on as well if you don’t like having your knees on the hard ground. I use an Airex pad, as these things have a million uses, this exercise being one of them.
How to perform the kneeling foam roller exercise
With the foam roller laying on the ground, get down into a kneeling position and place the topside of your feet on the roller behind you.
Next, slowly kneel backwards, bringing your bum towards your heels. Go slowly and only as far as comfortable. You should feel your ankles having to plantar flex (move downwards) a bit more than what they could otherwise achieve on their own. Once you’ve gone as far as you want, you can hang out in that position for a few seconds or instantly begin moving back to your starting position.
Repeat for as many desired repetitions as you feel necessary. Ten to twenty usually tends to be a good zone of repetitions to play around with based on how much force you’re using with each rep.
Exercise 3: The wrapped strap for ankle inversion
Ankle inversion is one of the movements that the foot and ankle joint produce. It’s the movement that occurs when you try to pull the inside edge of your foot up towards your face.
This motion is often limited by a couple of muscles and their respective tendons that run down the outside of the lower leg and attach onto the outside of the foot. These muscles are known as the peroneal (or fibularis) muscles. If these muscles get tight, ankle inversion becomes rather limited or restricted, often producing a feeling of tightness around the outside of the leg and/or ankle.
How to perform the wrapped strap exercise for ankle inversion
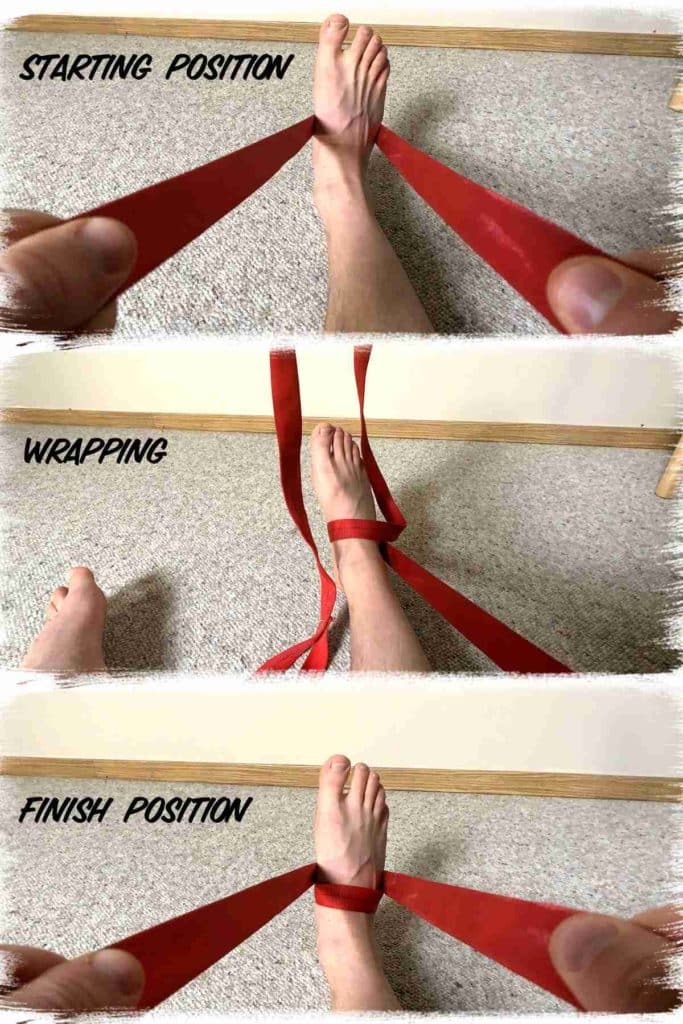
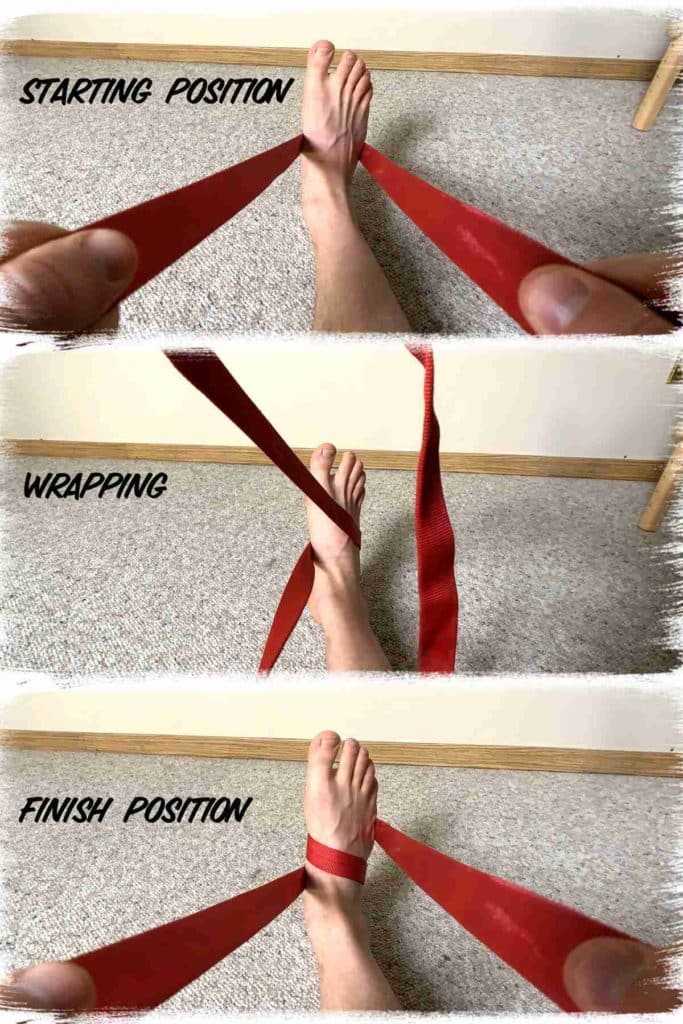
Using a strap of some kind (you can use the dog leash or strap you used from the first exercise in this article), hold onto each end and place the middle portion of the strap across the bottom of your foot, creating a stirrup.
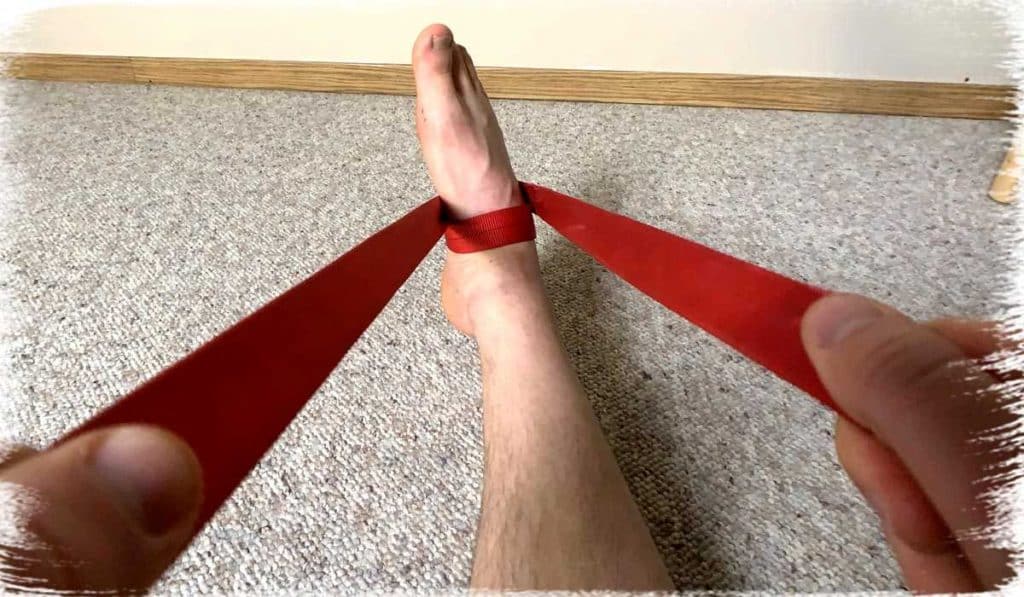
Next, while continuing to hold onto the strap, take your inside hand and wrap the strap around the foot in a counter-clockwise direction. You should have the foot wrapped securely in the strap.
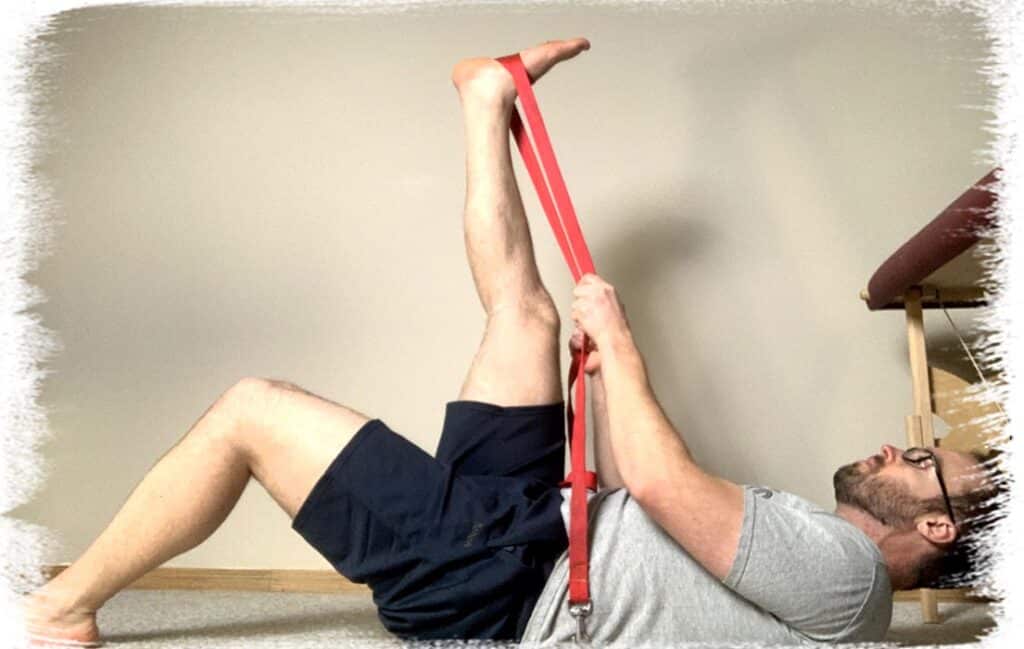
Now, either laying on your back with your foot up in the air, or with your leg out in front of you resting on the ground, pull the strap in your left hand toward you. This will bring your ankle into inversion.
Pull until you feel a gentle stretch on the outside of your lower leg or your ankle (where you feel the stretch can be based on which tissues and structures are stiff or tight).
Hold the stretch for just one or two seconds, back off and then repeat. I tend to perform about twenty gentle repetitions, but you can perform as many as you feel appropriate.
Exercise 4: The wrapped strap for ankle eversion
Eversion is the exact opposite of inversion; it’s the motion of taking the outside edge of your foot and pulling it up towards you.
The normal ankle doesn’t have much available range of motion for eversion, but it can still get restricted with this movement and performing gentle mobilization for it can feel quite nice.
How to perform the wrapped strap exercise for ankle eversion
The setup for the eversion strap wrap is the exact same as for the inversion strap wrap (exercise 3), but this time you’re going to take your outside hand and wrap the strap around your foot in a clockwise direction.
Then, pull your outside arm towards you, producing a gentle eversion of your ankle (remember, there won’t be a lot of motion here to begin with). Once you get to your available end range of motion, hold for a second or two, back off and repeat as needed. Twenty or so repetitions should do the trick, but feel free to do what works best for you.
Bonus: Using the MOBO board for improving joint mobility and more
One of my favourite tools to use these days for working on my ankle health (as well as for my patients) is the MOBO board. It’s a lesser known device, but does multiple things all at once when it comes to maintaining or improving ankle health.
If you’re in need of mobilizing a key joint in your ankle – the subtalar joint – this one can be tricky to do on your own. The MOBO however provides a way to get it done while also offering other unique benefits such as strengthening the inner arch of your foot and big toe tendon.
In addition to its unique capabilities not found with other balance boards, it also offers all the benefits of traditional balance boards when it comes to improving balance, ankle proprioception and more, making it perfect for injury prevention and injury rehabilitation.
If you want to learn more, be sure to check out my article: MOBO Board Review: Why it’s Unlike Any Other Balance Board
Final thoughts
Mobility exercises for your ankles that are both effective and easy to perform should be a staple in your movement arsenal. The exercises in this article are a great starting point since they’re not only simple and effective, but also target each of the major movements that the ankle produces.
Keep your ankles healthy and give them the movement and attention that they need. Preventing stiffness and immobility is better than having to fix it. In other words: be kind to your ankles and they’ll be kind to you.

Hi! I’m Jim Wittstrom, PT, DPT, CSCS, Pn1.
I am a physical therapist who is passionate about all things pertaining to strength & conditioning, human movement, injury prevention and rehabilitation. I created StrengthResurgence.com in order to help others become stronger and healthier. I also love helping aspiring students and therapists fulfill their dreams of becoming successful in school and within their clinical PT practice. Thanks for checking out my site!

