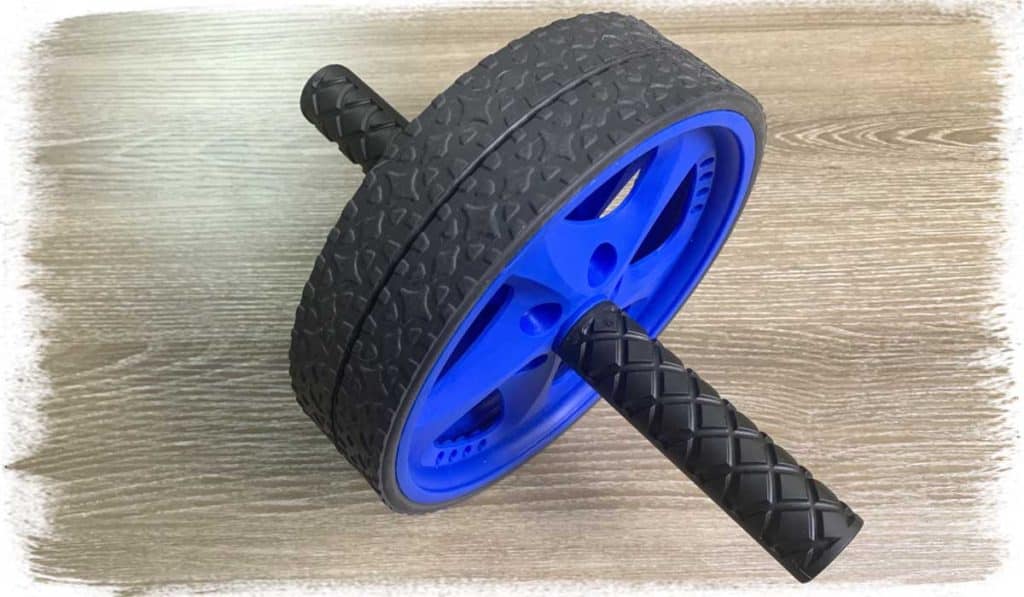
The ab wheel is an awesome and feisty piece of equipment that can seriously challenge your abdominal muscles and general midsection. Unfortunately, it has a reputation for causing low back pain or discomfort in many individuals who otherwise wish to use it. Whether this back pain is from inadequate technique or inadequate core strength, it can be frustrating to forego this little beast due to pain.
Thankfully, there are some amazing ab wheel variations that can hammer and strengthen your core musculature without punishing your lower back in the process.
The best ab wheel exercises to extensively challenge your core without producing any back pain are band-assisted rollouts, partial rollbacks, slow rollouts, end-range isometric holds, and end-range oscillation rollouts. These variations are gentle on the back and tough on the core!
If you want to know how to perform each of these unique yet challenging variations, along with how they’re able to stave off lower back pain, then be sure to keep on reading this article!
ARTICLE OVERVIEW
(Click/tap on any of the following headlines to jump to that section of the article.)
Why back pain can occur with ab wheel rollouts
The Proper technique required for any rollout or variation
Variation 1: Band-assisted rollouts
Variation 2: Partial rollbacks
Variation 3: Slow Rollouts
Variation 4: End-range isometric holds
Variation 5: End-range oscillations
Related article: Six Benefits of Using an Acupressure Mat for Your Aches and Pains
Disclaimer: While I am a physical therapist, I am not YOUR physical therapist. As a result, I cannot tell you whether or not any treatments mentioned on this website or in this article may or may not be appropriate for you, including using an ab wheel. By following any information within this post, you are doing so at your own risk. You are advised to seek appropriate medical advice for any pain you may be experiencing.
Why back pain can occur with ab wheel rollouts
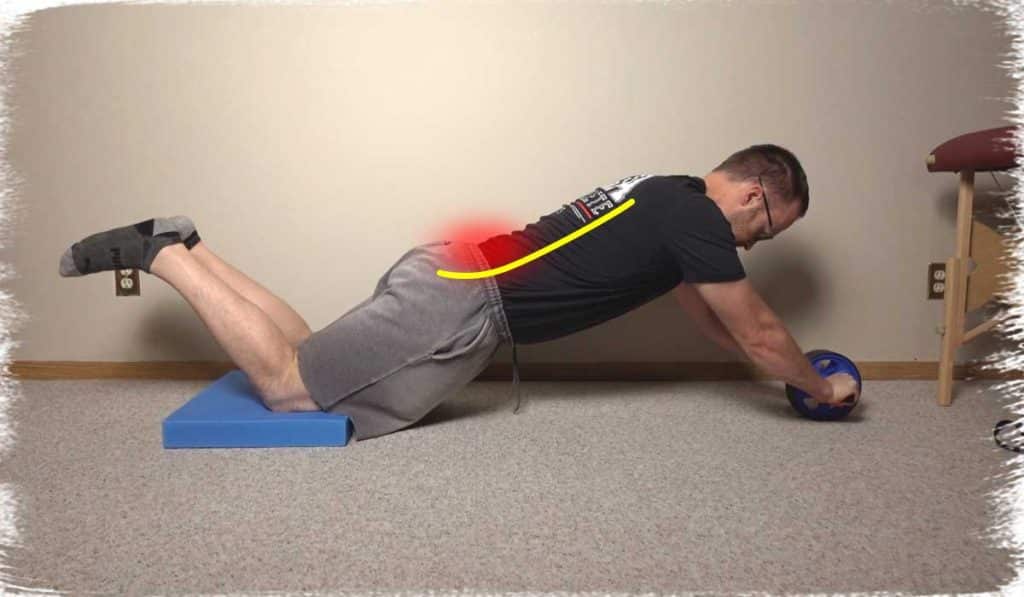
Lower back pain with ab wheel rollouts tends to occur due to improper technique during the exercise. Most often, the cause of the lower back pain or discomfort is due to letting the hips drop through or “sag” when performing the rollout.
When this occurs, the lower spine joints (known as the lumbar facet joints) are placed into an extreme range of extension. The extreme extension of these joints can be a very irritating and pain-provoking position for said joints.
Related Article: Vibrating Massage Balls: Here’s Some Effective and Nifty Benefits
Staying within a pain-free range
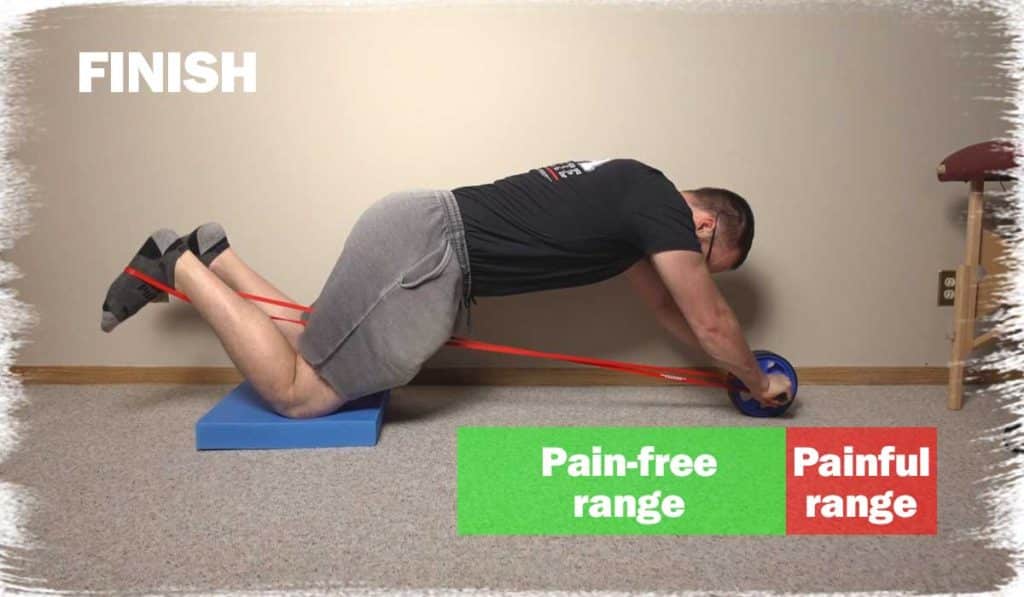
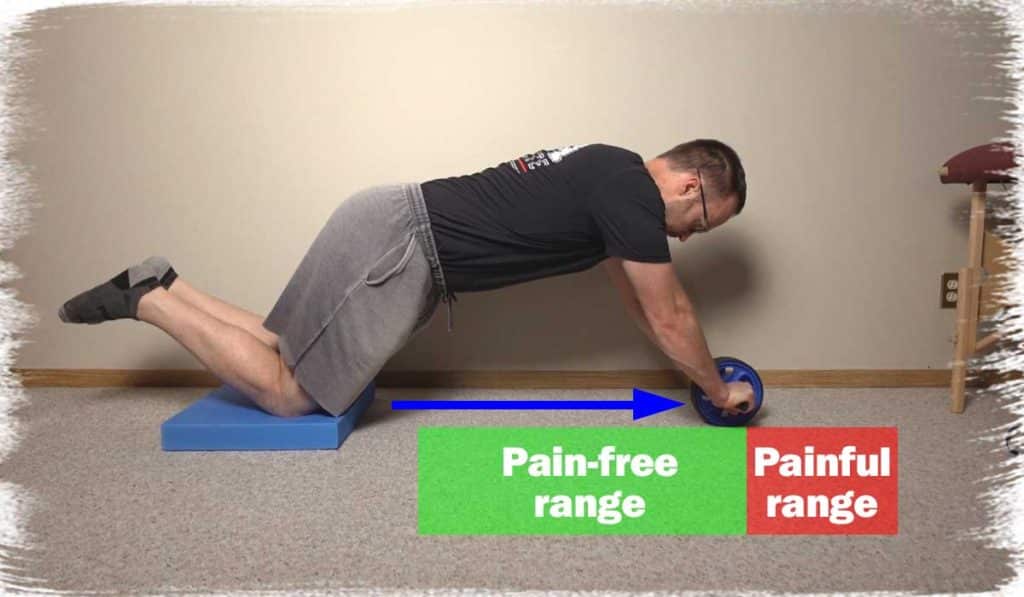
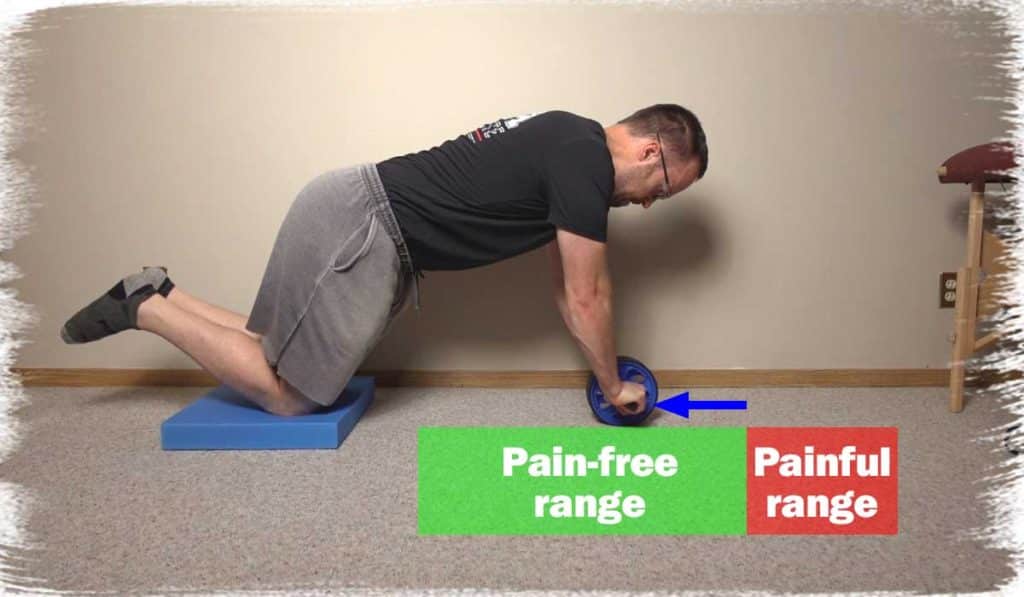
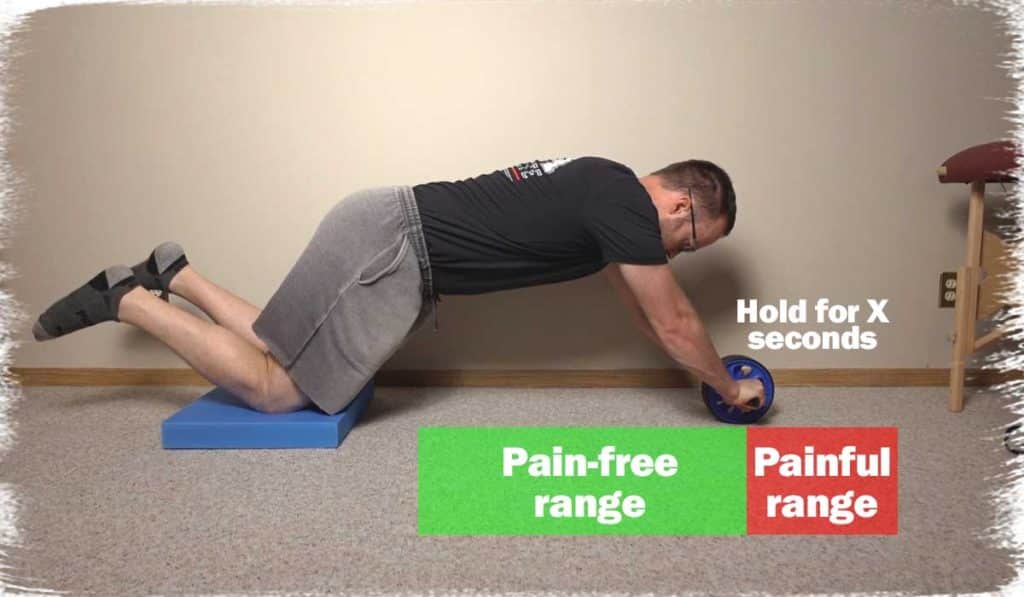
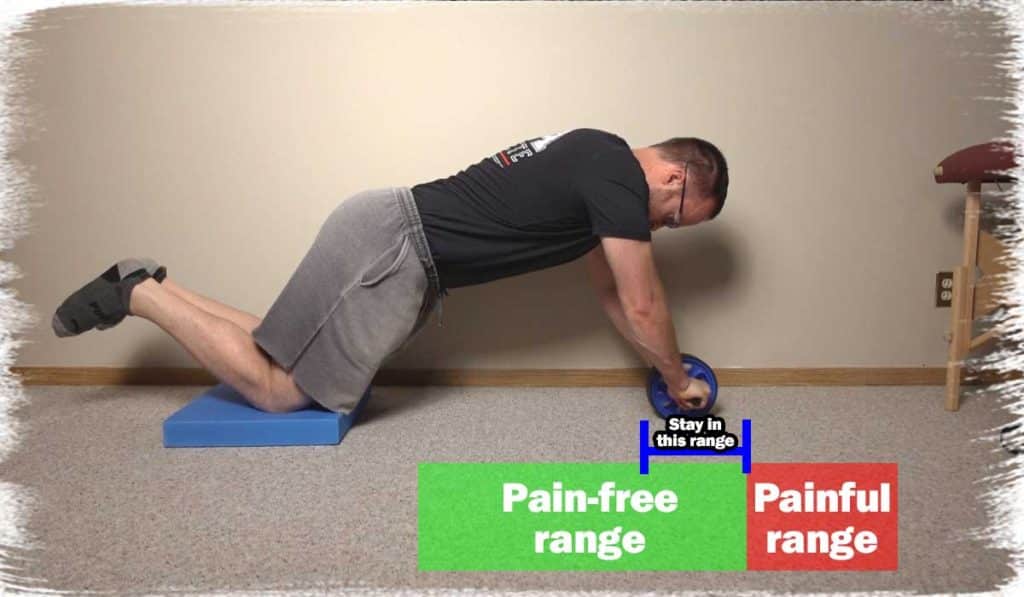
For all of the variations listed within this article, it’s essential to roll out as far as you can while staying pain-free. Most individuals tend to feel lower back discomfort at the end-range of their abilities, so make sure to roll up to this point, but not into it.
Proper technique required for any rollout or variation
There are a few universal technique requirements that need to take place for any type of ab wheel rollout. They’re universal and mandatory in that they ensure that the core muscles are challenged adequately while also ensuring that the lower back is not put into an overly aggressive or irritating position for the joints. Both of these are achieved by ensuring a proper bridge position, which is discussed below.
Ensuring the core muscles are adequately challenged
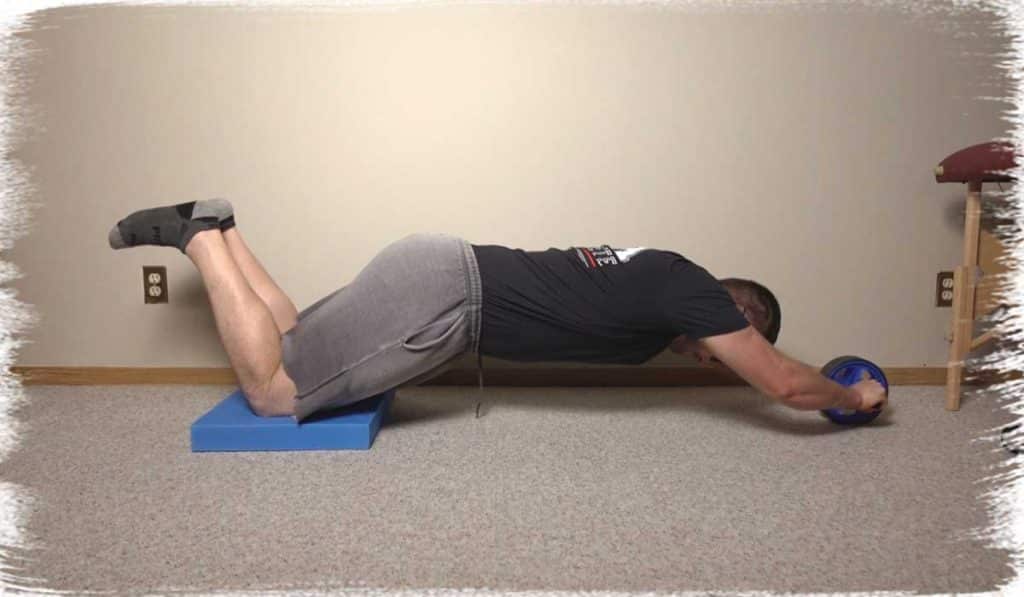
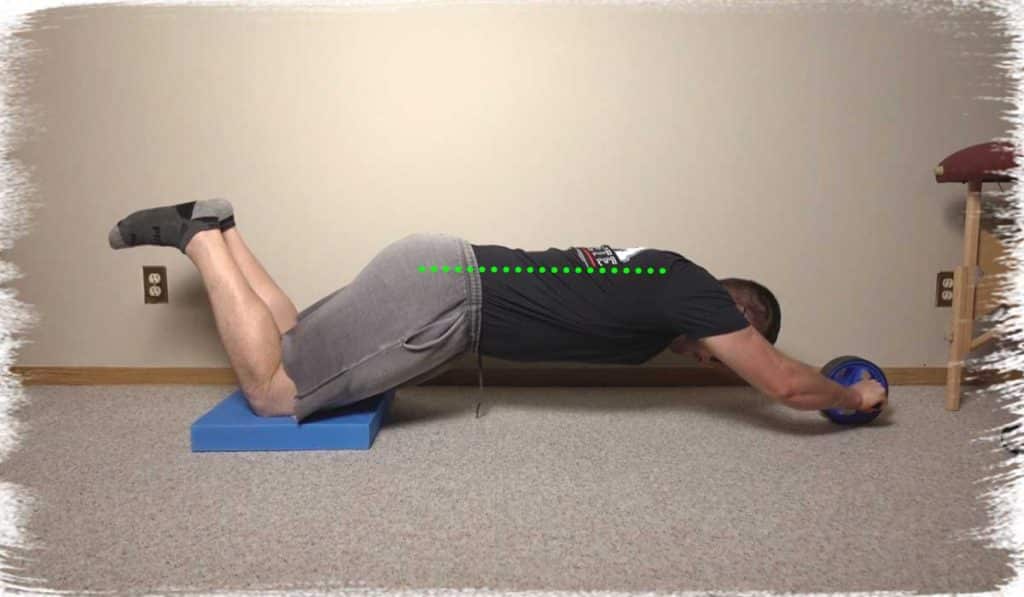
To ensure that you challenge the core musculature to an ideal extent when performing any type of ab rollout, you need to achieve an ideal bridge position. This position refers to the end-range position where your arms extend out in front of you while your legs extend back behind you. Your torso is, therefore, the body of the bridge.
A proper rollout is performed by ensuring that the shoulders and the hips move forward at the same time and rate in relation to each other as the rollout is performed. They are then retracted at the same time and rate when rolling back to the starting position.
The most common mistake when not challenging the core is to push the arms forward during the rollout while leaving the hips behind. This results in an inadequate bridge position that isn’t very challenging for the core muscles.
Variation 1: Band-assisted rollouts
This is the only variation of the five within this article that will require an additional piece of equipment. Thankfully, it’s just a half-inch wide general exercise band, which can be purchased for only a few dollars (and it will come in handy for a million other exercises as well), so it’s certainly worth picking one up.
This is a great variation to try if you can’t keep your hips up near the end of your rollout or find that you don’t have enough strength to do the rollback portion of the exercise. It’s one of my go-to exercises for my clients who want to begin ab wheel training but don’t have enough strength to maintain ideal form or experience back pain near the end-range of the rollout.
Performing the movement
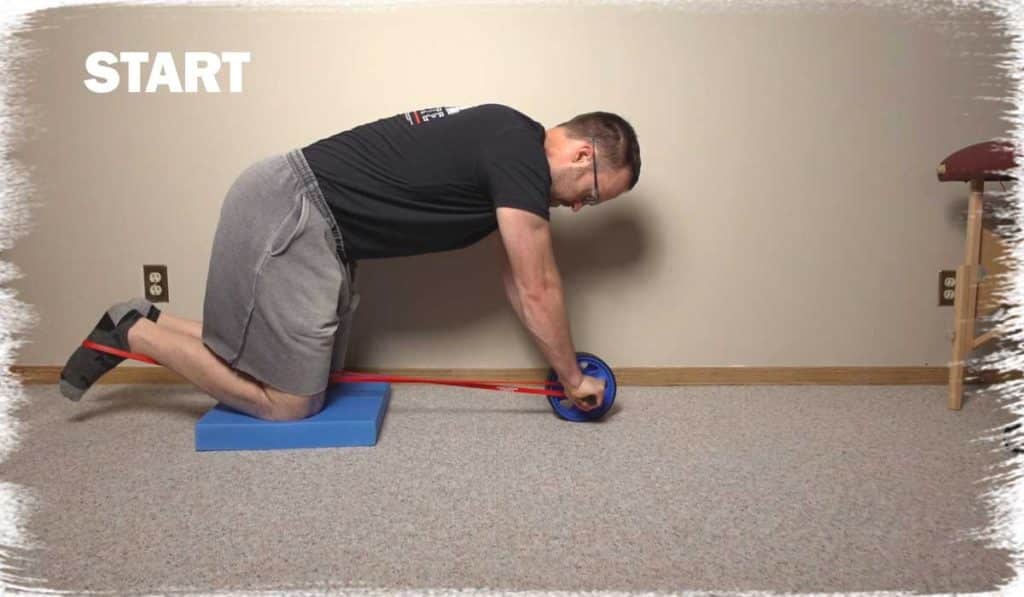
Loop one end of the band around your foot and the other around one of the ab wheel handles. You can have the band remain on the outside of your leg, on the inside, or even have your knee/leg inside of it.
Slowly roll out until you feel you’re at your limit. You will feel tension on the band increase the further you roll out, which will almost require you to push into the rollout a bit.
Once you’ve rolled out as far as desired, slowly return to the starting position. The elastic recoil of the band will help with this portion of the movement, which will help assist with the movement. This offloads the demand from the core muscles, which can help maintain proper form/technique and help you move further into the rollout range without irritating your lower back.
Perform as many reps as desired.
Variation 2: Partial rollbacks
Partial rollbacks are arguably my favorite ab wheel variation since they significantly challenge the core (you will feel it, believe me) without requiring a full range of motion to do so. This works by requiring the core and abdominal musculature to remain under continual tension for a much longer duration of time than for a standard rollout.
This increase in mechanical stress for a more extended time is what is known as time under tension. It is a sure-fire way to let your core know that you mean business while sparing your lower back in the process.
Performing the movement
Roll out as far as you can before either experiencing back pain or before you can no longer hold proper form or technique.
Once you’ve reached the end-range of your rollout, roll back approximately 25% of the way to the starting position.
Once you’ve rolled back approximately 25% of the way, roll out to the end-range again. Then, roll back 25% again and simply repeat the process.
You will notice that by only rolling back 25% of the way each time that your abs and core muscles don’t get a single moment to shut off and rest. Contrast this with traditional rollouts where these muscles get a small break or get to “shut off” for a brief moment before starting each repetition. This continual tension will tax your core and abdominals quite nicely.
Perform as many partial rollbacks as desired, then roll back 100% of the way to the starting position, then repeat. Five or so partial rollbacks before rolling back entirely for a small break is usually a good starting point.
Variation 3: Slow rollouts
Slow rollouts operate primarily on the same principle as partial rollbacks. They increase the time under tension for the abdominals and support core musculature. You can think of this variation in the same way as trying to stay on a bike while riding it really, really slowly; the slower you go, the more difficult it becomes.
Performing the movement
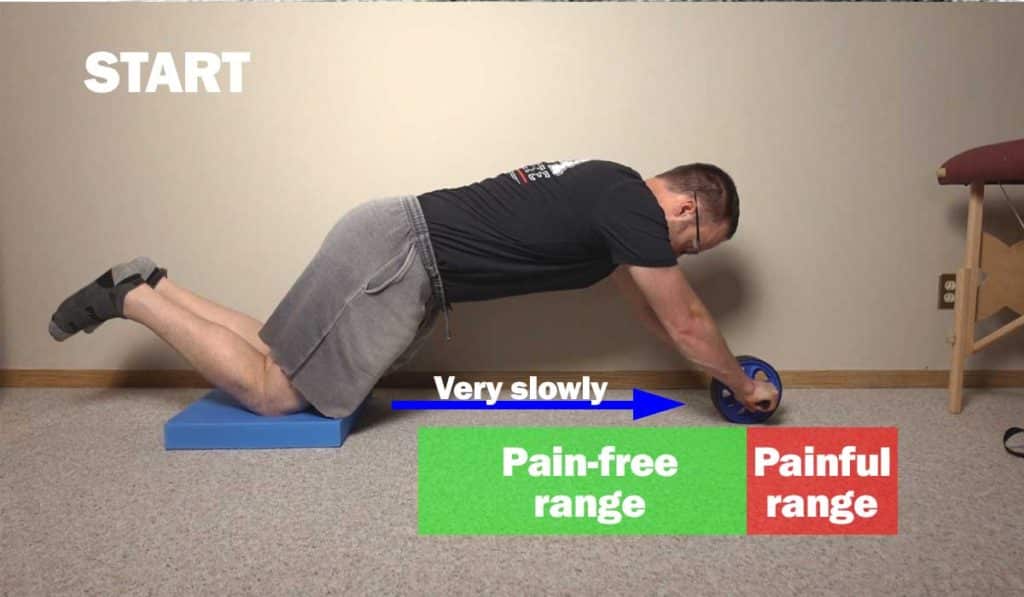
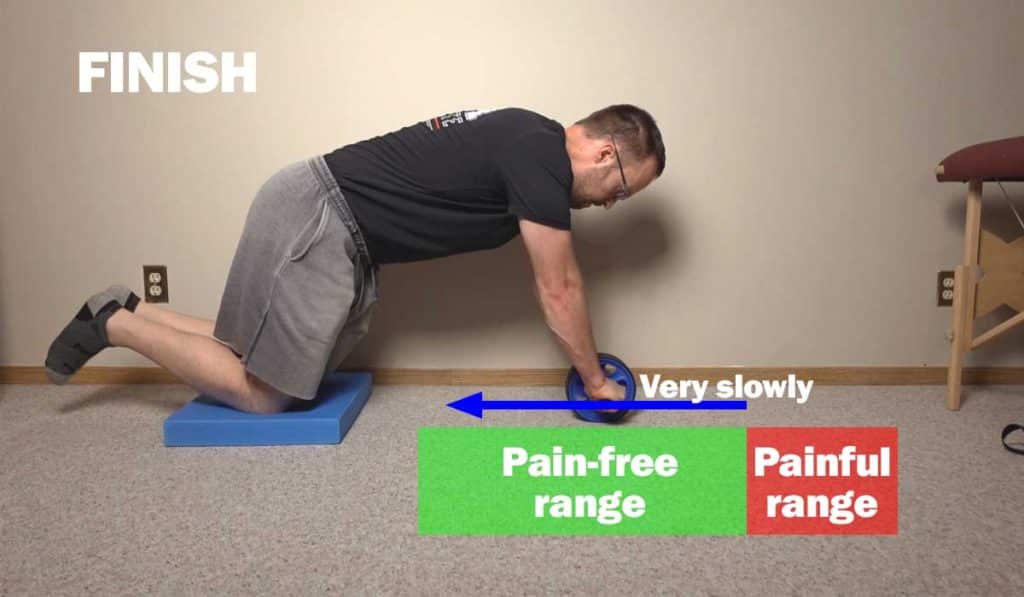
For this variation, simply perform a standard ab wheel rollout as far as possible without letting your form break down or without experiencing back pain. Once you’ve attained this limit, roll back very, very slowly. Make sure to keep your core muscles and abdominals braced and “tight” (contracted) during this process.
There’s no limit to how slow you can go, but anywhere from five to ten seconds for each rollback is a good range. Bonus marks if you decide to roll outwards just as slowly as you roll inwards. A handful of repetitions at this pace can take upwards of a minute to complete, which should be an ample amount of challenge for your core.
Variation 4: End-range isometric holds
The end-range isometric hold is a great variation to perform if you really want to ensure that you create a strong isometric contraction of your muscles for each repetition. An isometric contraction refers to your muscle(s) contracting without producing any movement. Think of a bodybuilder posing as he flexes and shows off his biceps, holding his arms still for a few seconds during the pose. That’s an isometric contraction, and it can be highly fatiguing when performed repeatedly.
Performing the movement
Perform a standard rollout to your available end-range of motion. As always, your goal is to roll outwards as far as you can before your form breaks down or any pain in your lower back is experienced.
Once you’re at the end-range of movement, hold this position, remaining absolutely still for anywhere from three to ten seconds. Keep your core and abdominal muscles tight and “clenched” for the entire time, as if you’re bracing your midsection in order to prepare for being punched in the stomach.
After your target isometric hold time has been attained, roll back to the starting position and then repeat. A handful of these repetitions should tire out your midsection quite nicely.
Variation 5: End-range oscillations
End-range oscillations may just be the most aggressive of the variations within this article. This is due to the fact that you are forcing your muscles to work while at a near end-range of motion, which tends to make movements very challenging and fatiguing for muscles (often attributed to the optimal overlap theory).
Performing the movement
To perform this variation, roll out to approximately 90% of the end of your available range of motion, once again avoiding any breakdown in form or sensation of lower back pain. This 90% is essentially going to serve as the midpoint of the oscillations you’re about to perform.
Next, roll outwards 10%, which should take you to the full available range of motion you can produce while maintaining pristine form and no lower back pain.
Next, roll backward 20% of the way, which will take you 10% behind your 90% starting point.
From here, roll back out to your available end range again, then roll backward to the 80% mark and keep repeating. This is the oscillation range for which you will essentially perform these mini “back and forth” movements near your available end range of motion.
Perform as many oscillations as you choose before rolling all the way back to the starting position to give your muscles a short break. Then, roll out again and repeat the process.
Five to ten oscillations per rep is a pretty good number to aim for. After doing this for 5-10 reps, your core muscles should be quite fatigued.
Final thoughts
The ab wheel is an excellent piece of fitness equipment to use, but it won’t serve you much good if it brutalizes your lower back or gives you pain in the process. If you’re a fan of using this little beast but find it flares things up, it may be worth experimenting with any of the above variations to see if they can keep your form sharp and your back pain-free.
Don’t be deceived; even though these variations don’t require a full range of motion when performing your rollouts, they’ll tax and challenge your core muscles quite extensively while remaining in positions that don’t require extreme ranges of motion during the rollout.
Give these variations a try, and don’t be afraid to tinker around with them in order to make them work as ideal for you as possible. The result will likely be a stronger midsection and a much happier (and healthier) lower back.

Hi! I’m Jim Wittstrom, PT, DPT, CSCS, Pn1.
I am a physical therapist who is passionate about all things pertaining to strength & conditioning, human movement, injury prevention and rehabilitation. I created StrengthResurgence.com in order to help others become stronger and healthier. I also love helping aspiring students and therapists fulfill their dreams of becoming successful in school and within their clinical PT practice. Thanks for checking out my site!
